Custom Painted Tile Dresser Upcycle
Posted by DecoArt on May 2nd 2016
You can make this dresser, with custom painted tiles, that looks like a designer piece.
SUPPLIES
- transfer paper
- sandpaper
- pencil
- flat brush
- 2" chip brush
- dresser
- round brush
INSTRUCTIONS
NOTES:
Let dry completely between painting steps.
- Make any desired modifications to the dresser and remove the drawer pulls. Paint a coat of Stain Blocker/Sealer stain onto the outside of the dresser as well as both the outsides and insides of the dresser drawers. Allow to dry according to product packaging.
- Paint the outside of the dresser and the drawer fronts in Everlasting with a flat or chip brush.
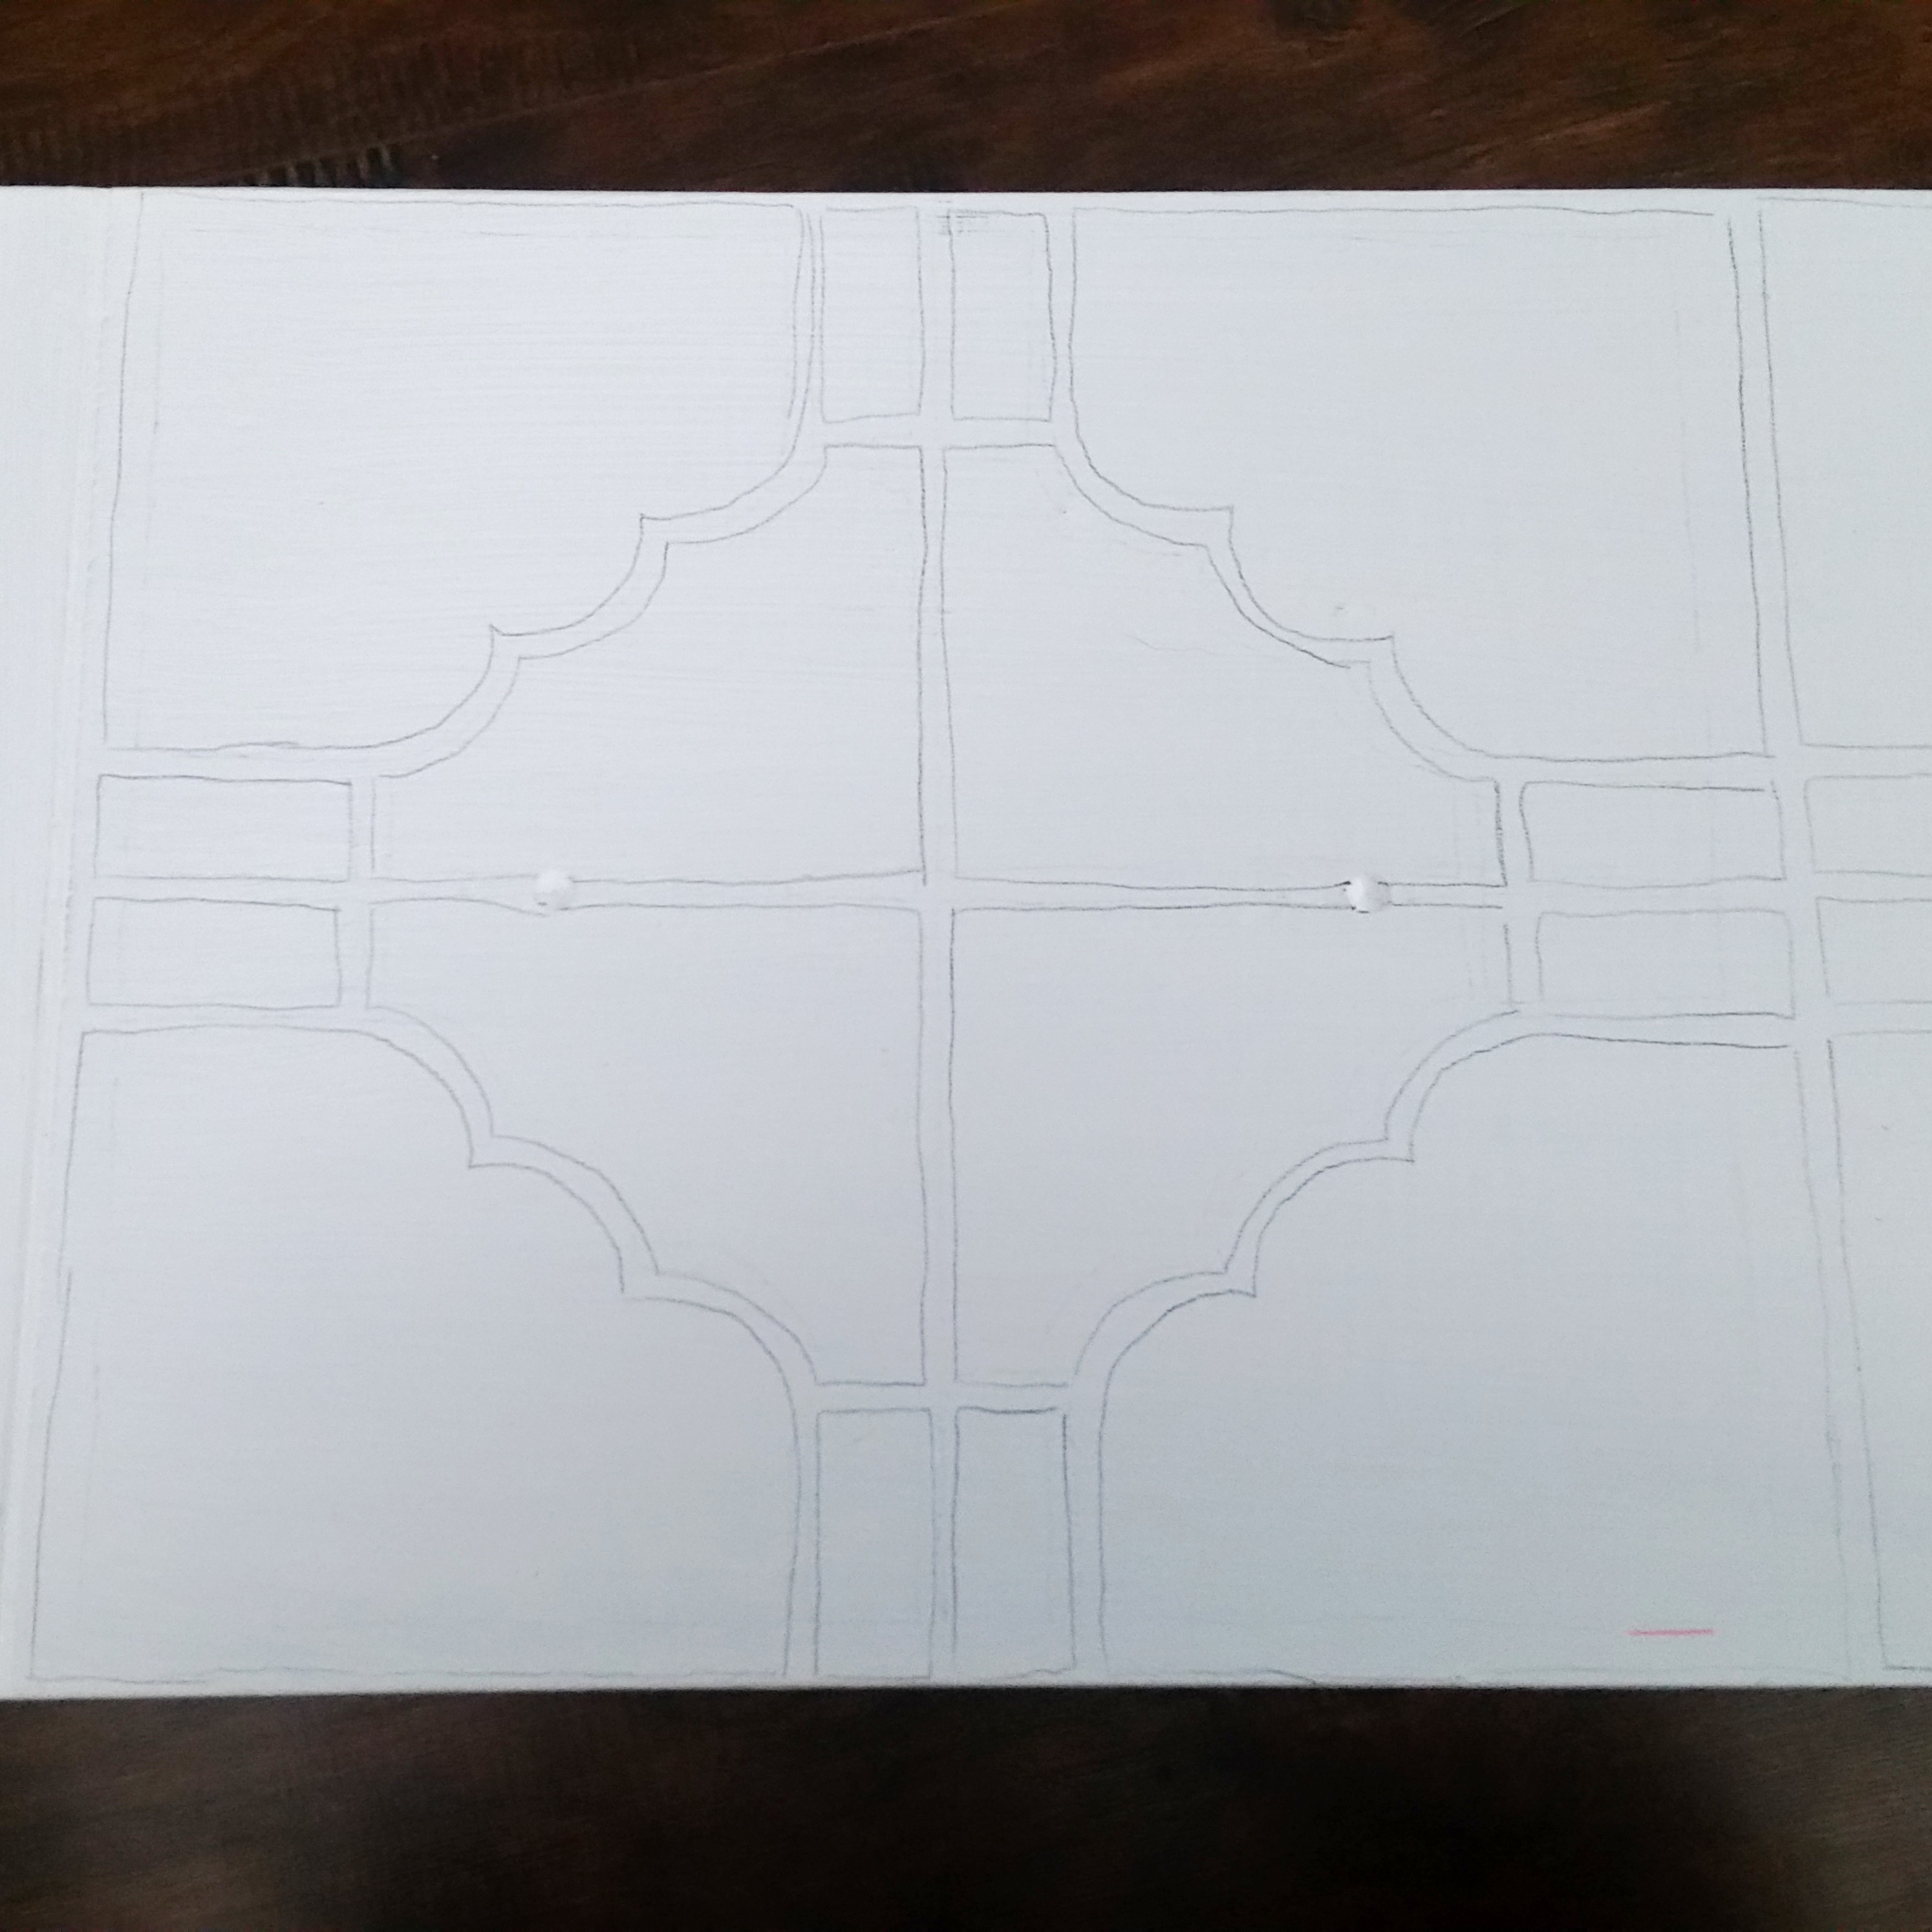
- Use transfer paper to transfer the hand-painted tile pattern onto the dresser drawer fronts. (Use a pencil to transfer the image with light pressure. You want it just dark enough to see the lines for painting but light enough that it won't be noticeable through the paint.)
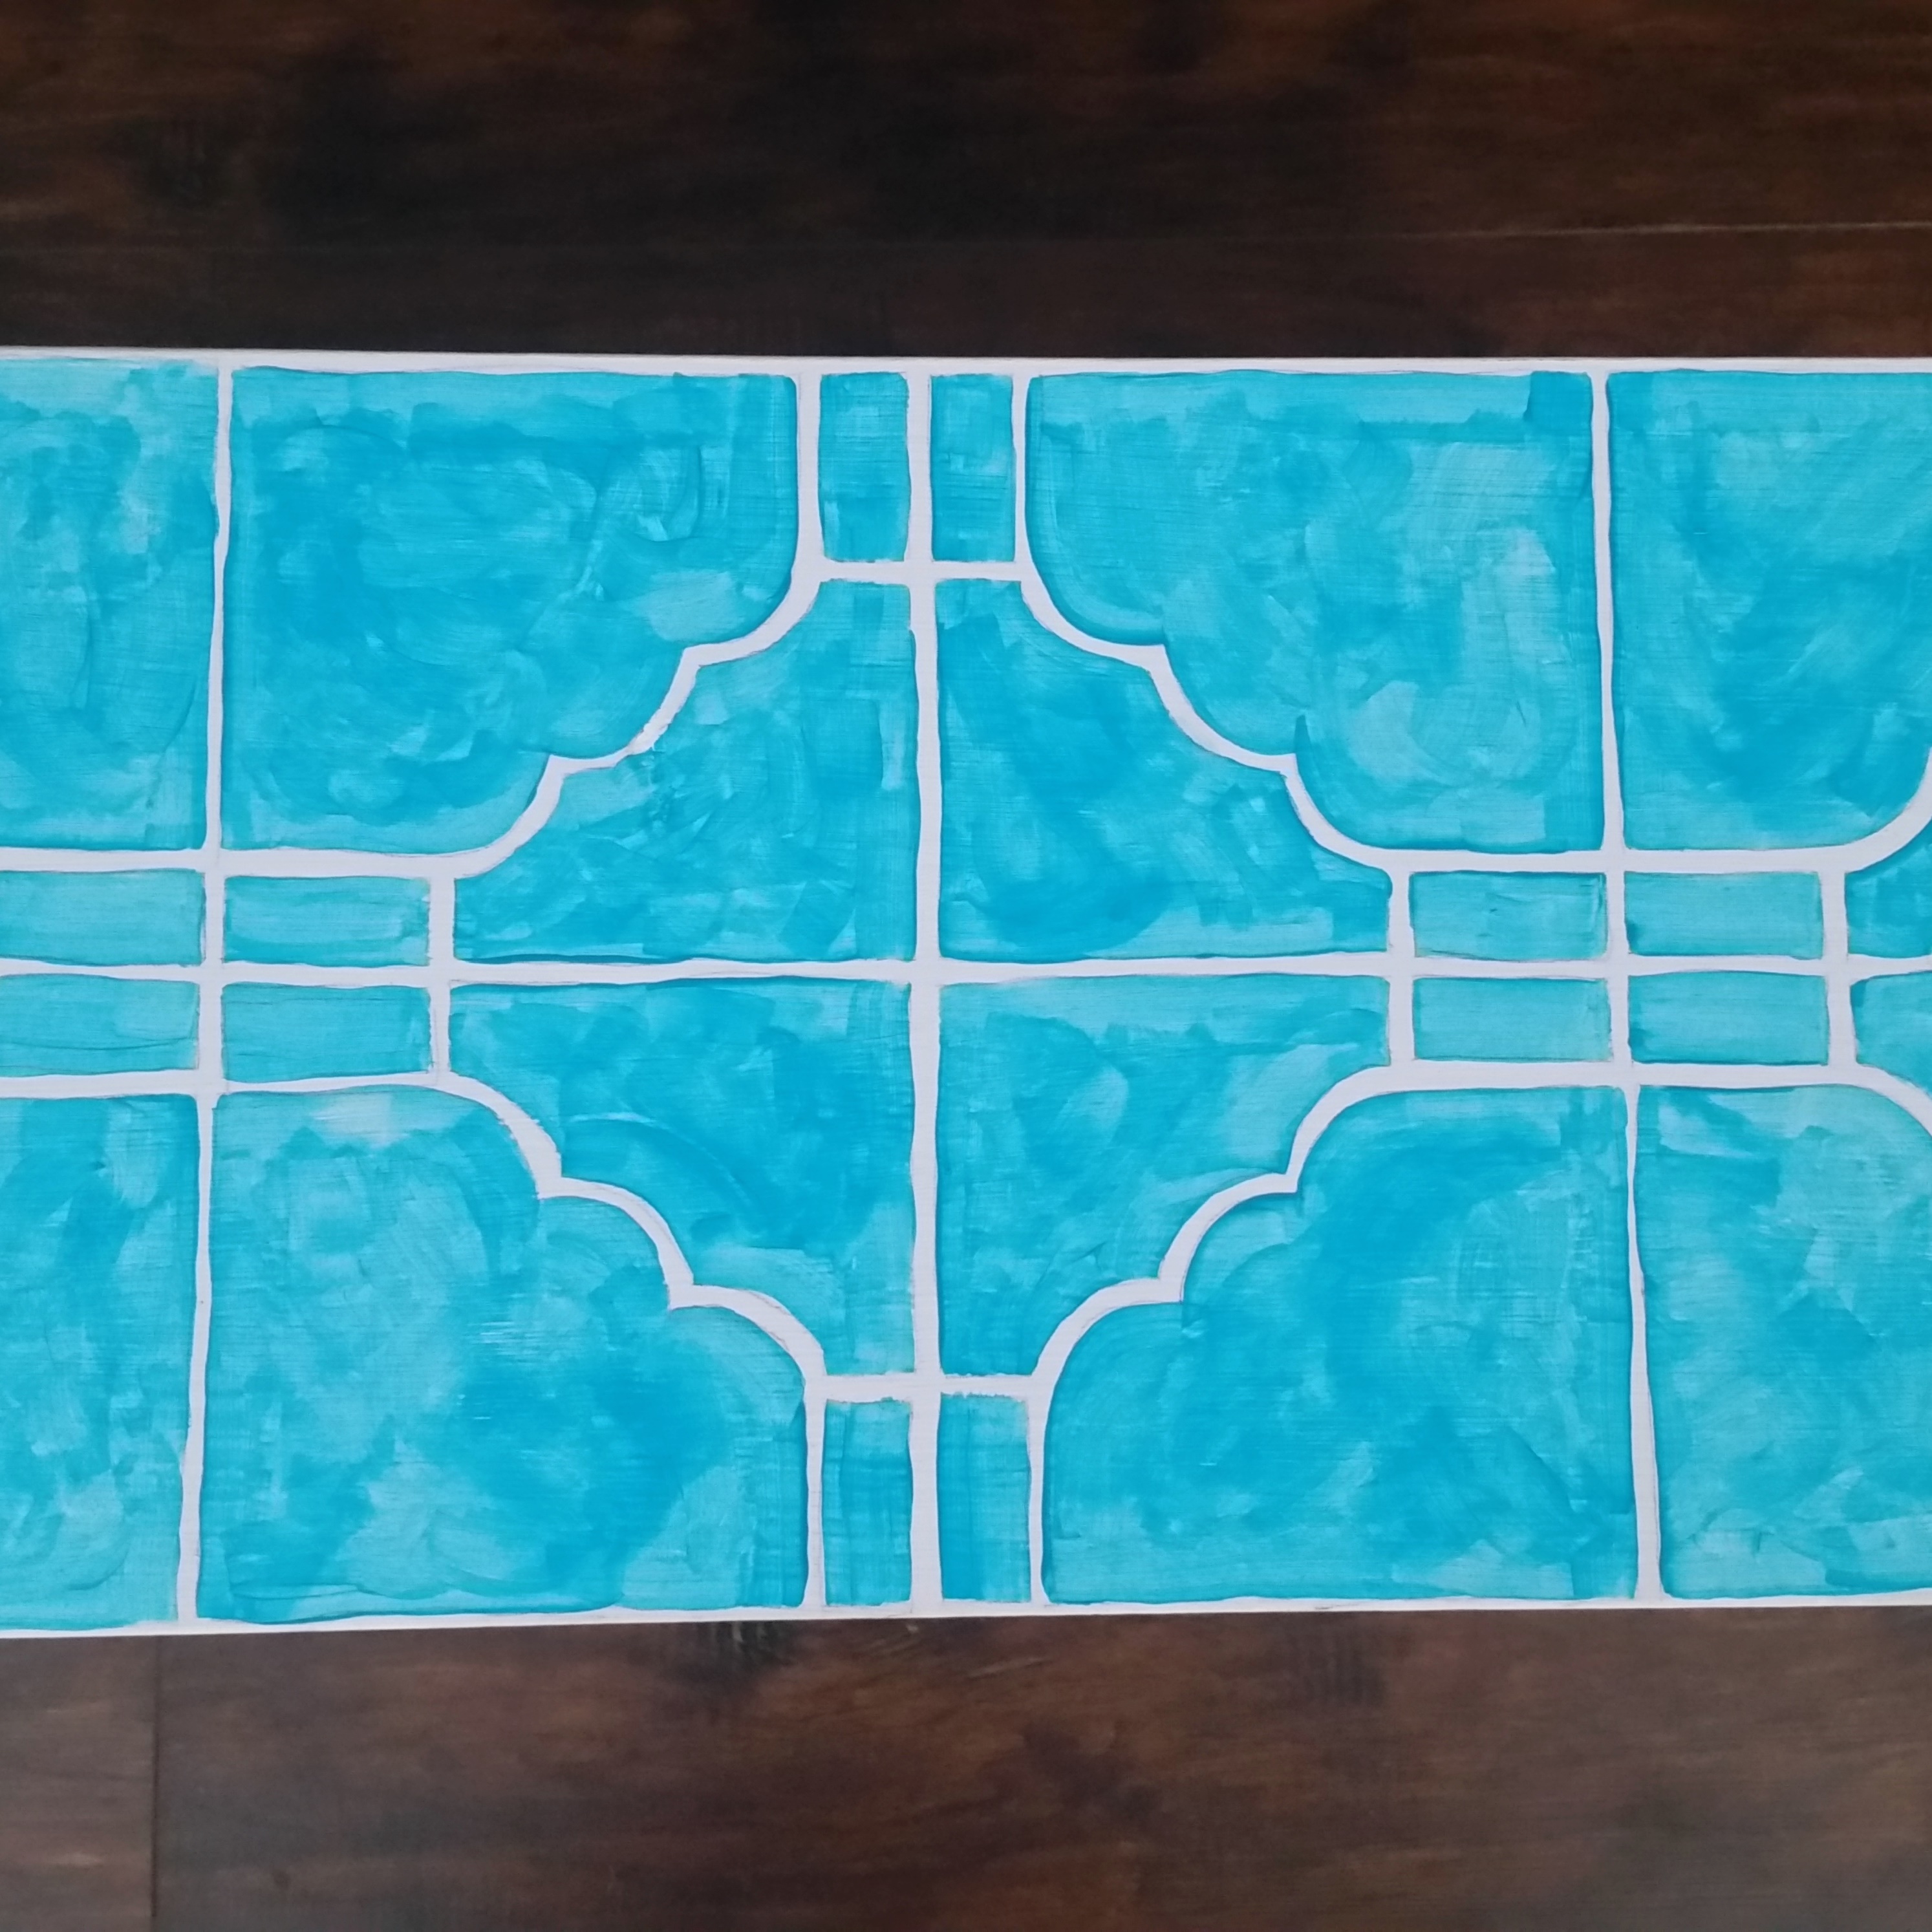
- Use a flat brush to paint inside the tile pattern in Cobalt Teal Hue. (You do not want perfect coverage. You want to fill in the shapes with a variety of light and dark areas to look more like glazed tile.)
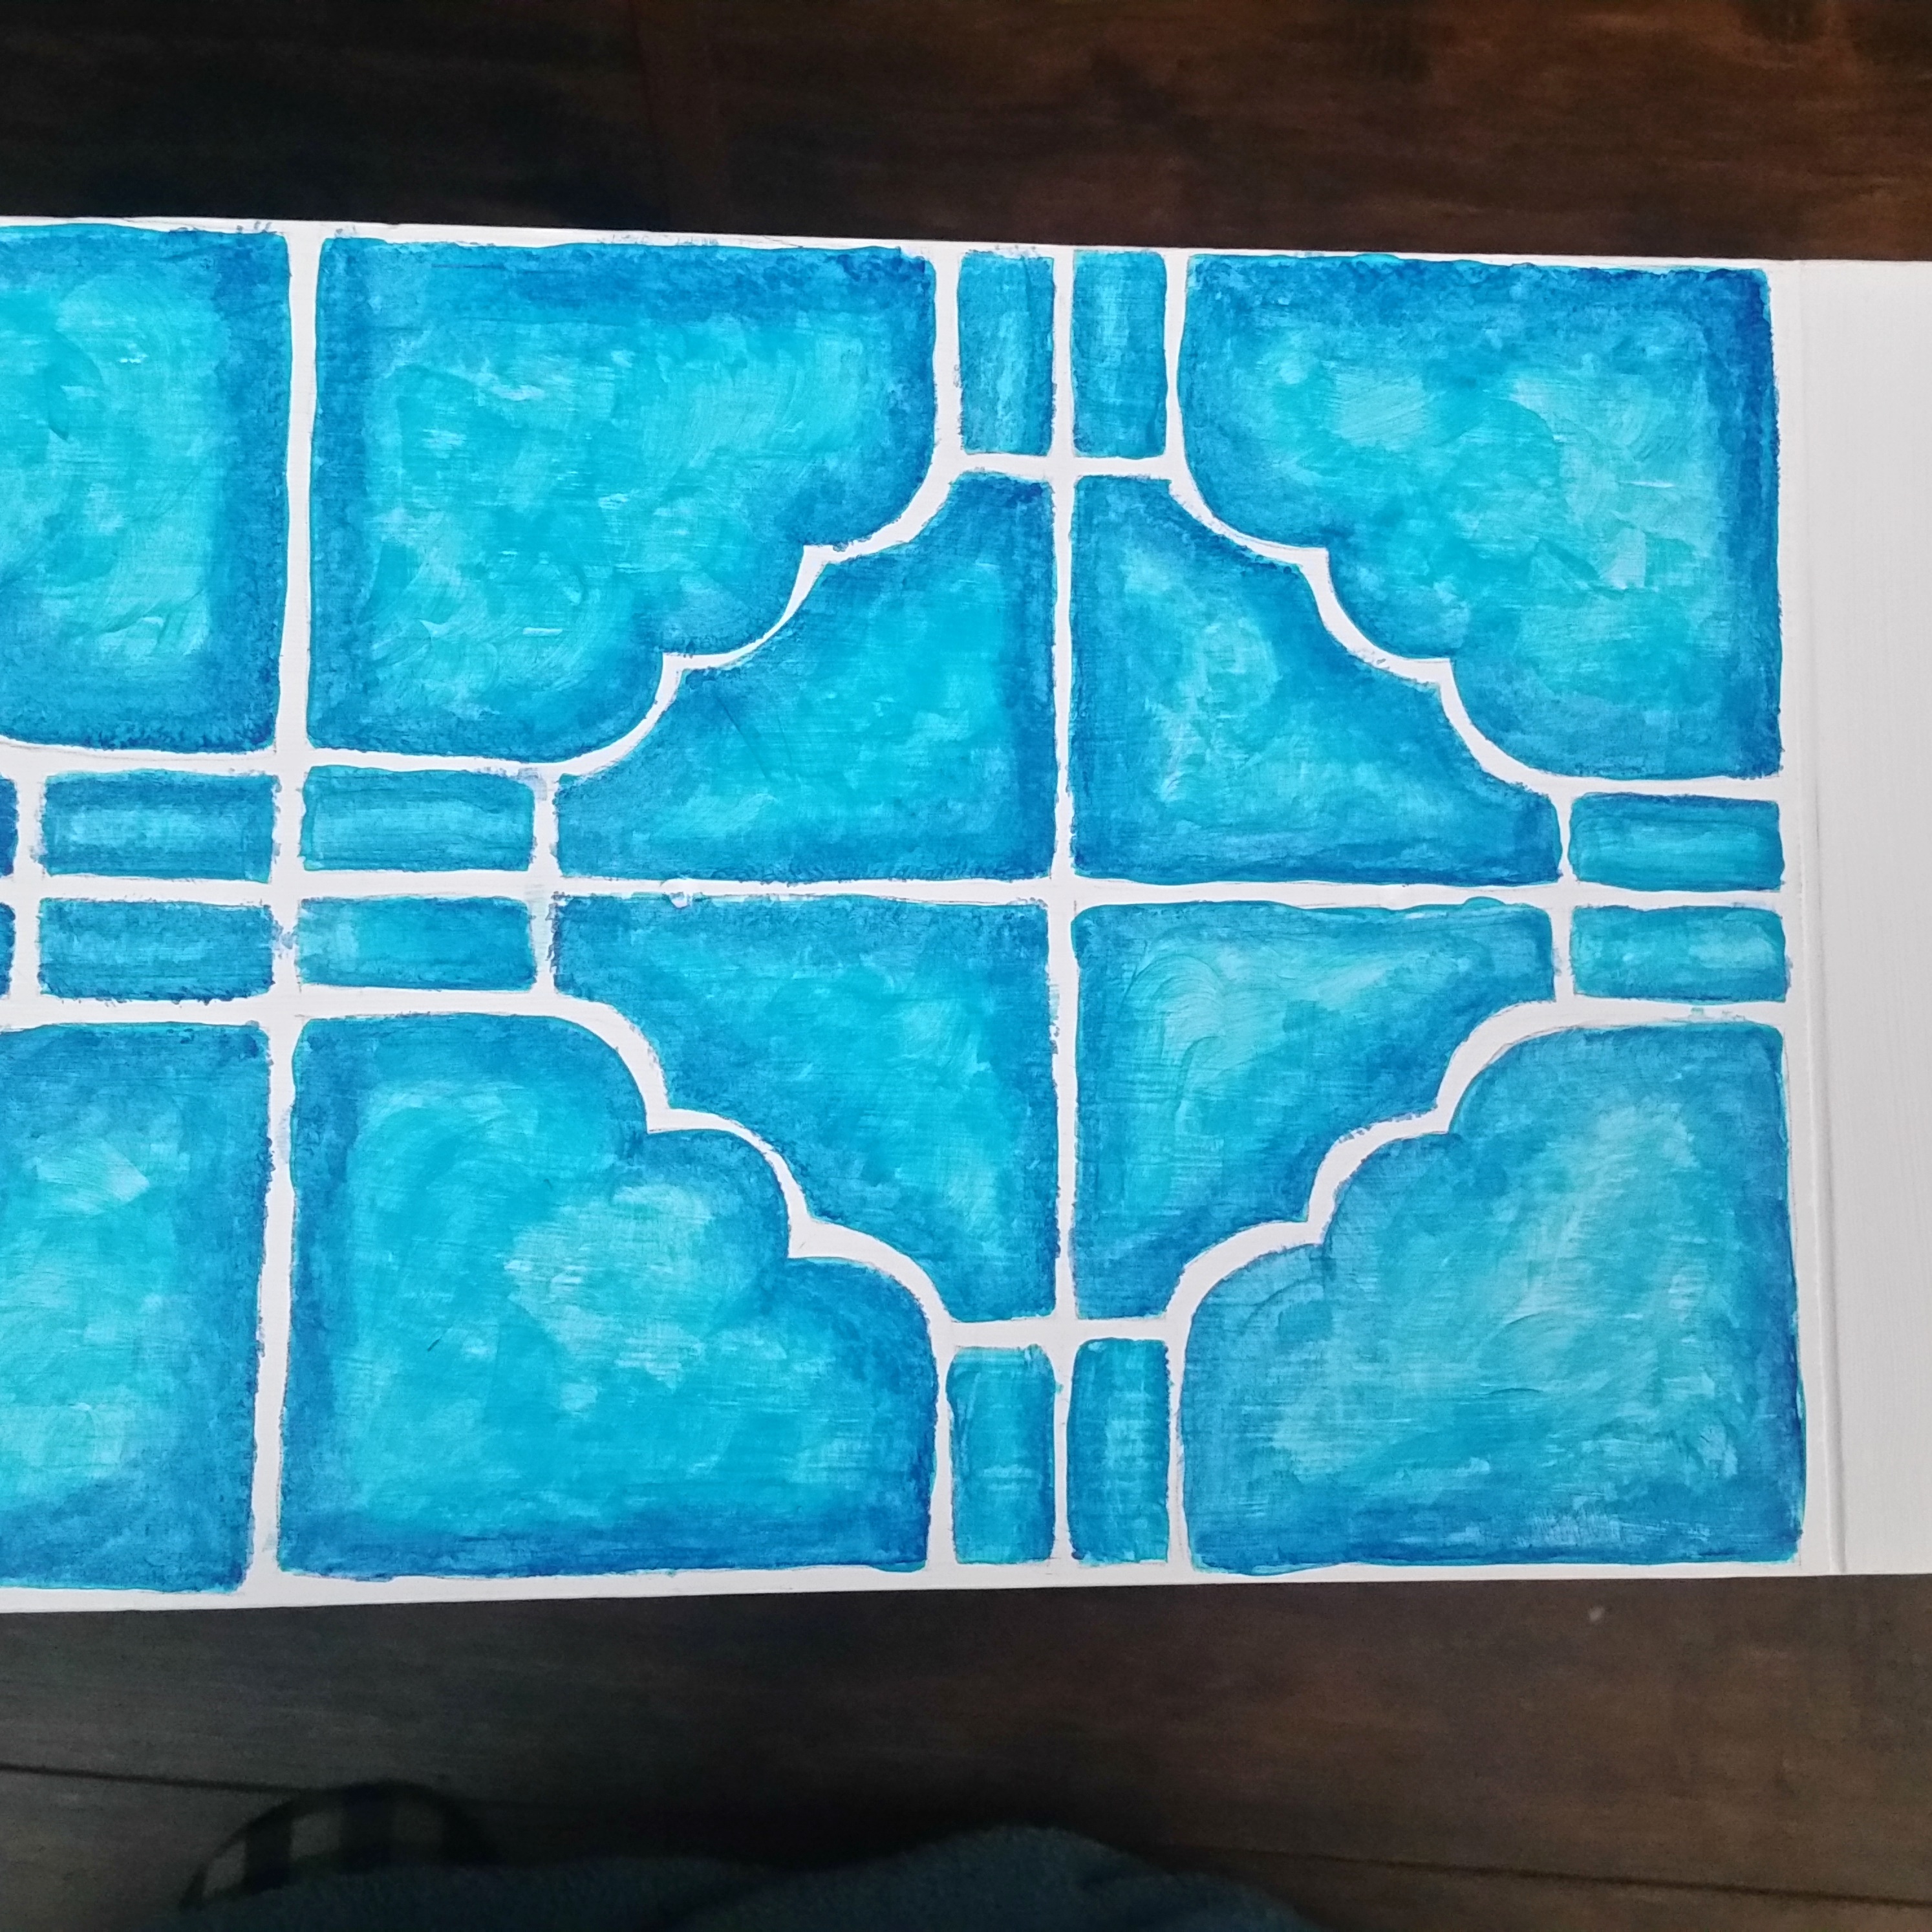
- Use a flat brush to paint inside the tile pattern in Cobalt Blue Hue around the edges of the tile. (You do not want perfect coverage. You want to add shadowed edges to the shapes with a variety of light and dark areas to look more like glazed tile.)
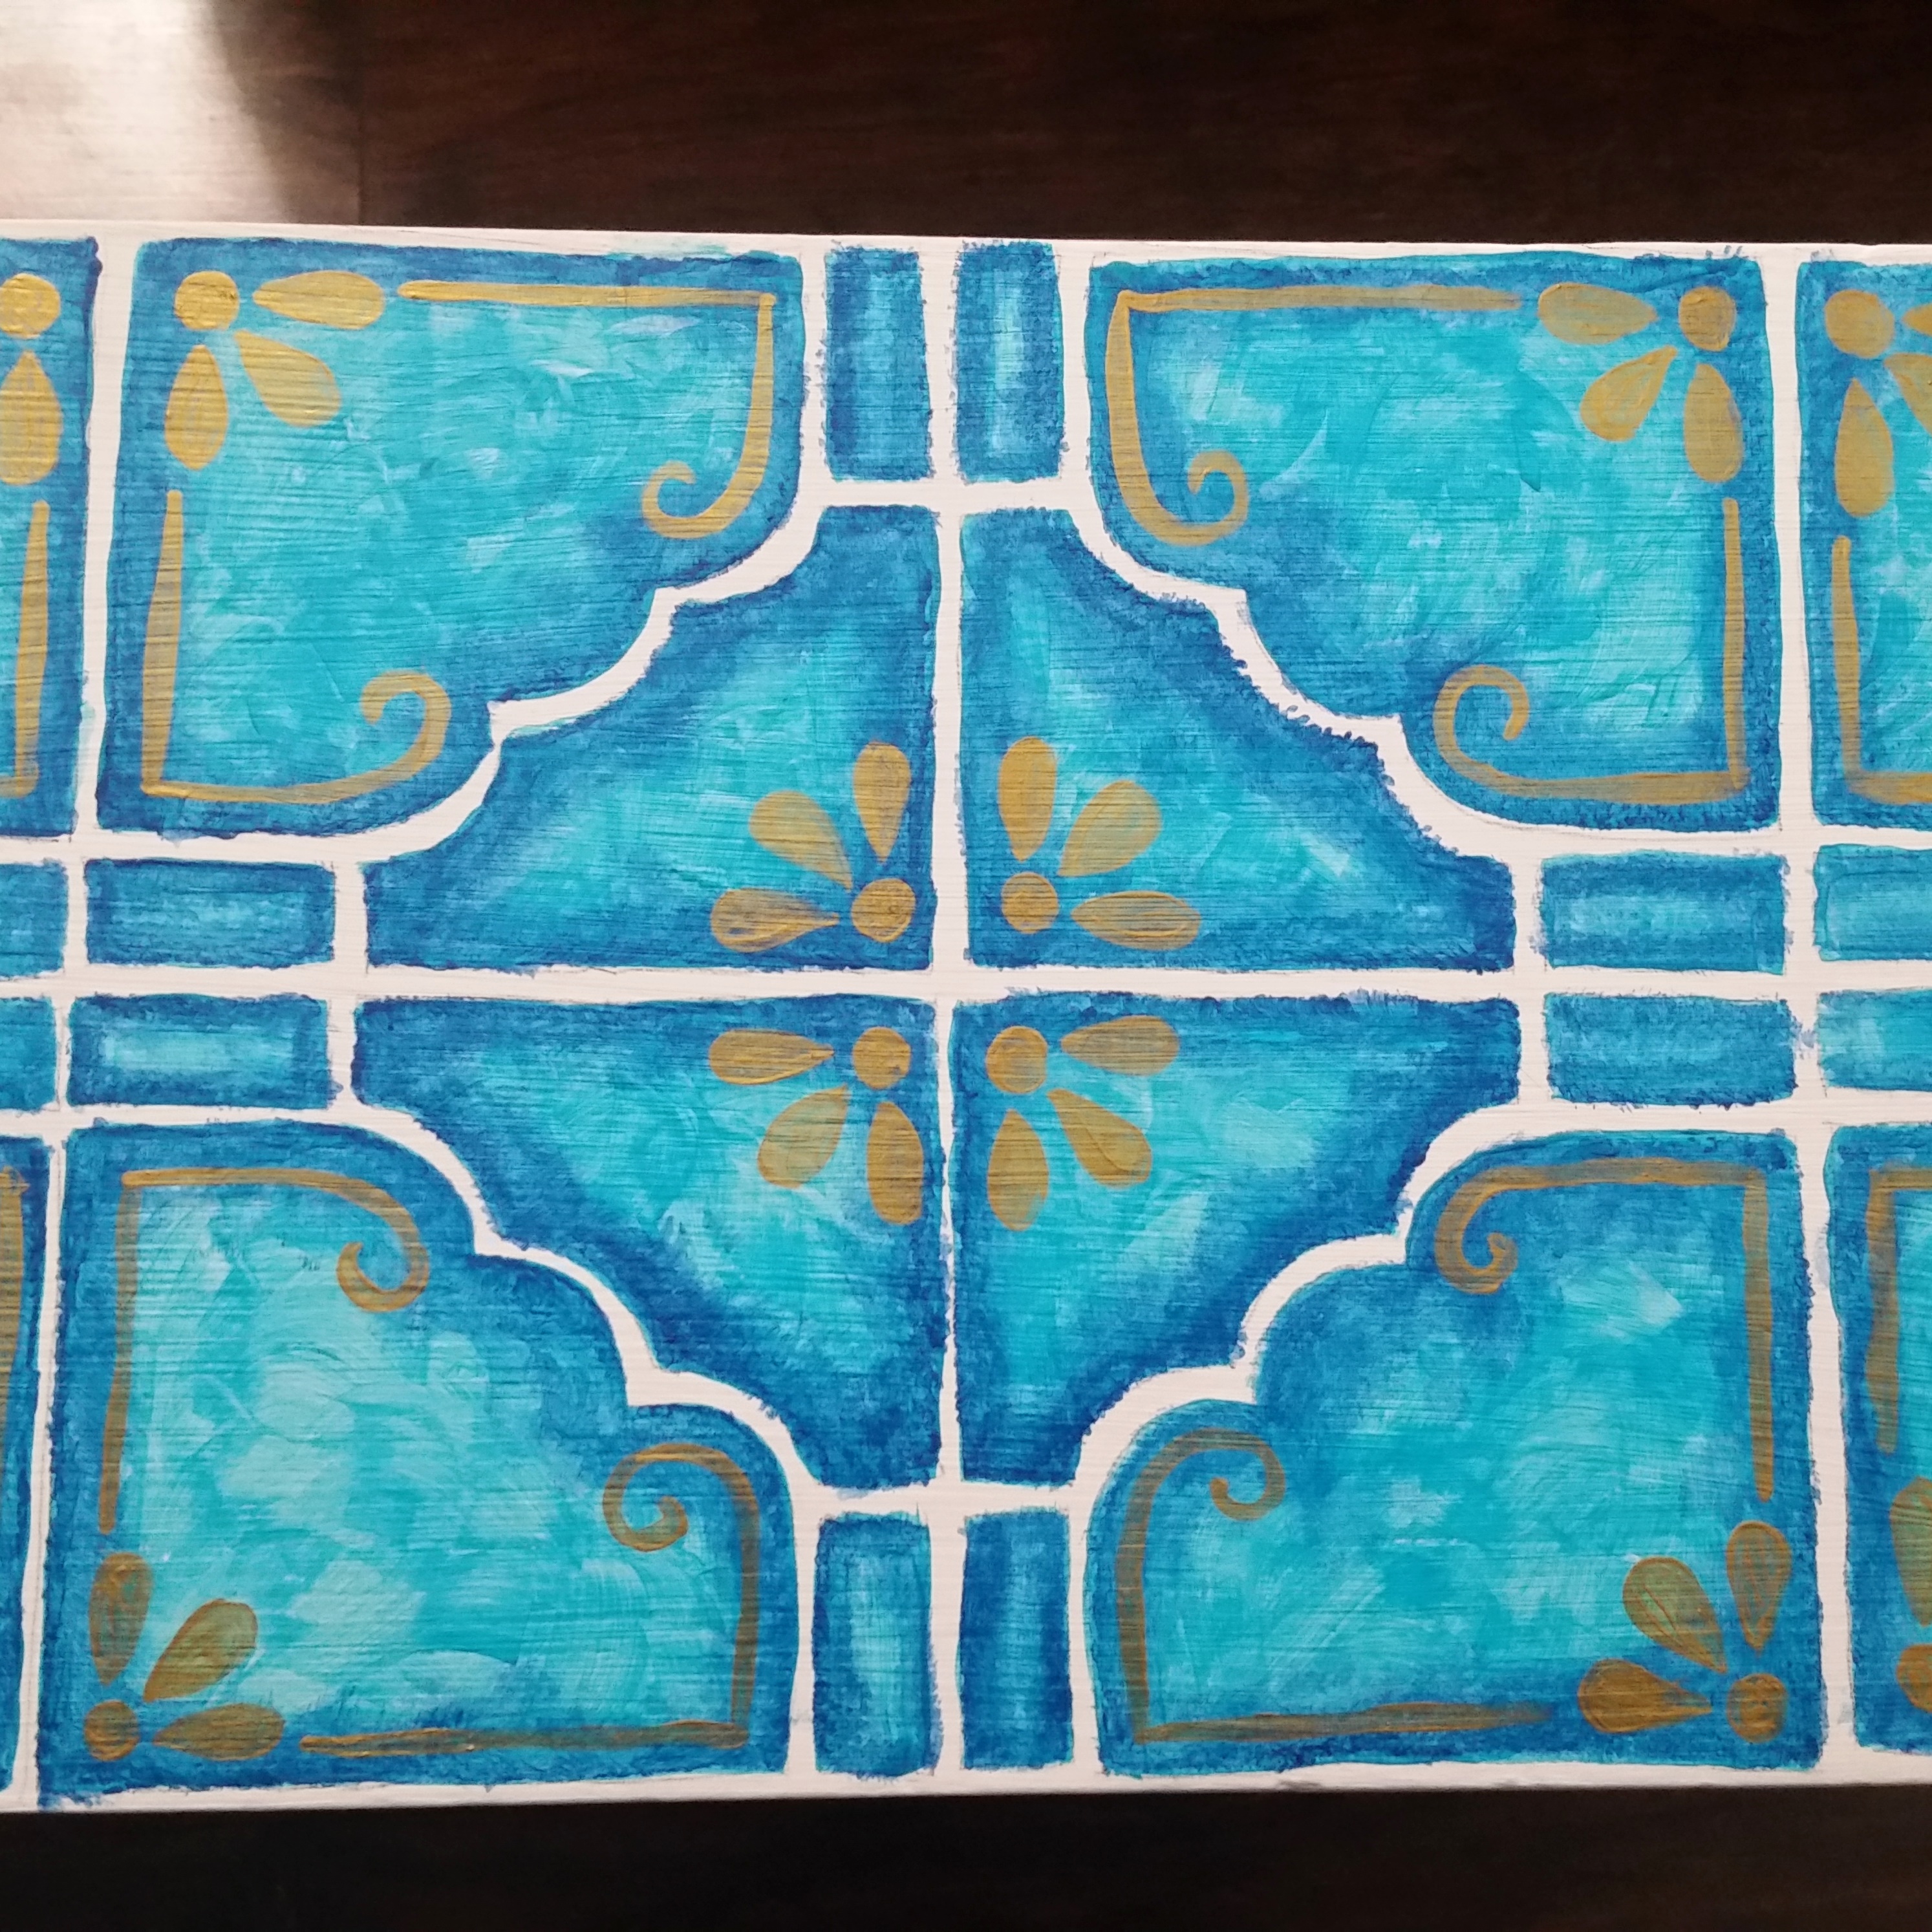
- Use a round brush to paint in the decorative accents on the tile in Gold (Metallic).
- Use a round brush with Everlasting to touch up between the tiles as necessary.
- Once you have finished painting all the drawer fronts with the decorative details, apply a coat of desired finish sealer.
- Paint the sides and back of the drawers in Serene.
- Tear about four 12" x 12" sheets of scrapbook paper into pieces. Use Outdoor Decou-Page to adhere the scrapbook paper to the bottom of the drawers. Use the straight edges of the scrapbook paper along the sides and for the corners.
- Seal the drawer sides, drawer bottom, and outside of the dresser with a desired varnish.
- Add drawer pulls back onto the drawers and insert the drawers into the dresser.