Fluid Art | Ocean Pour
Posted by DecoArt on Jul 18th 2021
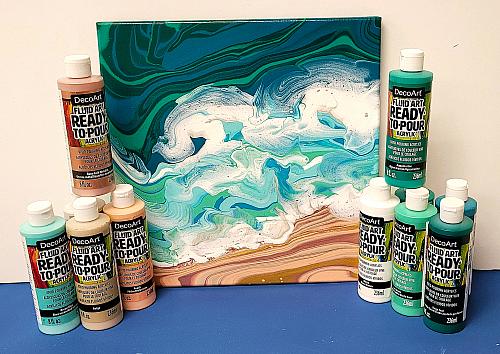
Create a beautiful ocean art pour using DecoArt® Fluid Art Ready-to-Pour Acrylic™ paints.
SUPPLIES
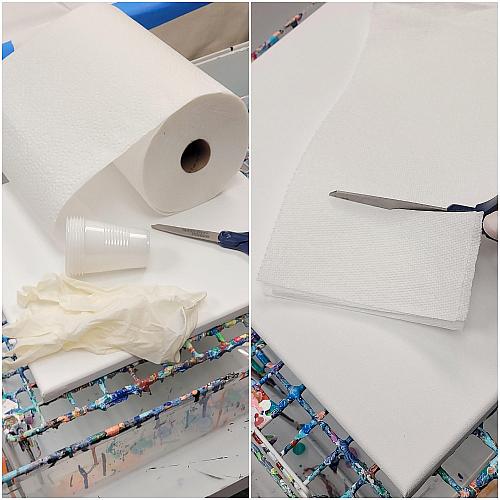
- paper towels
- scissors
- plastic box
- 14" X 14" stretched canvas
- disposable gloves
- grate
- disposable cups
INSTRUCTIONS
NOTES:
TIP: make sure your setup includes a way for the excess paint to drip off the sides of the canvas and dry without the canvas sticking to the surface. A grate and a plastic tub are handy tools for this process.
Overall drying time for the project will vary based on factors such as humidity and the thickness of the paint applied (which can vary even on the flat surface), but you will likely want to leave it undisturbed for three to seven days.
- Gather the supplies. Prep some paper towels by cutting them into 2" strips.
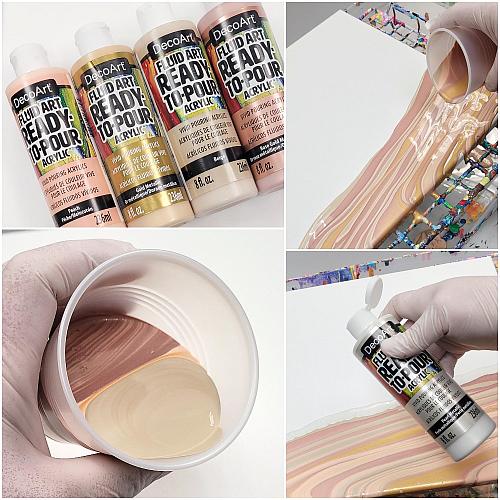
- For the first cup (sand colors), pour Fluid Art Ready-to-Pour Gold (Metallic), Rose Gold (Metallic), Peach, and Beige (in order) into the side of a tilted cup. Pour the cup back and forth horizontally across the bottom of the canvas. Tilt the canvas vertically to allow the paint to run off the bottom. Then, move the canvas back and forth to allow the excess paint to drip off of the sides. Pour a line of Pearl (Metallic) paint directly from the bottle above the "sand" colors.
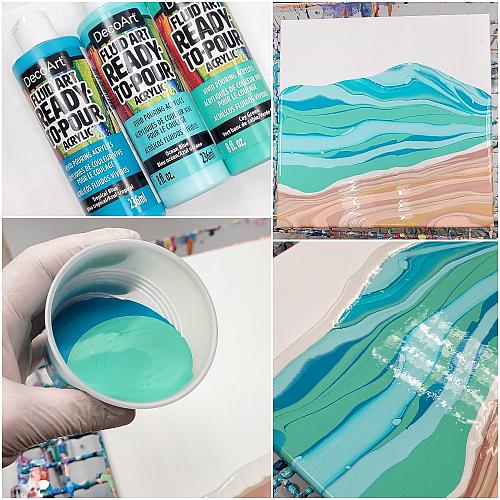
- Cup #2: Pour Tropical Blue, Ocean Blue, and Cay Green into the side of a clean tilted cup. Pour the contents of the cup back and forth horizontally onto the canvas above the Pearl paint line. Carefully move the canvas back and forth horizontally to allow excess paint to drip from the sides of the canvas. Pour a line of Pearl (Metallic) paint, directly from the bottle, above the colors of the water.
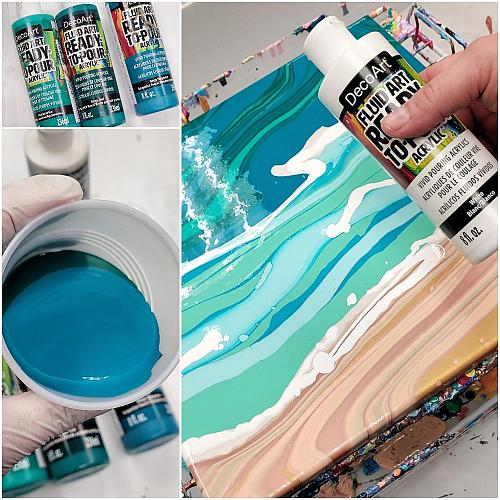
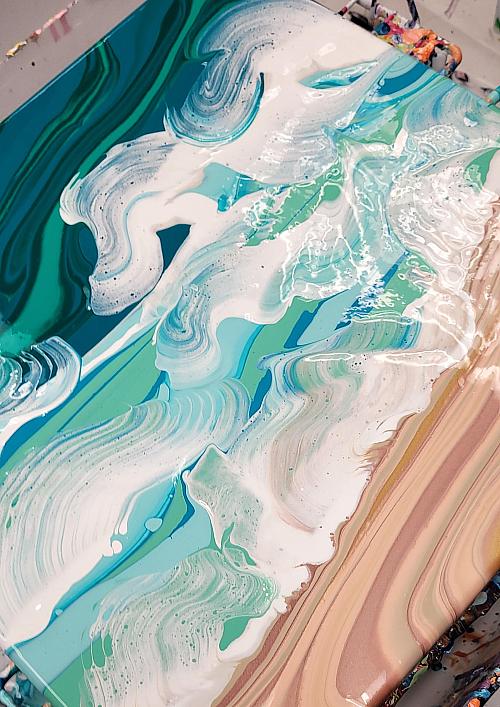
- Cup #3: Pour Dark Aquamarine, Deep Teal, and Deep Turquoise into the side of a clean tilted cup. Pour the contents of the cup back and forth horizontally onto the canvas above the Pearl (Metallic) paint line. Carefully move the canvas back and forth horizontally to allow excess paint to drip from the sides and top of the canvas. Pour some lines of White paint, directly from the bottle, onto the Pearl paint lines and some extra in the water areas.
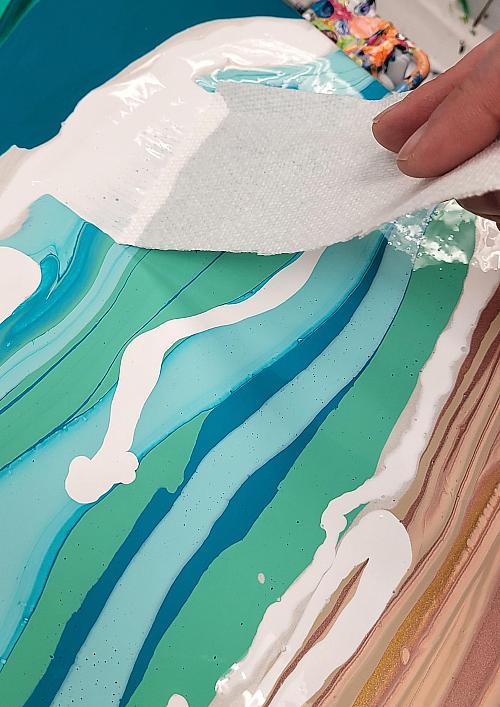
- Use the precut paper towel strips to lightly drag White paint lines into other colors.
- Continue to do this for all of the White lines, going in different directions each time to create a "breaking waves" look.
- Blow on some of the edges to spread the White even more. Move the canvas around to bring the waves into the sand colors.
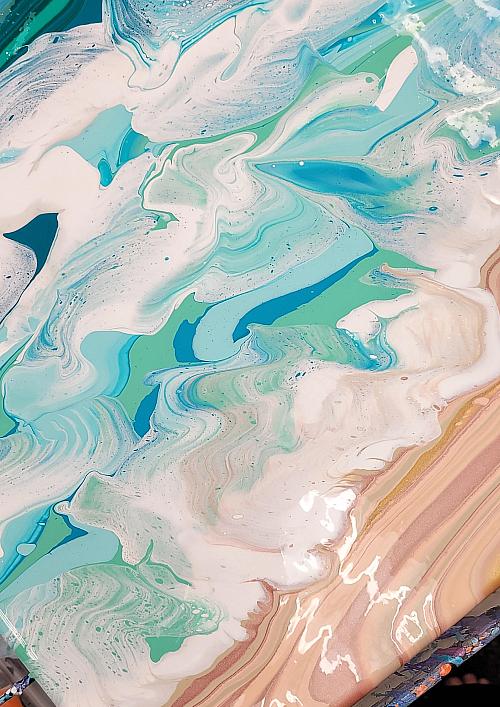
- Allow three to seven days to dry and then hang this beautiful DIY paint pour wall decor anywhere in your office or home.