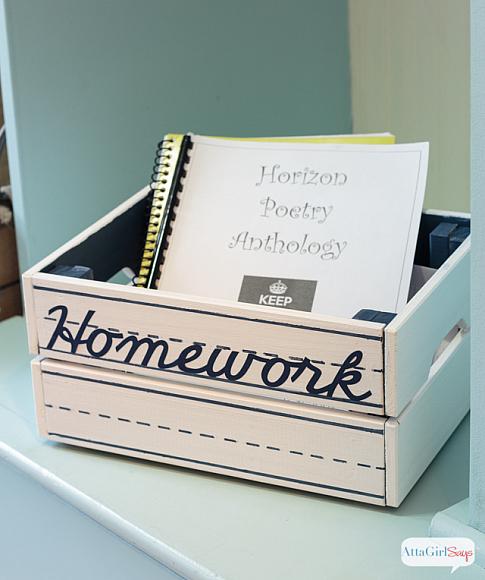
Homework Organization Crate
Posted by DecoArt on Jul 28th 2016
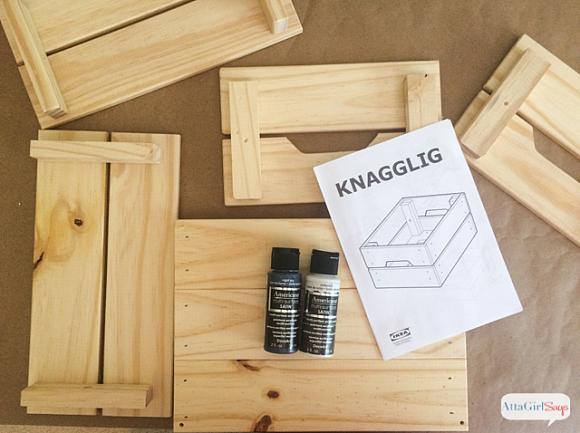
Items Needed:
- Wooden Bin
- Painter's Tape
- Foam Paint Brush
- Flat, Stiff-Bristled Paint Brush
- Vinyl Letters
Instructions:
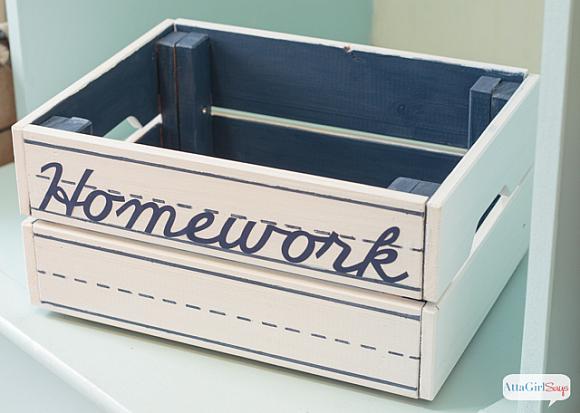
Any wooden crate will work, but the Knagglig bins from Ikea are great because you can paint them before assembly so you don't miss any spots. This was especially helpful since I did a two-tone finish on our storage crate. I painted the crate to look like a sheet of practice writing paper, then added vinyl lettering I cut with my Cricut Explore Air.
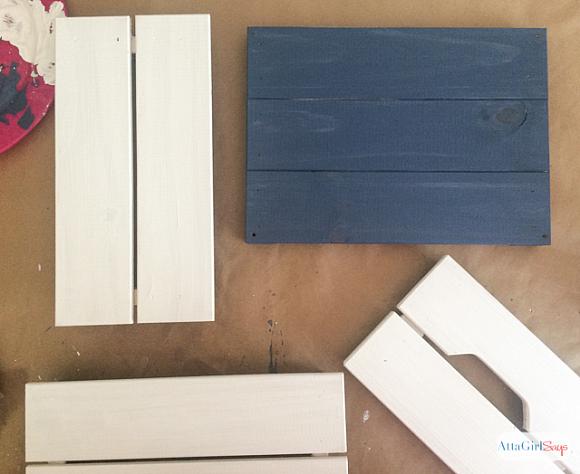
I began by painting the interior of the crate with two coats of Night Sky.
When dry, I painted the exterior with two coats of Cottonball.
I used a foam paint brush to paint the slats, then used a flat, stiff-bristled brush to paint the edges and any crevices.
When the white paint was thoroughly dried, I taped off the writing guidelines using painter's tape.
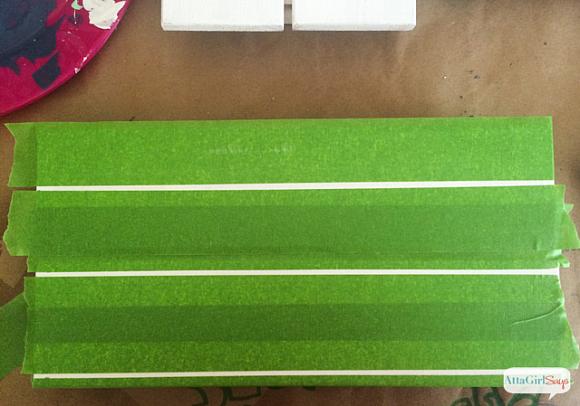
To make the lines, I brushed on two thin coats of Night Sky paint. If you have a steady hand, you could paint on the lines in freehand. but my hand is not that steady.
To keep the paint from seeping under the tape, make sure the edges are secured and also paint in long, horizontal strokes.
For the dotted line, I used the same flat-bristled brush. It was the perfect width to make the dashes.
Remove the tape and allow the blue lines to dry completely.
I used my Cricut and a cursive font to create the vinyl letters that spell out the word "homework". If you don't have an electronic cutting machine, you can paint the letters on using a stencil or in freehand.
We're ready for the first day of school!
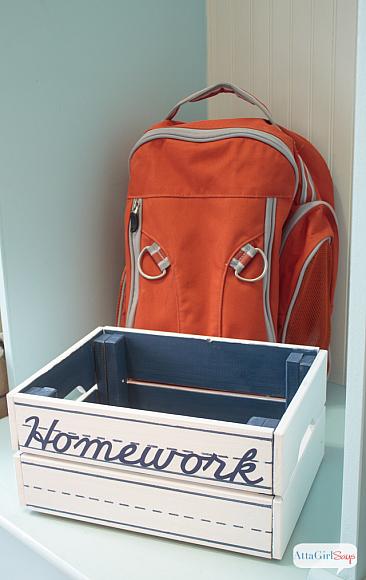
And the first homework assignment!