
Paint Black-Eyed Susans
Posted by DecoArt on Aug 20th 2019
We are so fortunate to have a large pond behind our store, that’s teeming with prairie flowers. I love being able to pop outside on a warm summer day and take a quick walk around. The scent of the wildflowers together is amazing, and it’s so calming. One of the flowers that grow around the pond is black-eyed susans. It’s a pretty yellow flower in the daisy family with a pretty deep orange and red undertone. I was inspired on my latest walk to paint black-eyed susans with the new DecoArt Traditions Artist Acrylic.
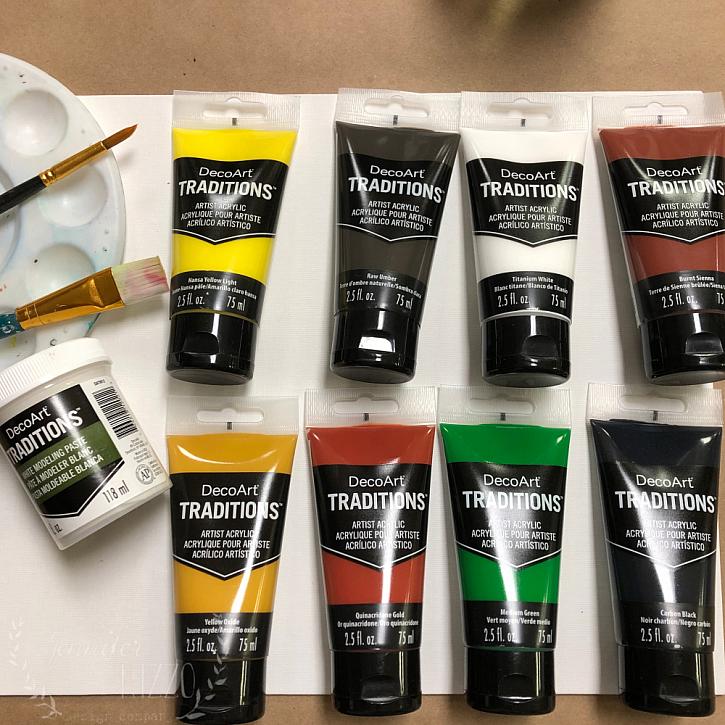
Items Needed:
- DecoArt Traditions Acrylics - Raw Umber
- DecoArt Traditions Acrylics - Cerulean Blue
- DecoArt Traditions Acrylics - Titanium White
- DecoArt Traditions Acrylics - Quinacridone Gold
- DecoArt Traditions Acrylics - Yellow Oxide
- DecoArt Traditions Acrylics - Hansa Yellow
- DecoArt Traditions Acrylics - Carbon Black
- DecoArt Traditions Acrylics - Sap Green
- DecoArt Traditions Acrylics - Medium Green
- DecoArt Traditions Acrylics - Perinone Orange
- DecoArt Traditions Acrylics - Medium Grey Value 6
- DecoArt Traditions Mediums - White Modeling Paste
- Brushes ((round, Filbert And Flat)
- Flat Canvas
Instructions:
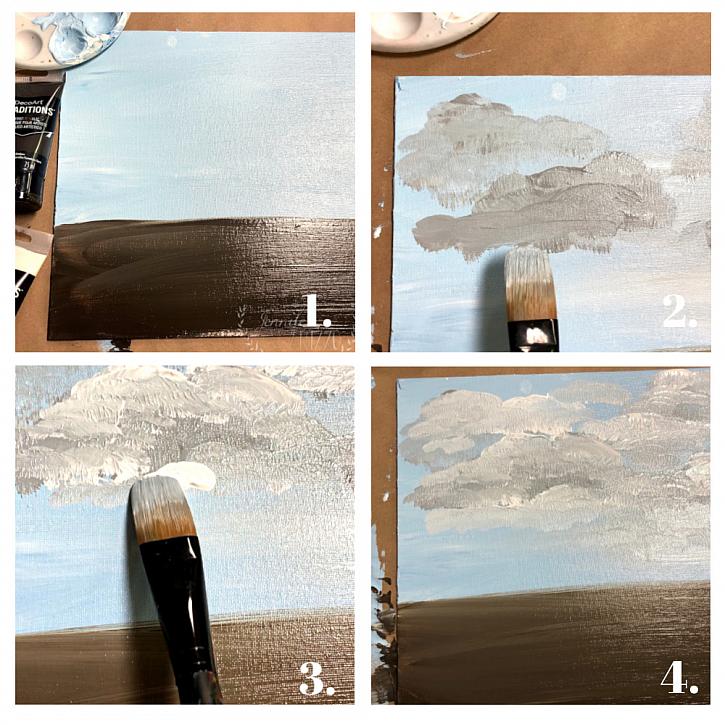
Step1: (1) Coat the canvas with white gesso if it isn’t already coated. Let dry. After canvas is dry, mix Titanium White and Cerulean Blue to create a sky color. Paint the upper ¾ of the canvas board. Paint the lower 1/4 with Raw Umber. (2) Add clouds by dabbing paint on with Medium Grey Value 6 and a large filbert brush, and then (3) Titanium White on the top to highlight the cloud tops, leaving some gray showing at the bottom of the clouds. (4) Let dry before moving onto the flowers.
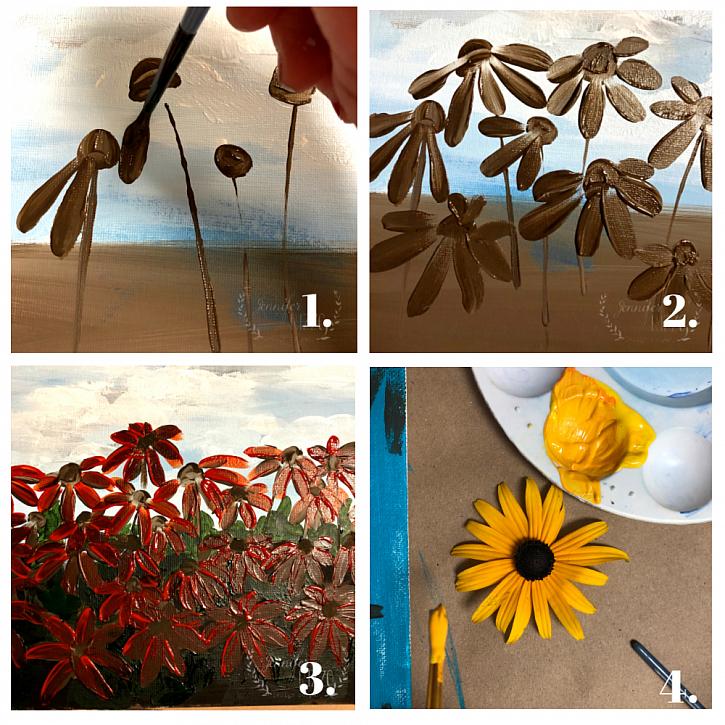
Step 2: The next step includes underpainting the black-eyed susans with Raw Umber. (1) Use a round brush to paint the flower shapes on the canvas. (2) Fill in the canvas, paint over the petals and then (4) mix your paint to match your flower petals. I found mixing Hansa Yellow Light, a small amount of Yellow Oxide, and a dab of Perinone Orange brought me fairly close to the petal color.
Step 3: Once your flowers are under painted, paint over the petals with Quinacridone Gold, following your underpainting.
Step 4: While paint dries slightly, use Carbon Black to paint around all of the flower petals. On top of the black, paint Medium Green and Sap Green randomly to mimic greenery in the background. This doesn't have to be perfect, it’s just to give the impression of greenery.

Step 5: Paint over the Quinacridone Gold with Hansa Yellow Light, following the flower petal shape.
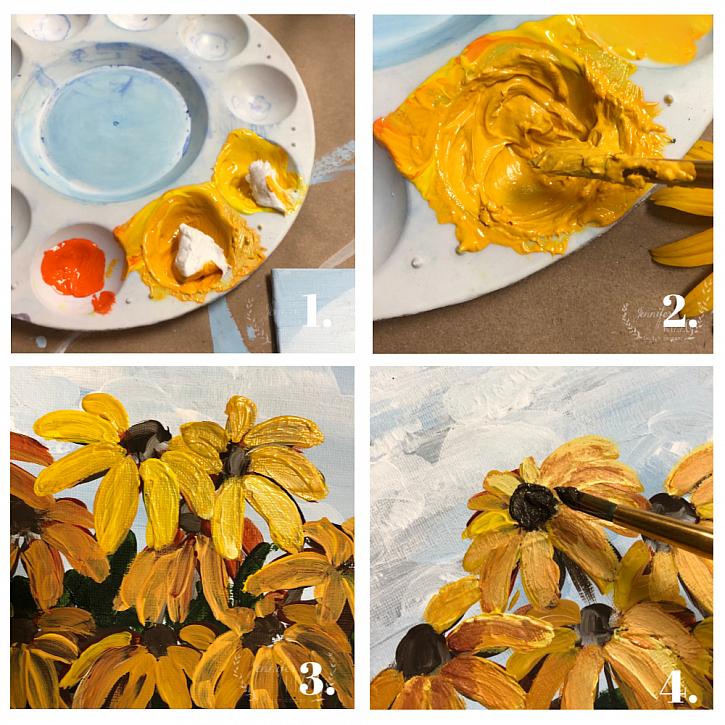
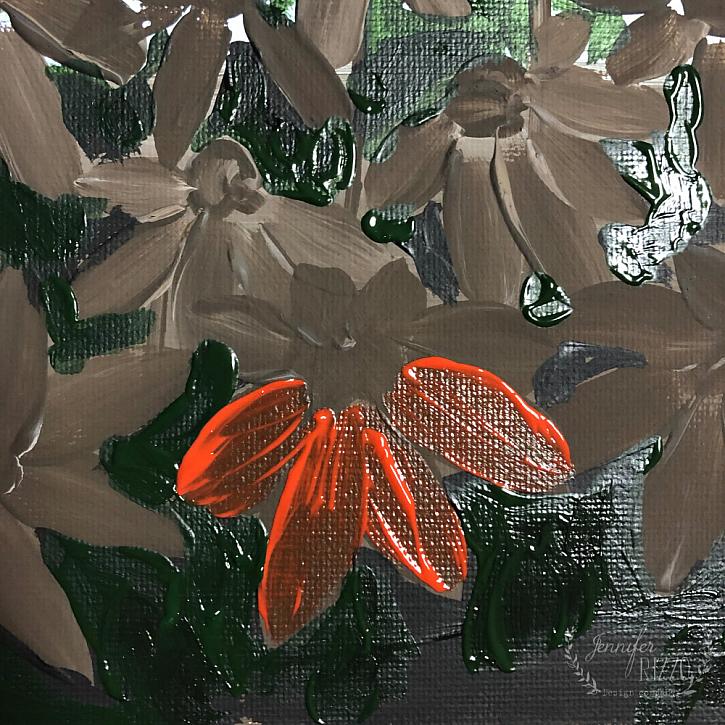
Step 6: (1) Add a small scoop of White Modeling Paste to your paint palette. (2) Mix with Yellow Oxide and Hansa Yellow Light. Add a small amount of Burnt Sienna to each well to mix in and give the paint a slightly orange-ish red hue, and body to the paint. (3,4) Paint onto petals.

Tip: When mixing paint and medium, it seems like it won’t mix at first, and then suddenly, it’s mixed, so keep stirring! Also, once you start mixing, the medium and paint mixture slightly increase in volume (even thought they don’t), so plan your container accordingly.
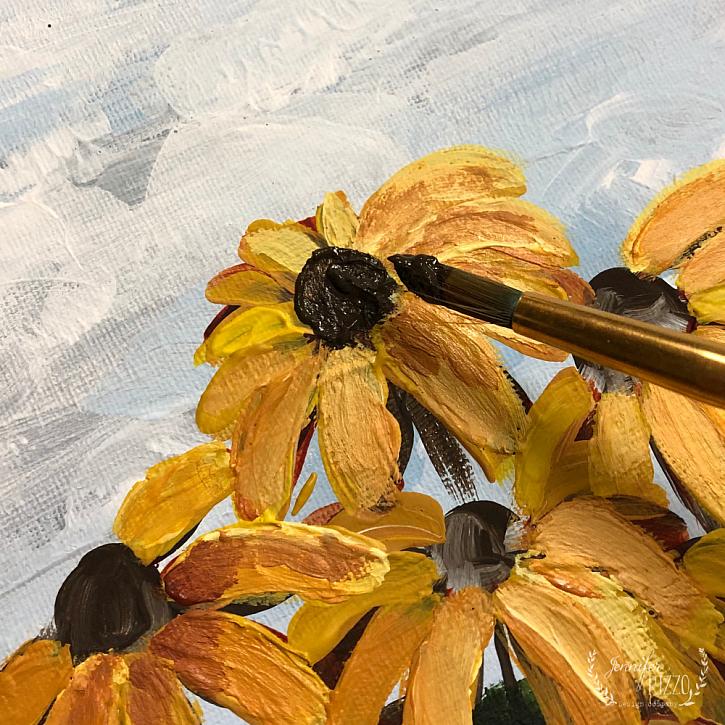
Step 7: Mix modeling paste with Raw Umber and paint onto flower centers with a round brush. Use Titanium White to add highlights to center. Add any leaves or greenery poking out of the top of your flowers with Medium Green, and Sap Green. Highlight with Titanium White.

Step 8: Let canvas dry flat. Paint mixed with modeling paste needs slightly longer to dry.
Looking for more canvas painting DIY’s? Try this how to paint a pumpkin canvas tutorial!
Find more creative inspiration, art projects, makeovers, and crafts, visit me at JenniferRizzo.com, or visit my retail store, and take a workshop with me! The Collective lhe Makery in Lisle, IL