Painted Apron
Posted by DecoArt on Oct 26th 2014
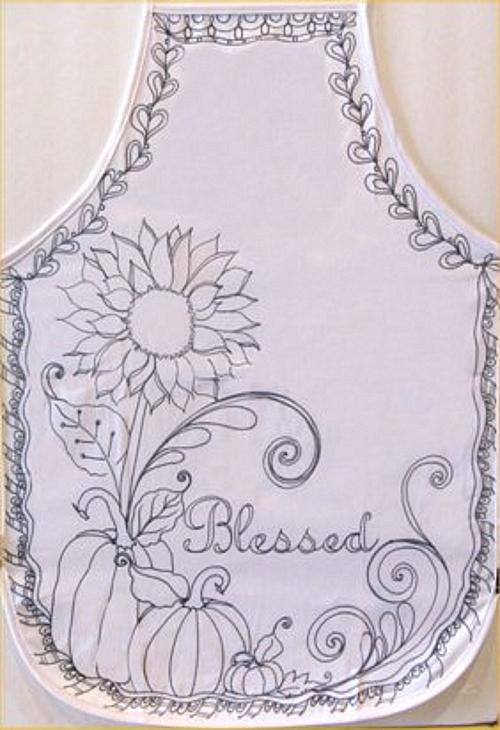
An apron decorated with the images of fall makes a perfect accessory for autumn entertaining.
SUPPLIES
- water container
- palette or plastic plate
- paper towels
- 3/4" flat brush
- #6 flat brush
- #8 flat brush
- #12 flat brush
- apron
- fine line painting pen or script
- #2 script liner brush
- foam core board
- fabric marker
- quilter's tape
INSTRUCTIONS
- Stretch out and secure the apron to a smooth, protective surface. (I like using a foam board; it’s sturdy and long enough to fit the entire apron.) Print the patterns and slide them under the apron, using clamps or tape to make the apron taut.
- Trace the designs onto the apron.
- Base in the section you are painting with Transparent Medium first. (It won’t look painted, but rather milky to clear in color.) Load the brush with the medium, paint it on a small section, load or side-load the brush with paint, and paint the section as instructed. If your brush isn’t moving smoothly, load a bit more medium.
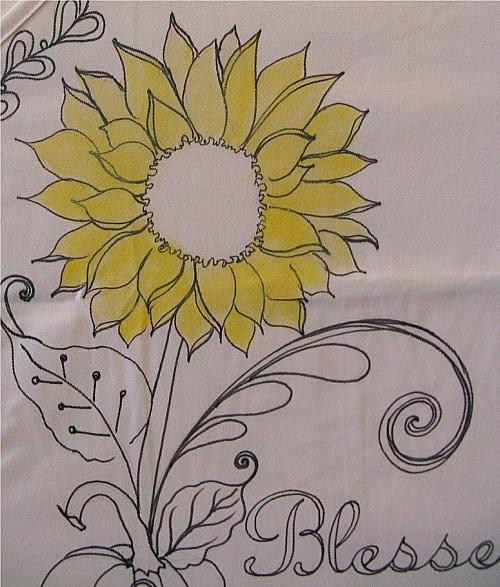
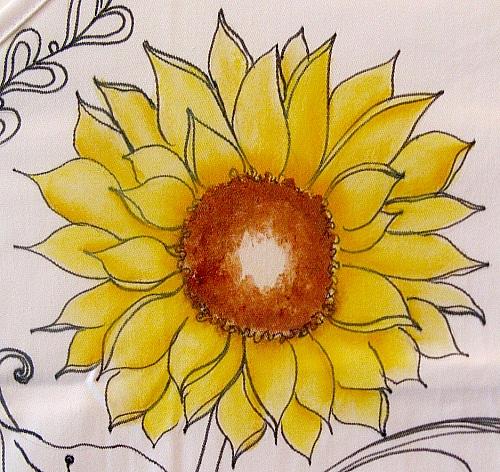
- Load a #12 flat brush with Transparent Medium and paint a few petals of the sunflower. Load brush with more medium and a touch of Cadmium Yellow; paint the petals. (You want the color to be very light, so less paint and more medium is the key. You can add more color, but once you put too much on, it’s harder to return it to a lighter shade.) Continue the same steps until all of the petals on the sunflower are painted.
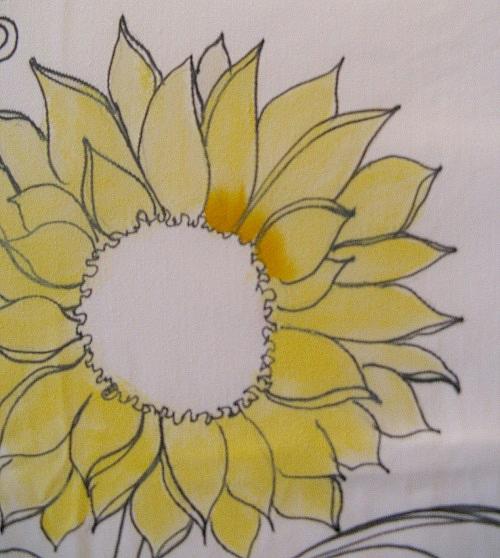
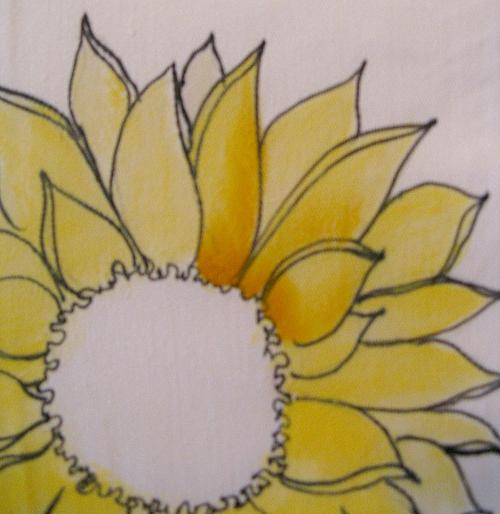
- Load a #12 flat brush with a little Transparent Medium and side-load one corner with Primary Yellow and Antique Gold. Lay in the color at the base of a few petals, wipe off the brush, and lightly brush over it a couple of times to blend it at the base of the petals. Repeat for all of the petals.
- Pull some of the painted color at the base of the petals up one side to give the petals a bit more color. Don’t paint the entire petal. Wipe the brush off often as you move to the next petal and only reload if the paint at the base of the petal is dry. Since you pulled the color up one side, you get a nice shadow effect. However, you can also shade under some petals using a #12 flat brush loaded with medium and side-loaded with Antique Gold.
- Load a #12 flat brush with Transparent Medium and paint the center of the sunflower. Load the brush with Burnt Sienna and tap around the center, leaving the inner circle unpainted, (See photo.) Wash the brush and dry well. Load with Green Apple and tap inside the center circle.
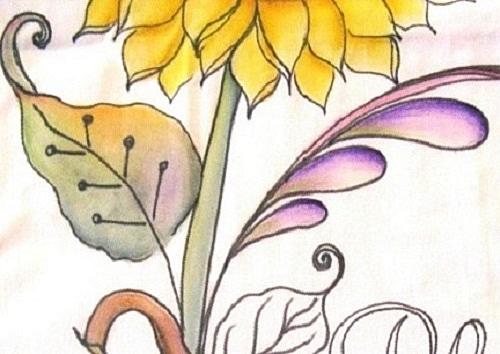
- Paint all leaves using the same technique as steps 5 & 6. (You can, however, switch colors and paint them however you’d like.) Load a #12 flat brush with Transparent Medium and paint leaf. Load the brush with a touch of Olive Green and paint the leaf base. Wipe off the brush and soften the leaf at the base and up the left side to the tip. (Wipe brush off often if you feel you have too much paint on it.)
- Pick up a tiny touch of Tangerine and place it on the upper right side of the leaf. Wipe off the brush and softly brush over it to blend with the Olive Green where they meet.
- Load a touch of Transparent Medium to the brush and a very tiny touch of Dioxazine Purple to the corner of the brush. Paint Dioxazine Purple on the lower part of the leaf; wipe off the brush and softly go over to blend with the other colors.
- Load a #12 flat brush with Transparent Medium and side-load one corner with Dark Chocolate; float the color on the bottom of the flower center.
- Load a #8 flat brush with Transparent Medium to paint the stem. Side-load one corner with Olive Green and paint up the right side of the stem. Wipe off the brush, load with a touch of Cadmium Yellow, and paint the left side of the stem. Wipe off the brush and lightly brush over the stem to blend the colors a bit.
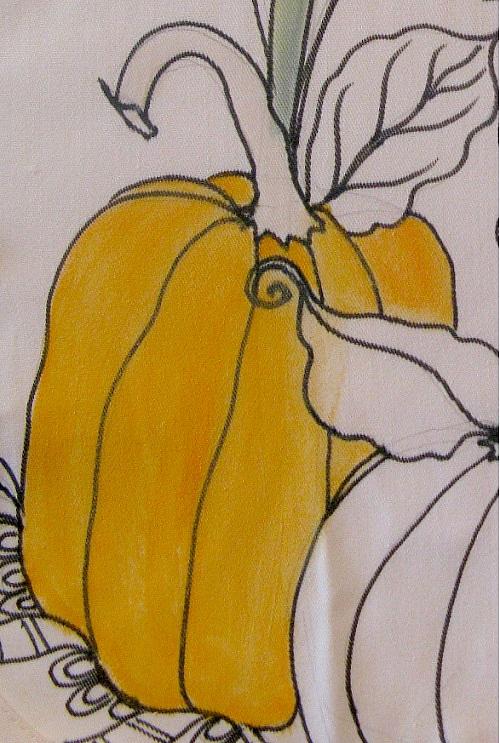
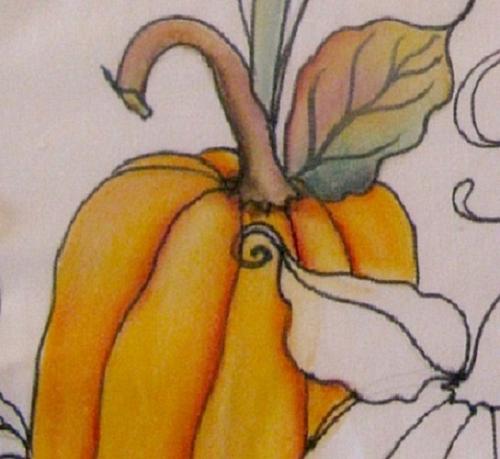
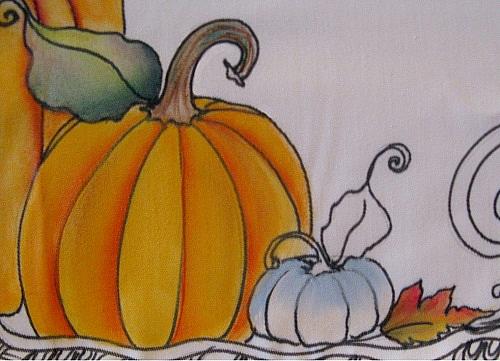
- Load a 3/4” flat brush with Transparent Medium and paint a couple sections of the largest pumpkin (at left). Reload brush with more Transparent Medium and then with Cadmium Orange. Paint the sections of the pumpkin. Repeat until all sections are painted.
- Load a #12 flat brush with Transparent Medium and side-load one corner with Bittersweet Orange. Shade on the left side of each of the black lines to the left below. (See photo above.) You want the brush flat with the corner loaded with Bittersweet Orange next to the black line, pulling the brush flat to shade. (If it's dragging, add more medium.)
- Load a #8 flat brush with Transparent Medium and paint the stem. Load a #8 flat brush with Dark Chocolate and paint the left side of the stem up. Wipe off the brush, load with more Transparent Medium, and bring that color out onto the rest of the stem. (You want the top of the stem lighter.)
- Load a #8 flat brush with Transparent Medium and side-load one corner with Dark Chocolate. Shade around the base of the stem and slightly up the left side. Wipe off the brush, load with Green Apple, and paint the tip of the stem. (See photo.)
- Load a #12 flat brush with Transparent Medium and paint the leaf. Load the brush with a touch of Olive Green and paint the base of the leaf. Wipe the brush off and soften the Olive Green at the base and up the left side to the tip. (Wipe the brush off often if you feel you have too much paint on it.)
- Pick up a tiny touch of Cadmium Yellow and place it on the upper left side of the leaf. Wipe the brush off and softly brush over it to blend with the Olive Green where they meet. Load a touch of Transparent Medium on the brush and a very tiny touch of Red Pepper to its corner. Paint on the left side of the leaf, wipe off the brush, and softly go over to blend with the other colors.
- Paint the second (middle) pumpkin just as you did the first. (You can use Dark Chocolate to shade if you want to change it up a bit. Just be careful to add only a touch to one corner as you don’t want the pumpkin to be a dull brown.)
- Load #8 flat brush with Transparent Medium and paint the small pumpkin (at right). Side-load one corner of the brush with Island Blue and paint the top. Wipe off the brush. Paint Island Blue at the bottom of each section, leaving it unpainted in the middle. Wipe off the brush and softly brush over the sections with no medium or paint on the brush. (Wipe off the brush often and try to keep the middle section very light.)
- Wipe off the brush, load with White, and pull the flat of the brush from the top of a section down just a bit to highlight. Repeat for all of the sections. (You might need to turn the brush up a bit if the section is too small for the flat of the brush to fit in.)
- Paint the stem and leaves just like you did the others, switching the colors on the leaves if you like. (I added more Cadmium Yellow, Red Pepper, and Primary Yellow on the leaf next to the Island Blue pumpkin.)
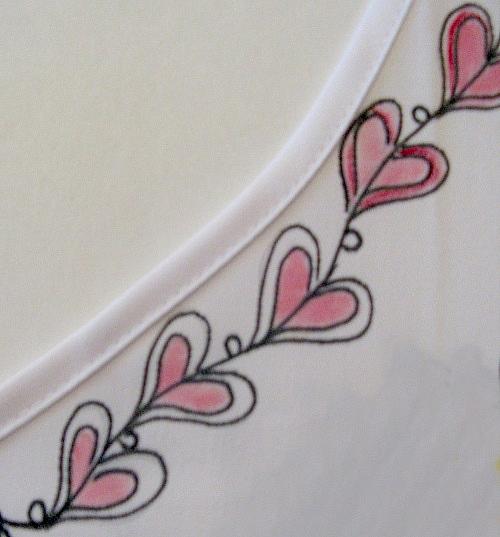
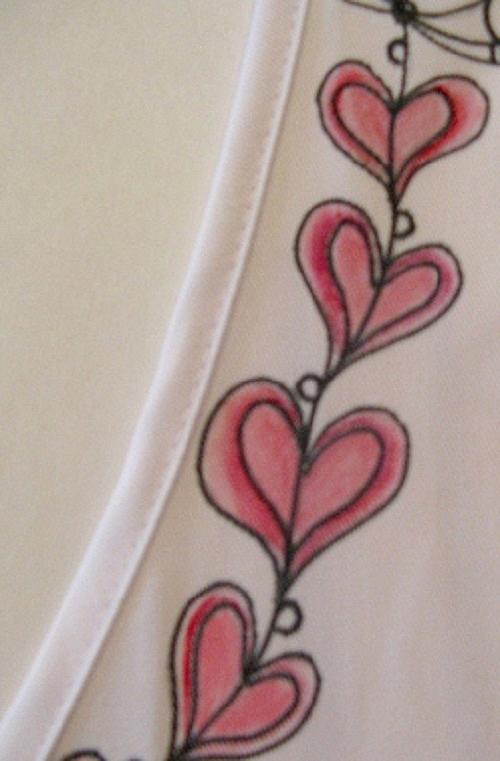
- Load a #6 flat brush with Transparent Medium and paint inside the heart. Load a touch of Red Pepper to the brush and paint the inside heart and then, without reloading, paint the outer heart. (If the brush isn’t moving, load a touch of Transparent Medium and paint the outer heart. You don't want to add more paint to the brush because you want it to be lighter.) Repeat for all hearts on the border.
- Load a #6 flat brush with Transparent Medium and side-load one corner with Red Pepper. Float color around the inside heart. (Make sure to angle the brush where it gets tight so that the Red Pepper brush corner floats near the inside heart and the other corner is up slightly to avoid painting outside the outer heart.)
- Repeat the steps to paint the heart border on both sides of the apron. Dip the handle end of a paintbrush into White and dot on along the border between hearts. (See photo above for placement.)
- Load a #6 flat brush with Transparent Medium and paint the curl. Load the brush with more Transparent Medium and add Dark Burgundy; paint the curl a very pale color. Load the brush with Dark Burgundy and paint full-on color on the inside of the curl. (See photo.)
- Load a #6 flat brush with Transparent Medium and paint one of the scrolls. Side-load one corner with Dioxazine Purple and paint the top part of the scroll. Wipe off the brush and lightly brush where the color ended on the right and bring it softly over to the left. (Add more Transparent Medium if the brush drags.) Wipe off the brush, load with Bright Avocado, and paint at the base of the scroll.
- Wipe off the brush, softly brush over the scroll and slightly up into the Dioxazine Purple to blend. Wipe off the brush often to get rid of excess paint and medium. Repeat the step for all three scrolls. Paint all of the curls and scrolls the same way.
- Paint the little design in the corners of the apron's top border with a #6 flat brush and Transparent Medium. Add a touch of Island Blue and brush on one side of each loop. Wipe off the brush and lightly bring Island Blue over to the other side of the loop. Repeat for all.
- Use a #6 flat brush and Transparent Medium to paint two or three half circles. Wipe off the brush and load with Cadmium Yellow to paint the half circle. Side-load one corner with Tangerine and paint the left side. Wipe off the brush and lightly blend colors.
- Load a #6 flat brush with Transparent Medium and paint band on the border at the apron sides. Side-load the brush with Green Apple and paint the bottom of the rectangle. Wipe off the brush, load with more Transparent Medium and lightly bring color up to the top of each rectangle. (I left the small sections between the rectangles white; you can paint them another color if you’d like.)
- Load a #6 flat brush with Transparent Medium and paint the corner loops. Load a touch of Bright Avocado and paint each loop.
- Load #6 flat brush and paint a section of the band at the apron top with Transparent Medium. Side-load Green Apple and paint the right side of the band. Wipe off the brush and softly brush over color, bringing a bit of it up to the other side. Repeat until the entire band is painted.
- Paint a few of the rectangles at the apron top with a #6 flat brush loaded with Transparent Medium. Load a touch of Tangerine and paint the whole thing. Load a touch of Dark Burgundy and paint the little sections on each rectangle. Repeat until all of them are painted.
- Load a #6 flat brush with Transparent Medium and paint three double loops at a time. Load a #2 script liner brush with a touch of Cadmium Yellow and paint the outer loop. Wash brush, dry off, and load with a touch of Red Pepper. Paint the inner loop. Repeat this for all of the double loops on the border.
- Load a #2 script liner brush with Transparent Medium and paint a couple of letters. Load the brush with Green Apple and paint the right side of each letter. Wipe off the brush and lightly brush over to bring some Green Apple over to the other side. Repeat until all of the letters are painted.
- Paint Glittering Topcoat anywhere you’d like to add some glitz. (Sometimes it looks great just on one side of the petal, pumpkin section, or leaf instead of over an entire area.)