Origami Christmas Ornaments
Posted by DecoArt on Dec 8th 2022
December 13, 2022
Origami Christmas Ornaments
The ancient art form of paper folding has so many wonderful interpretations. Follow along to learn how create your own hand-made ornaments using paper and paint. This craft is a great family acivity to do together. Have fun and create your own festive colorful tree.
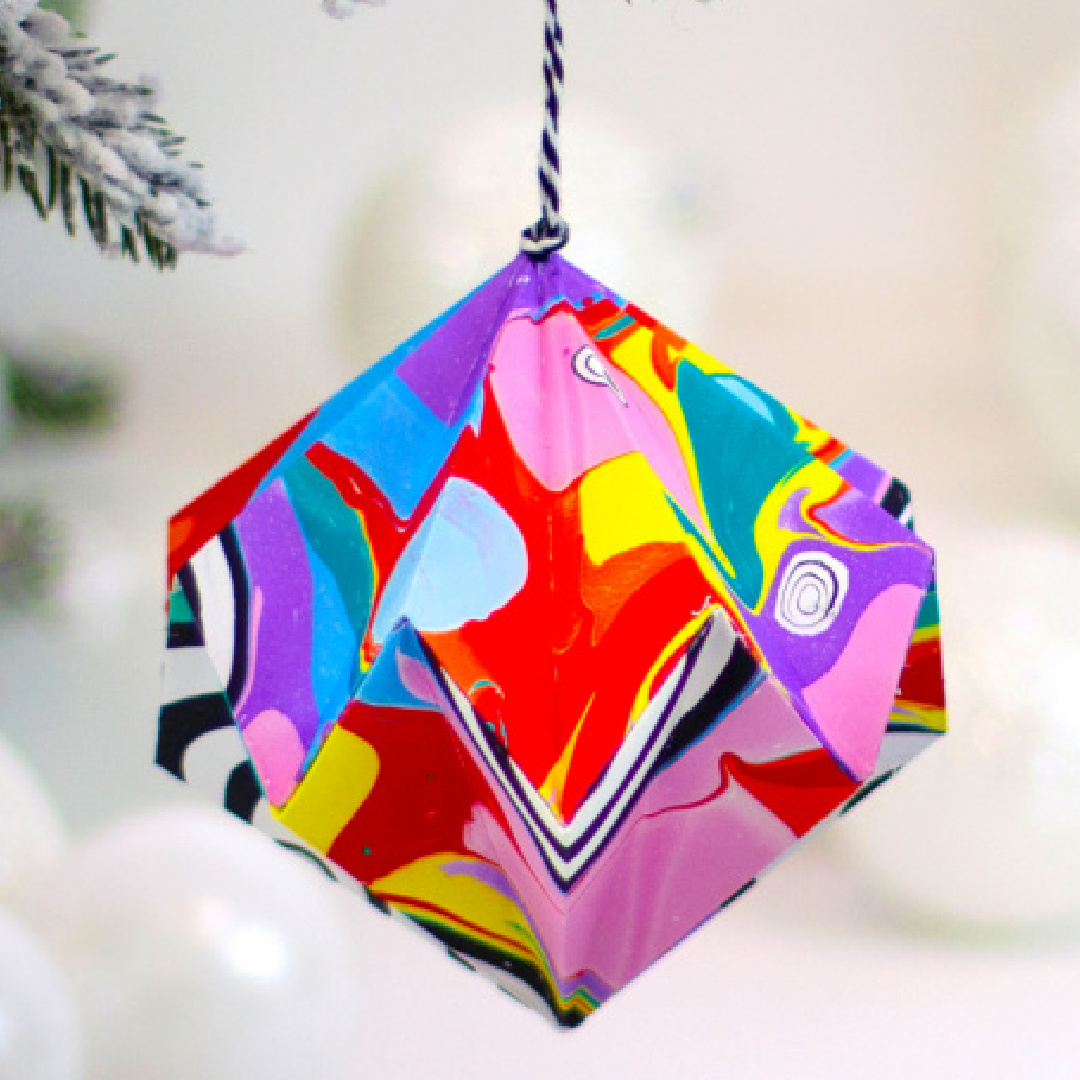
Water Marbled Origami Ornament
Level: Easy-Intermediate
With DecoArt's Water Marbling Acrylic Paints, all of the guess work and mixing has been taken care of with no worries of harsh odors or chemicals to deal with. You can use the paints directly out of the bottle to experiment and create beautiful patterns on a variety of materials! DecoArt also has eductional videos for work space set up and water marbling techniques as well as historical/ traditional references to help you get started on your artisitic journey using water marbling paints.
Step 1
Follow directions to mix up size using the Magic Medium. The Magic Medium thickens the water so the water marbling paints will float on top, allowing you to pull a print. Set up the rest of your area for water marbling. Make sure to have all of your materials easily accessible.
Check out this link for some great tips for an efficient set up.
https://www.youtube.com/watch?v=6TBp8iRkwWQ
TIP: Have a garbage can handy for discarding used cleaning papers.
Watch the full project marbling demo before you begin!
Step 2
Begin your design by creating a base color with Red Water Marbling Arcylic. Pour a line down the center of the tray. Pour an additonal red line down the center. Then drop "stones" of Orange paint randomly over surface. Continue to alternate dropping Yellow, Green, Aquamarine, Light Blue, Lavender, and Pink paints to build up layers of paint.
Step 3
Then drop "stones" of Orange paint randomly over surface. Continue to alternate dropping Yellow, Green, Aquamarine, Light Blue, Lavender, and Pink paints to build up layers of paint.
TIP: To create a smaller stone, dip the tip of a clean Specialty Water Marbling Stick into the paint and touch to the center of the stone.
Step 4
Lightly blow the surface or use a Marbling Stick to move the paint around. Drop 4-6 stones of Black onto the colorful design. Add drops of White into the center of the black stones. Continue this process alternating black and white to build the stone shapes. Lightly blow surface to create more movement in the black and white stones.
Step 5
Drop 4-6 stones of Black onto the colorful design. Add drops of White into the center of the black stones. Continue this process alternating black and white to build the stone shapes. Lightly blow surface to create more movement in the black and white stones.
Step 6
Holding a piece of the Water Marbling Paper by the corner edges, allow the center of the paper to touch the surface first and gently drop the sides. Pull your printed paper off of the surface and allow excess size to drip back into tray. Place print face down into a clean water bath and agitate. This washes off excess size and allows paper to dry faster and colors to be more crisp. Place print face up onto paper towels to dry. Allow to dry. Place dry print face down on a clean surface such as a piece of watercolor paper and iron the back.
TIP: Before beginning a new water marbling design, clean off the surface of the size using the DecoArt Clean
Step 7
Gather what you will need to create your origami ornaments. You will need to prints per ornament. Measure and cut two 8"x 8" squares.
TIP: Practice the origami folding patterns with another sheet before starting your ornament.
Origami folding steps:
Step 8
Use water marbling stick to poke a hole in the end of the top shape. Thread your ribbon or twine through one shape. Tie the end of the string to creat a loop and affix with hot glue. Glue each folded facet together.
TIP: Create multiple different ornaments with a variety of color combinations and different water marbling techniques. Check out this link to water marbling techniques:
"Boho Vibes" Origami Ornaments
TIP: Create and add some tassels with yarn and painted wooden beads that match.