
Altering a Cigar Box
Posted by DecoArt on Feb 16th 2017
Items Needed:
- DecoArt Media Mediums and Specialty Products - Clear Matte Medium (DMM20-71)
- DecoArt Media Mediums and Specialty Products - Crackle Glaze - Clear (DMM16-71)
- Americana DuraClear Varnishes 2oz - DuraClear Gloss Varnish (DS19-3)
- Americana Stencils 12x12 - Segmented Swirls (ASMM29-K)
- Americana Stencils 6x8 - Owl (ASMM20-K)
- Americana Stencils 6x8 - Daisy Chain (ASMM45-K)
- Wood Cigar Box
- 110lb Cardstock
- Assorted Brushes
- Permanent Black Pens
- Brayer
- Wood Candle Cup Holders
- Washi Tape
- Assorted Embellishments
- Ephemera
- Embossing Machine And Folders
- Gel Plate
- Alcohol Inks
- E6000
Instructions:
I started out with a wooden cigar box that I found at my local flea market. I took off as much of the labels that I could get off, and then sanded down the residue --it's not necessary to get all of the paper off because this will all get covered up.
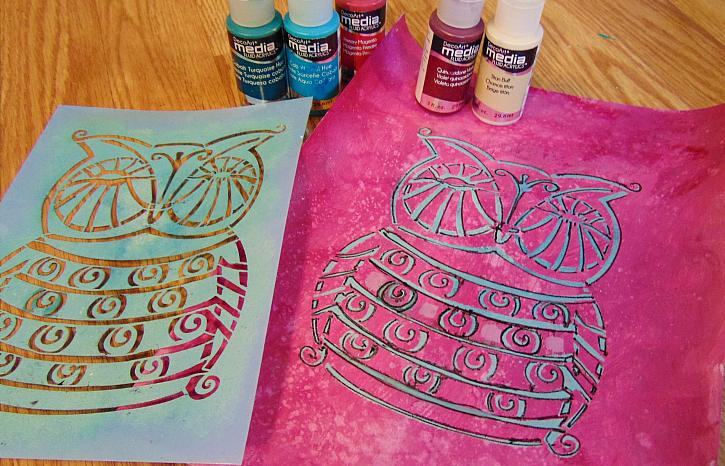
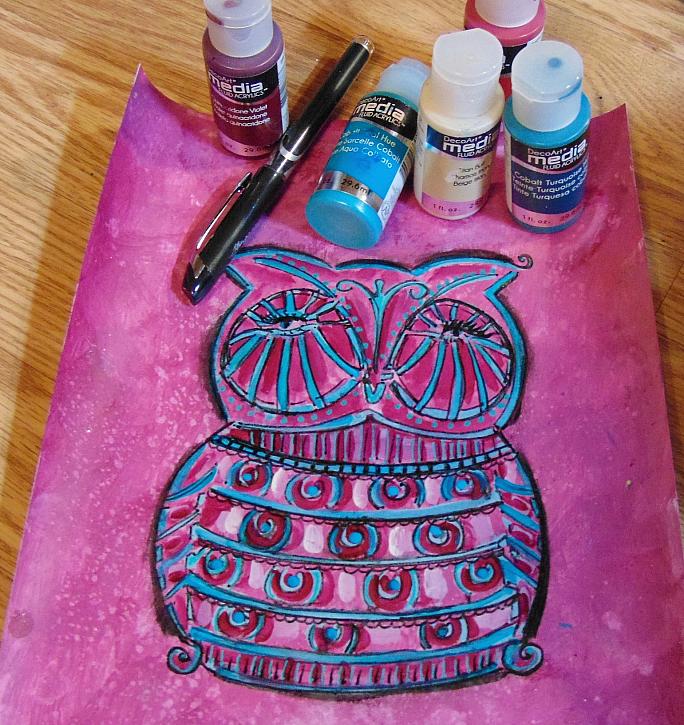
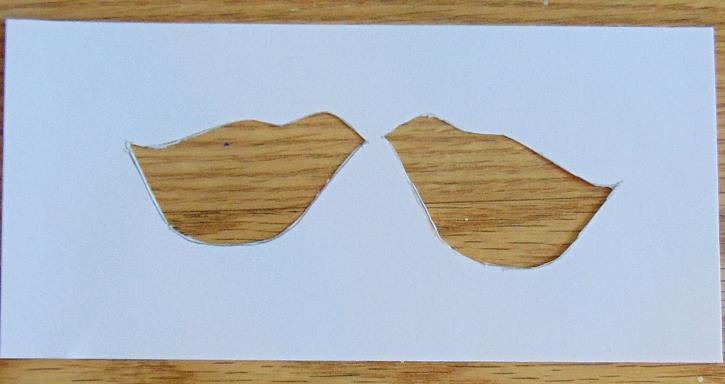
Next, comes the fun part. First I painted shades of the Quinacridone Violet, Primary Magenta, and Titan Buff on 110lb cardstock. and then I stenciled with my Owl stencil using the Cobalt Teal Hue paint. After that, I defined all of the lines with my fine tip black pen. I could have stopped there, but I kept going embellishing the owl with my paints and pen to give her a little more personality.
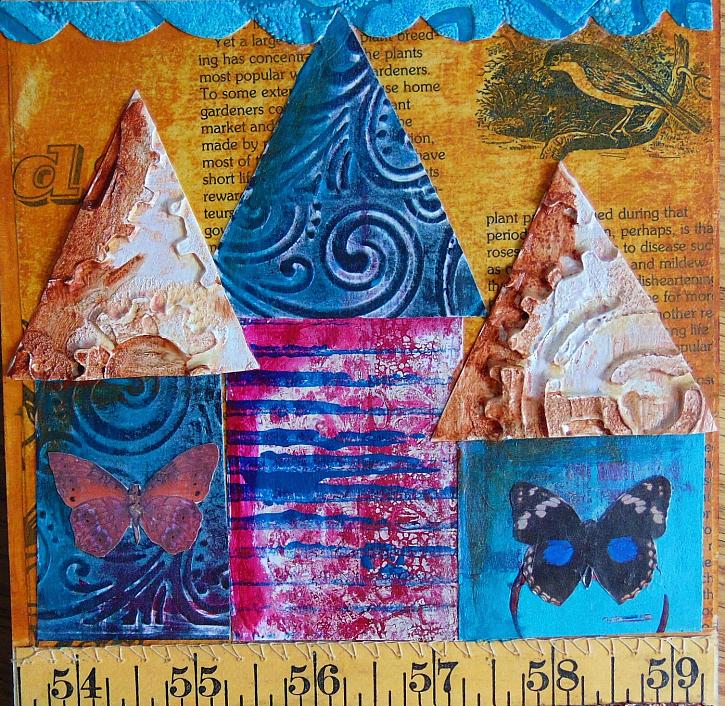
After that I painted papers for collage starting with some textured wallpaper that I had--the paint will get into the grooves of the paper which will create lots of dimension and depth even if you're using just one color of paint. Next, I got my embossing machine out and embossed some papers on the 110lb cardstock--I dry brushed the paint on them, and I also used the Patina Green Antiquing cream on the one paper--lots of fun just to play around with these papers.
I also made some mono printed papers with my gel plate using the Segmented Swirls and Daisy Chain stencils along with bottle caps and corrugated cardboard--again, playing around and seeing what happens.

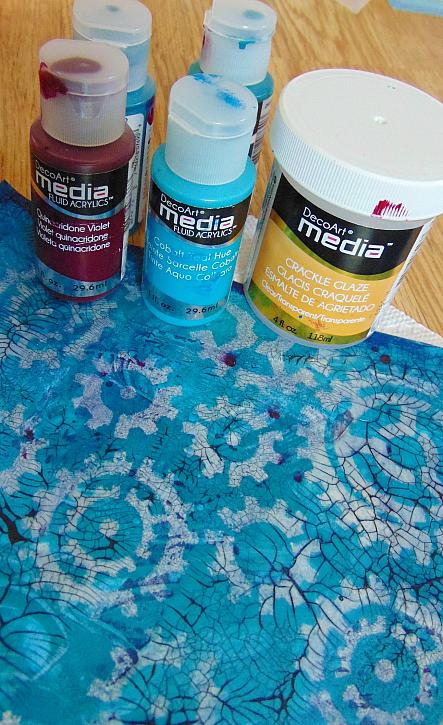
I then tried the Decoart Crackle Glaze for the first time (which I enjoyed very much). After painting the paper (110lb) and using the Gears and Cogs stencil I applied the glaze over it according to the directions and then applied a watery wash of the Carbon Black paint over it which I then wiped away--great effect!
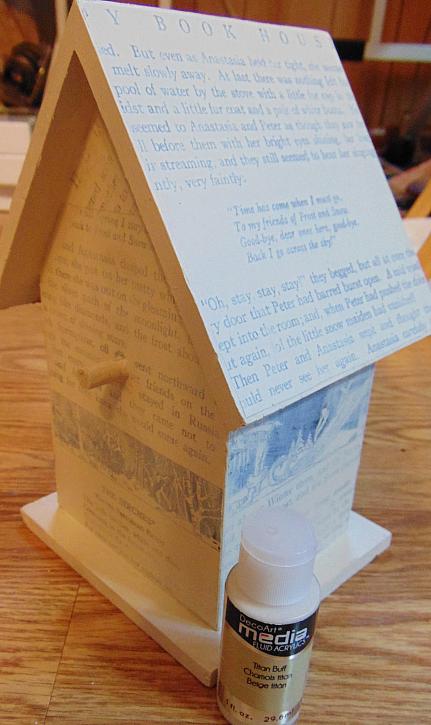
Now comes the time to start collaging papers on to the box. I started with my owl on the top and then the sides with random pieces of paper that I had cut up. I applied it with the Matte Medium. If the paper is too heavy, you may have to switch to a heavier gel medium, and it's easier when you wet the backside of the papers. Apply the medium to the back of the paper and the surface also to avoid air bubbles using a brayer to adhere the papers, and also apply the medium over the top of the entire collaged surface to seal it all in. I also decided to add some butterfly and flower ephemera once I had the first layer of papers on the box sealing those also with the Matte medium . And don't forget the inside of the box too.
When everything was dry, I took my brush tip permanent pen and defined between each collaged paper to add a little depth. When finished I applied a couple coats of the Decoart gloss varnish. The gloss makes the colors pop even more. And then I added my chosen embellishments.
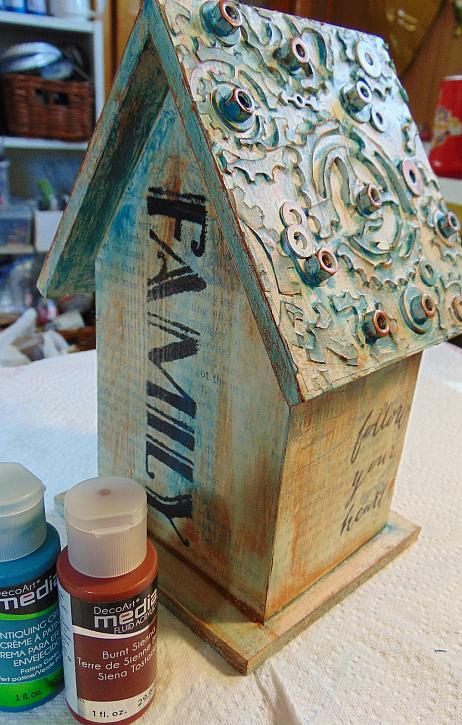
And the finishing touch for my owl--a butterfly collar with 'jewels' and her crown.
Taking a plain box--whatever kind you choose is always fun--they have a way of putting themselves together--try it and you'll see what I mean.