Classic Rose Gold Storage Bins
Posted by DecoArt on Apr 11th 2016
Even storage boxes can be glamorous with Metallic Lustre®.
SUPPLIES
- water container
- palette or plastic plate
- paper towels
- soft cloth
- painter's tape
- 2" chip brush
- 3/4" flat brush
- sea sponge
- cosmetic sponge
- paper tag
- sponge pouncer
- small stencil brush
- embellishments of choice
- cord
- 3/4" angle brush
- storage container
INSTRUCTIONS
NOTES:
Let dry completely between painting steps.
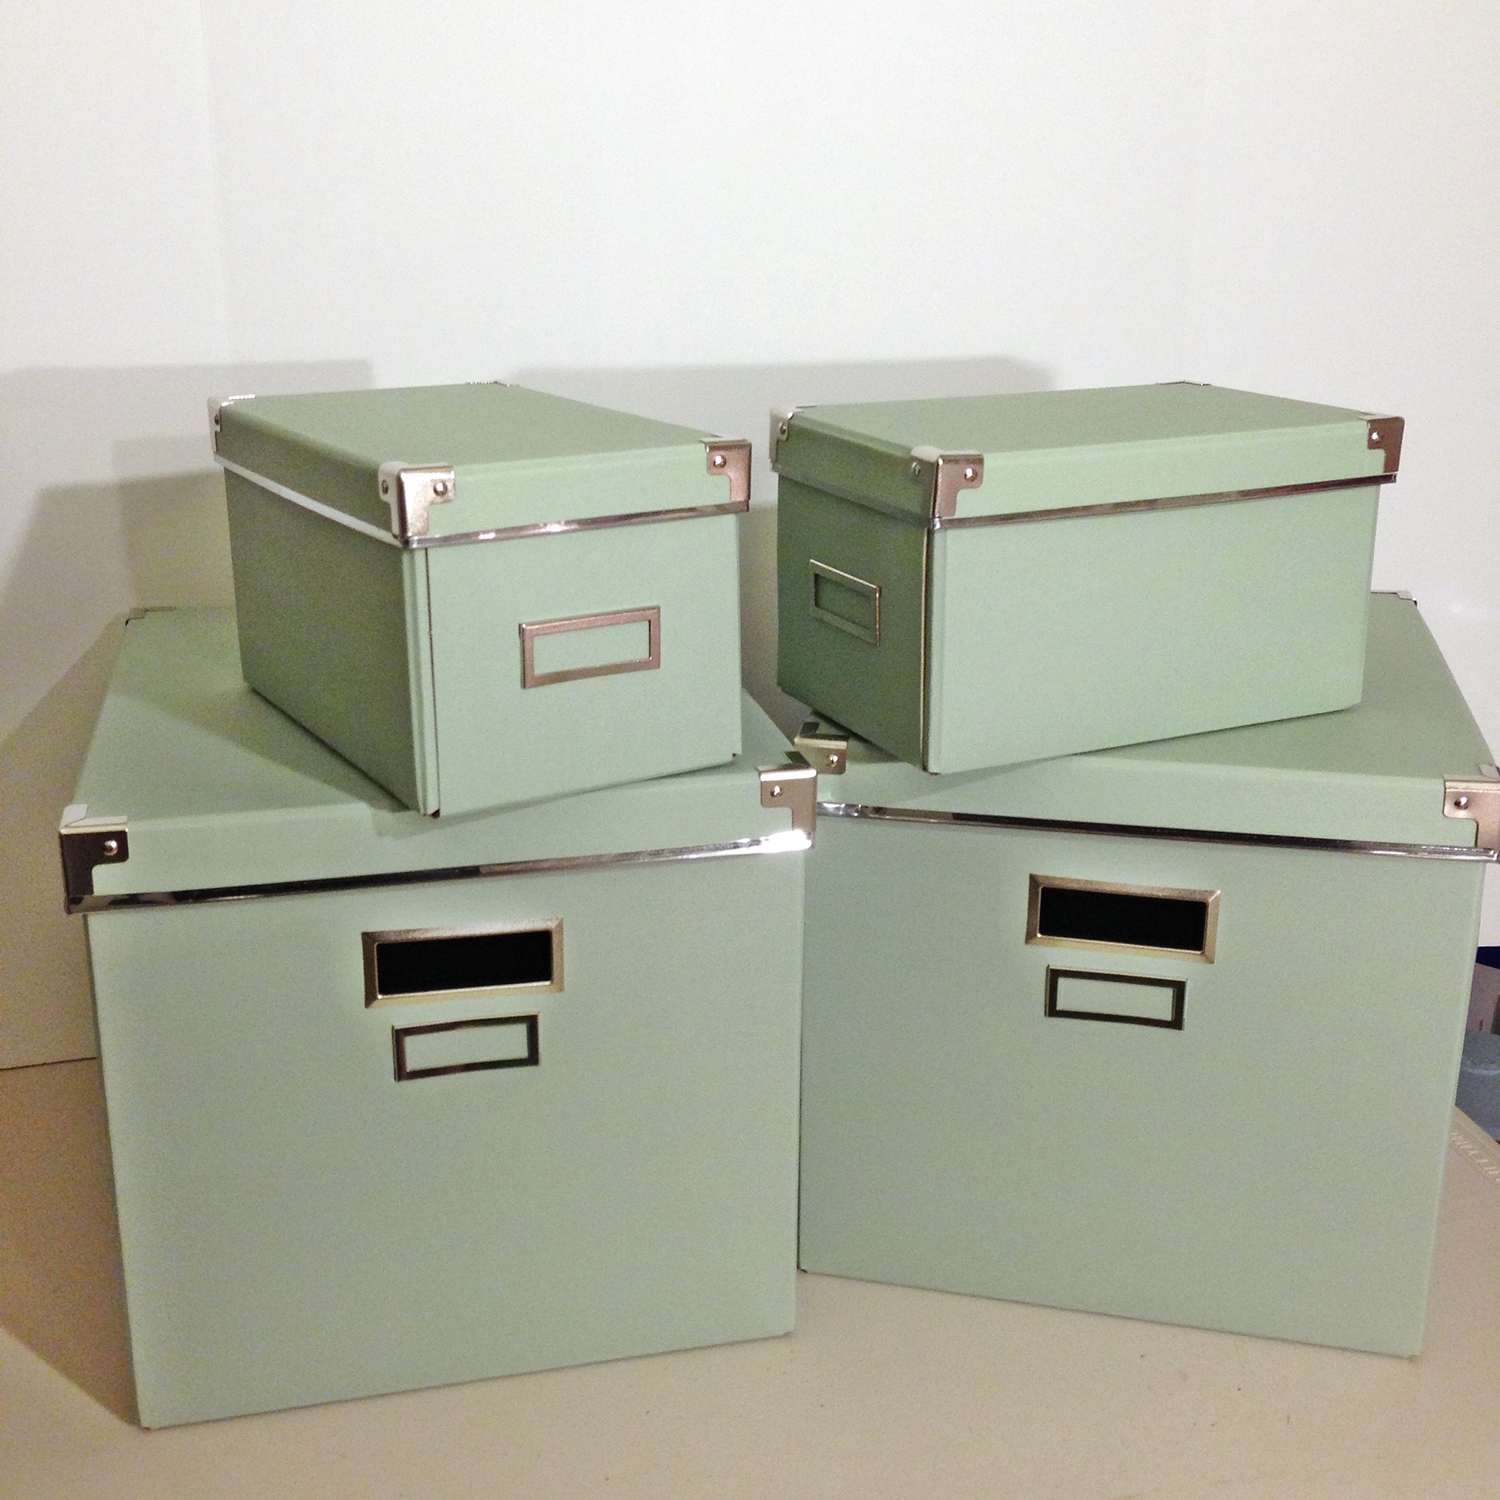
- Wipe each bin and lid with a damp paper towel to remove any dust.
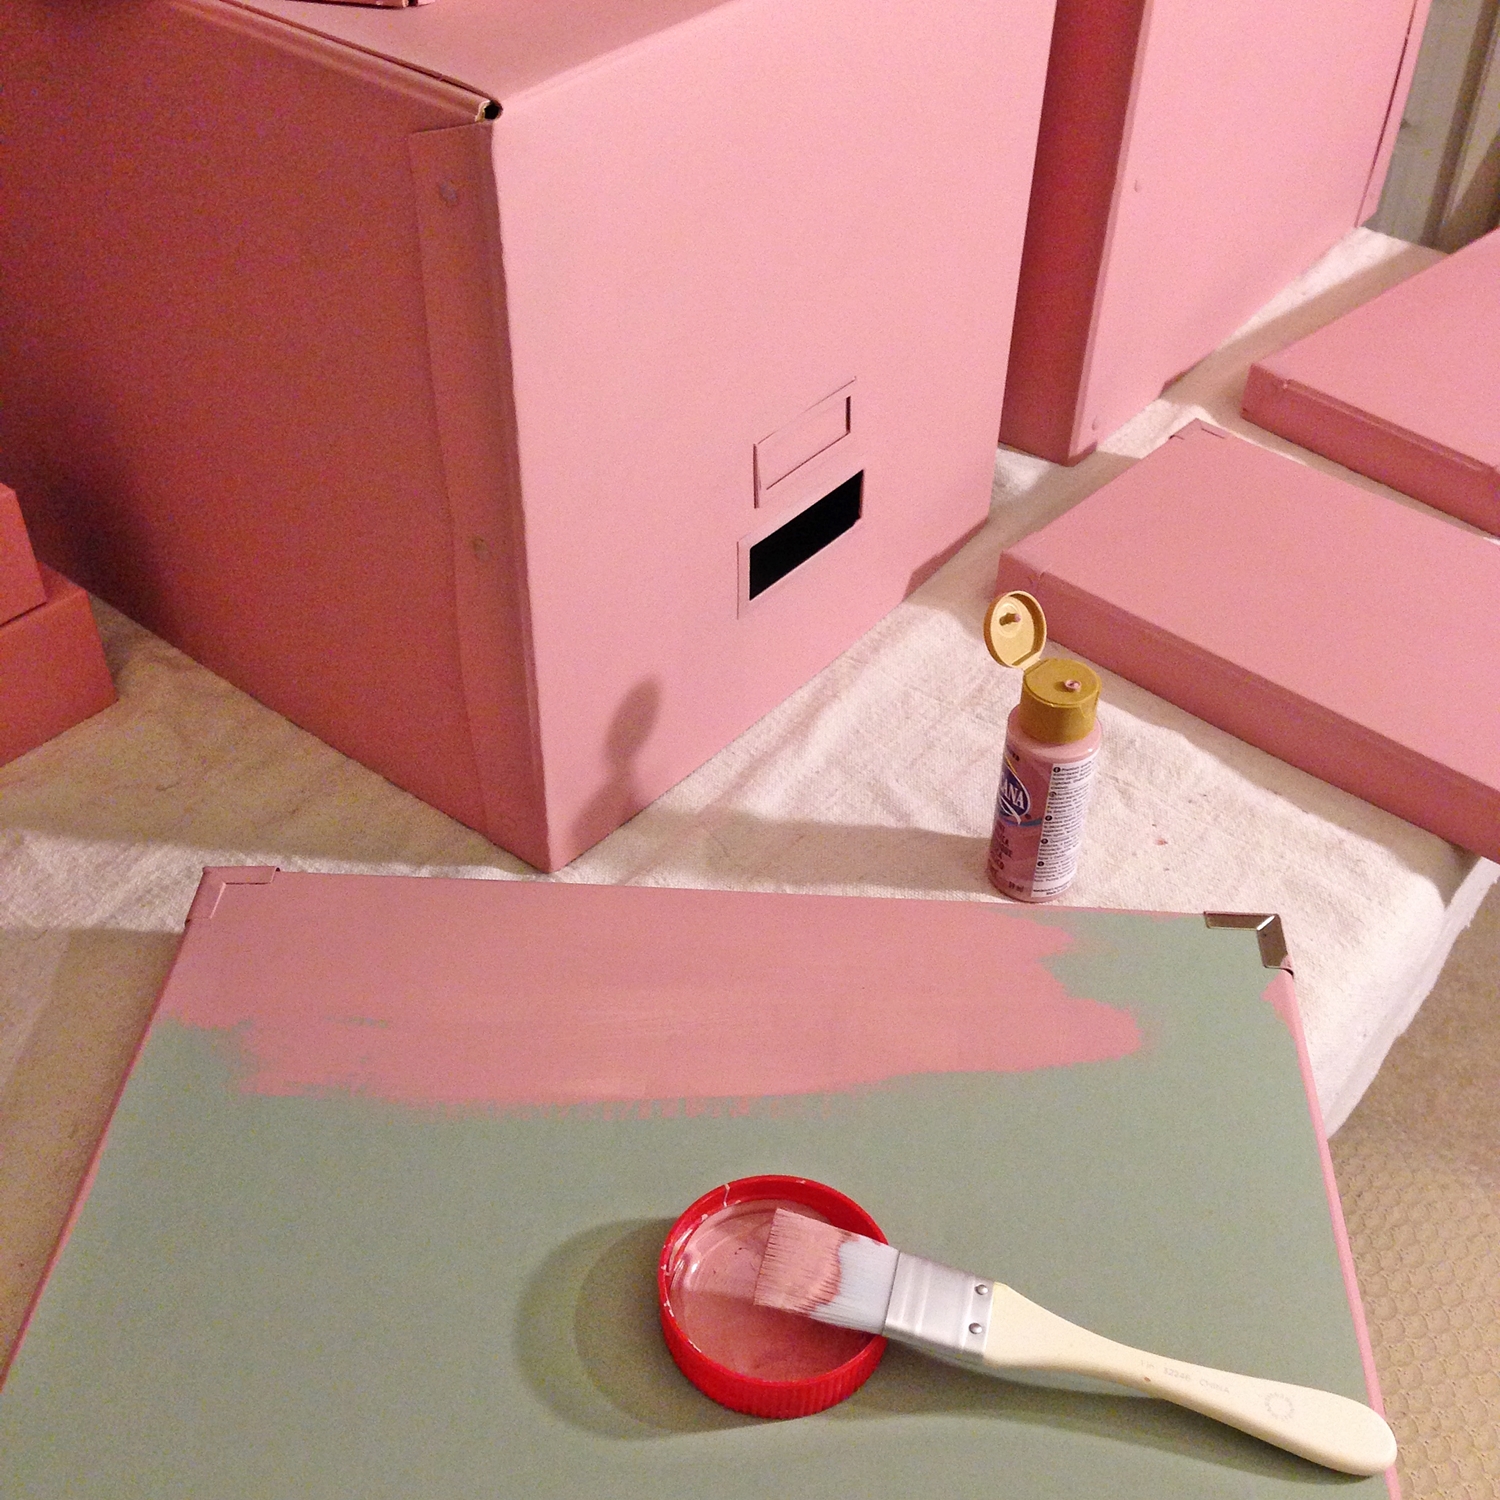
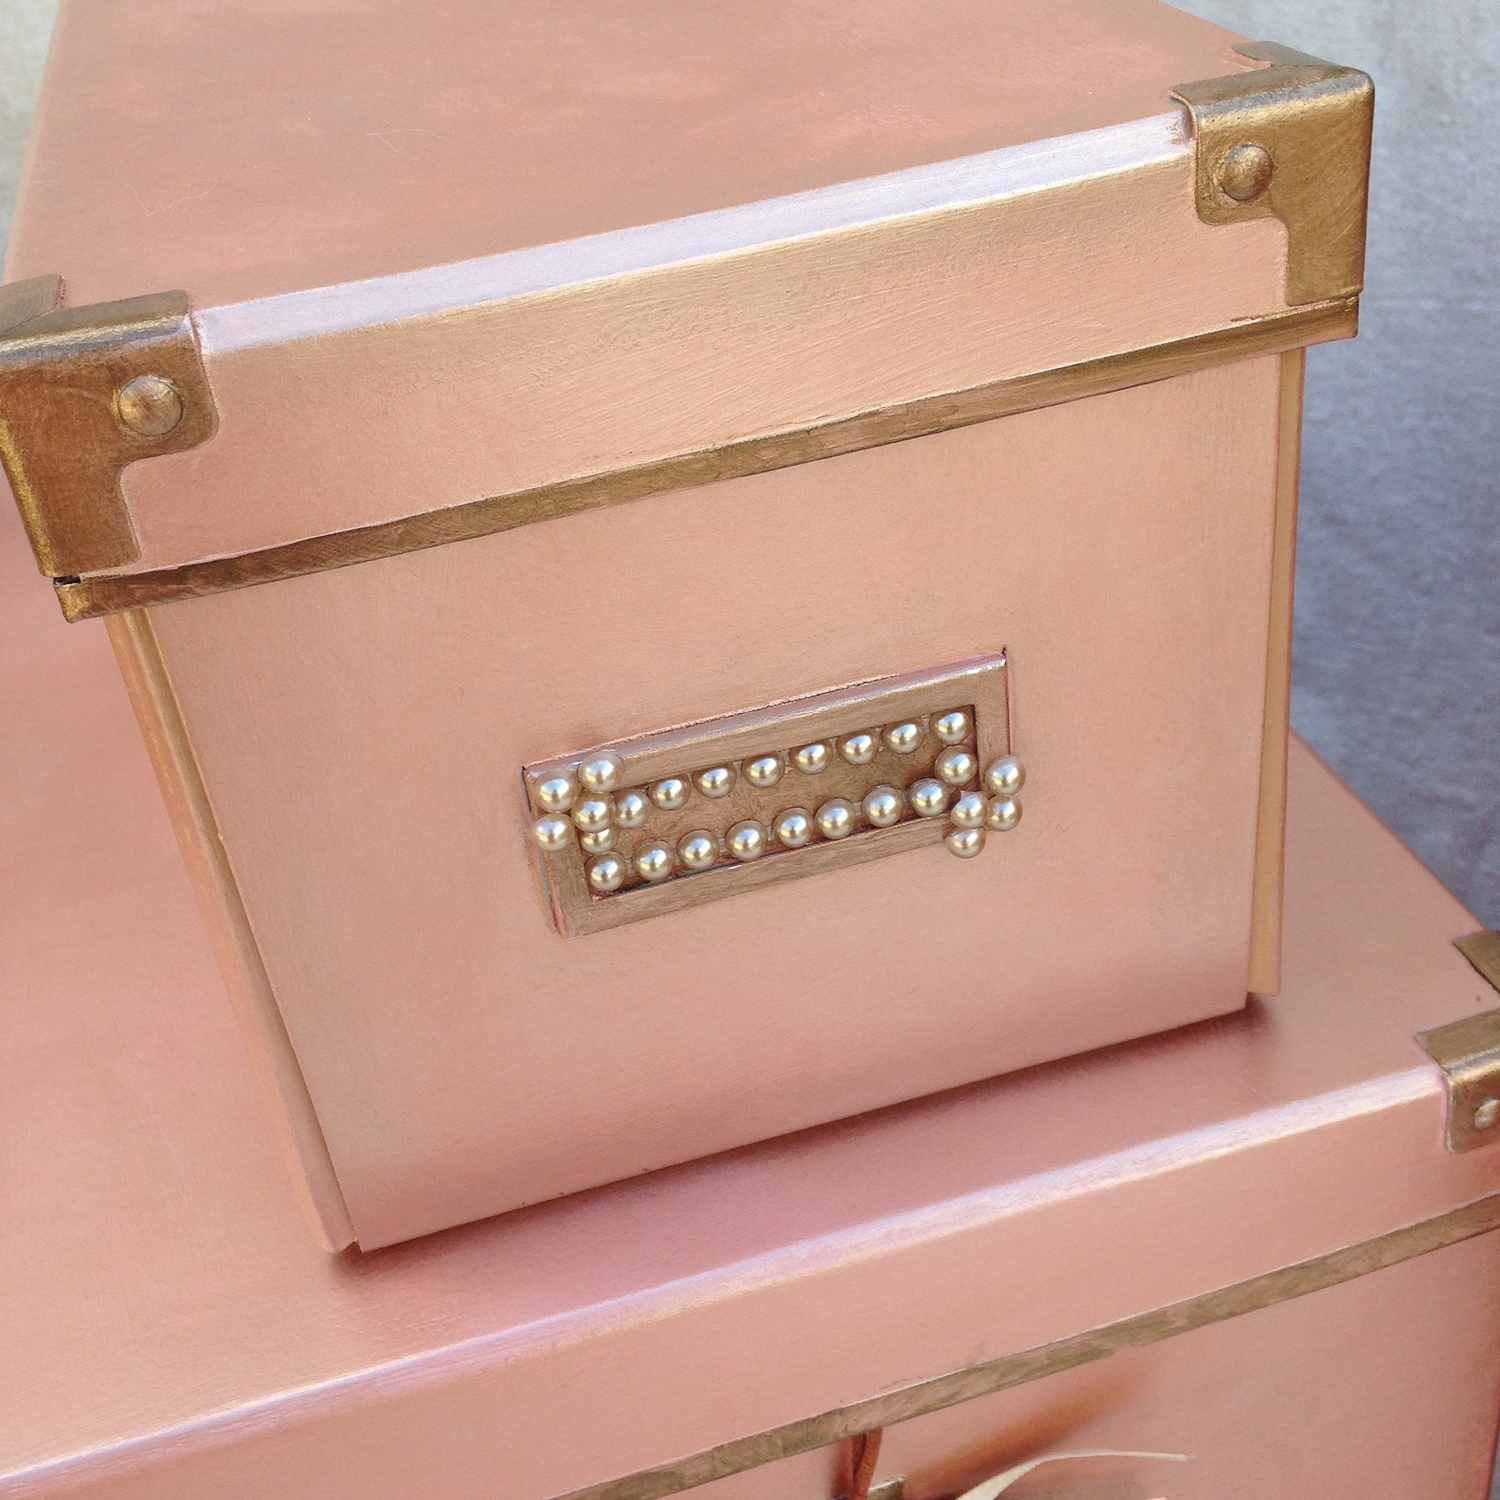
- Using a 2" chip brush, paint the storage bins and lids in French Mauve.
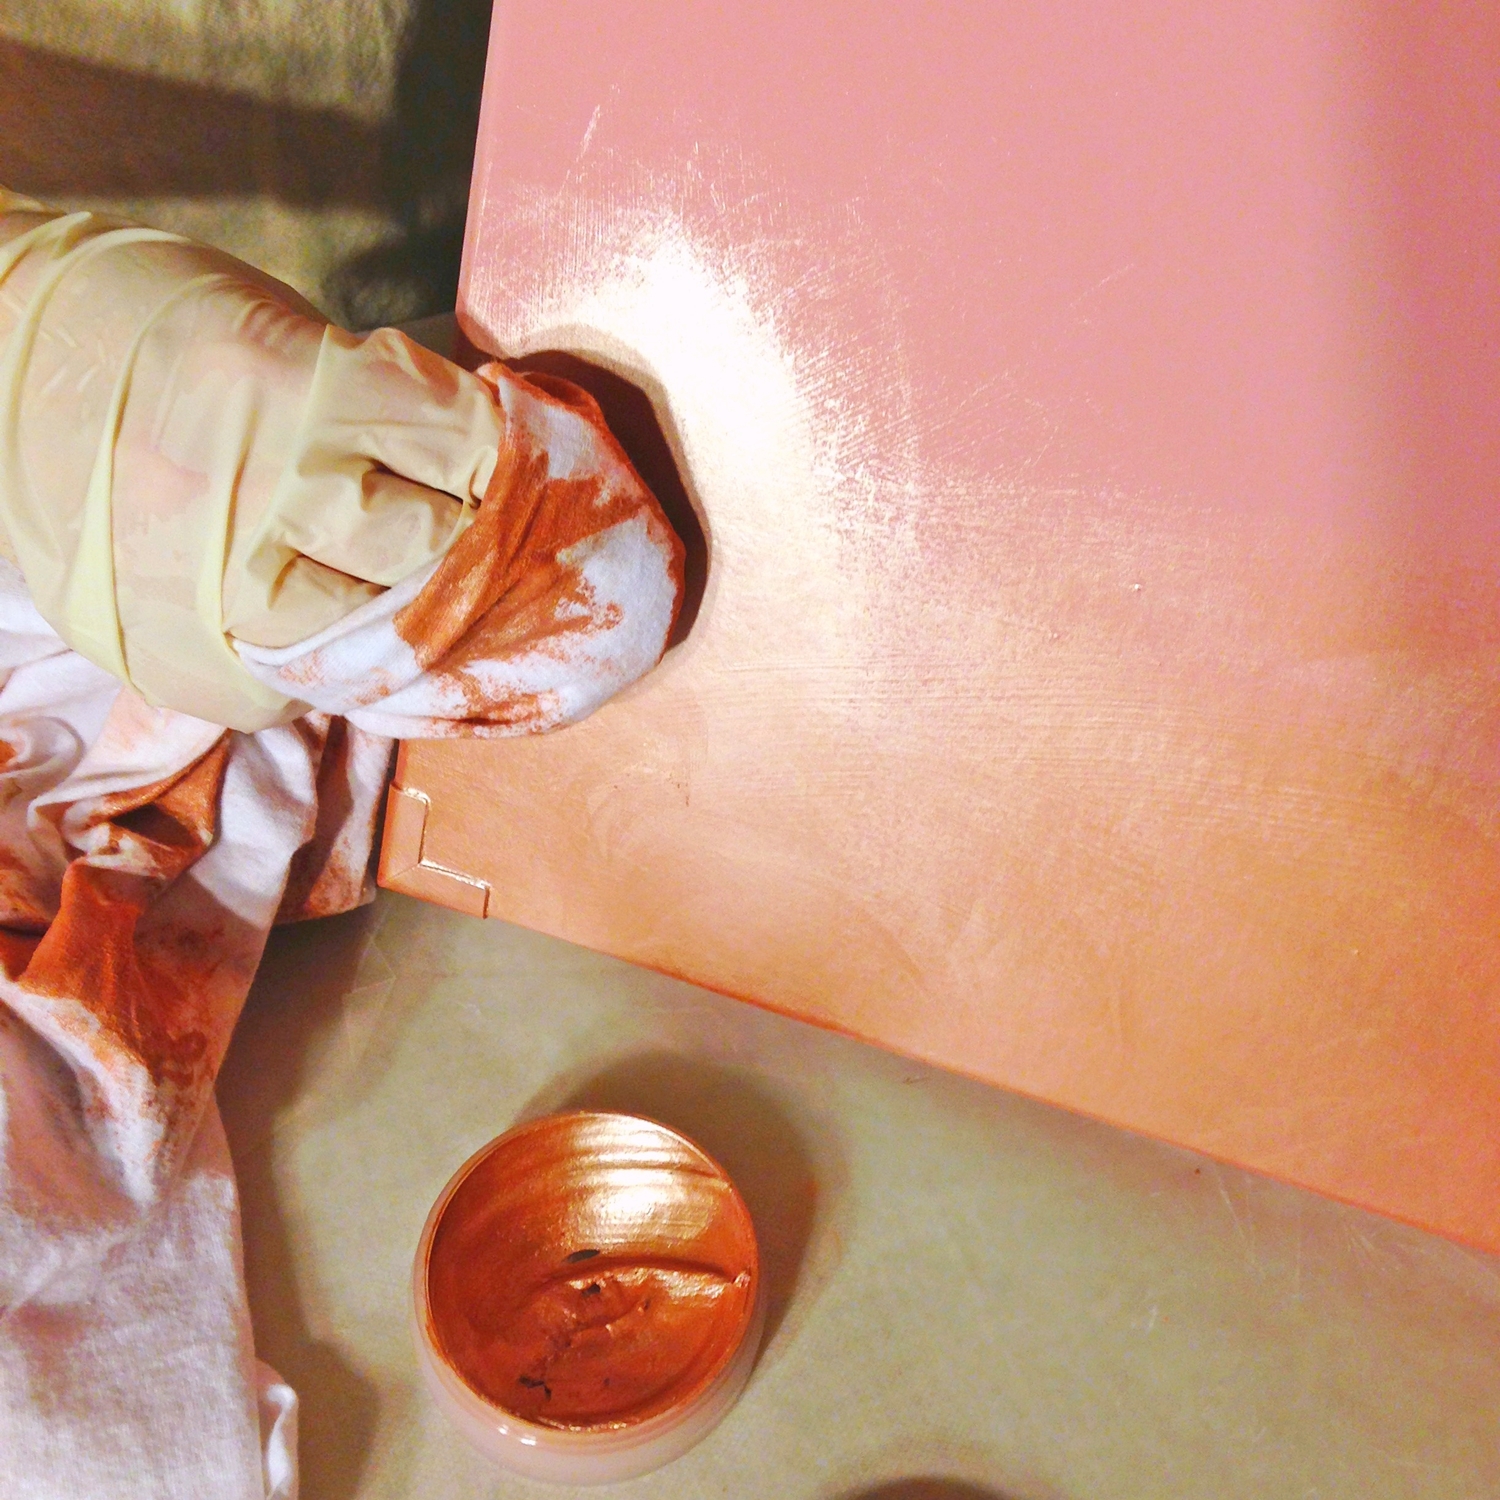
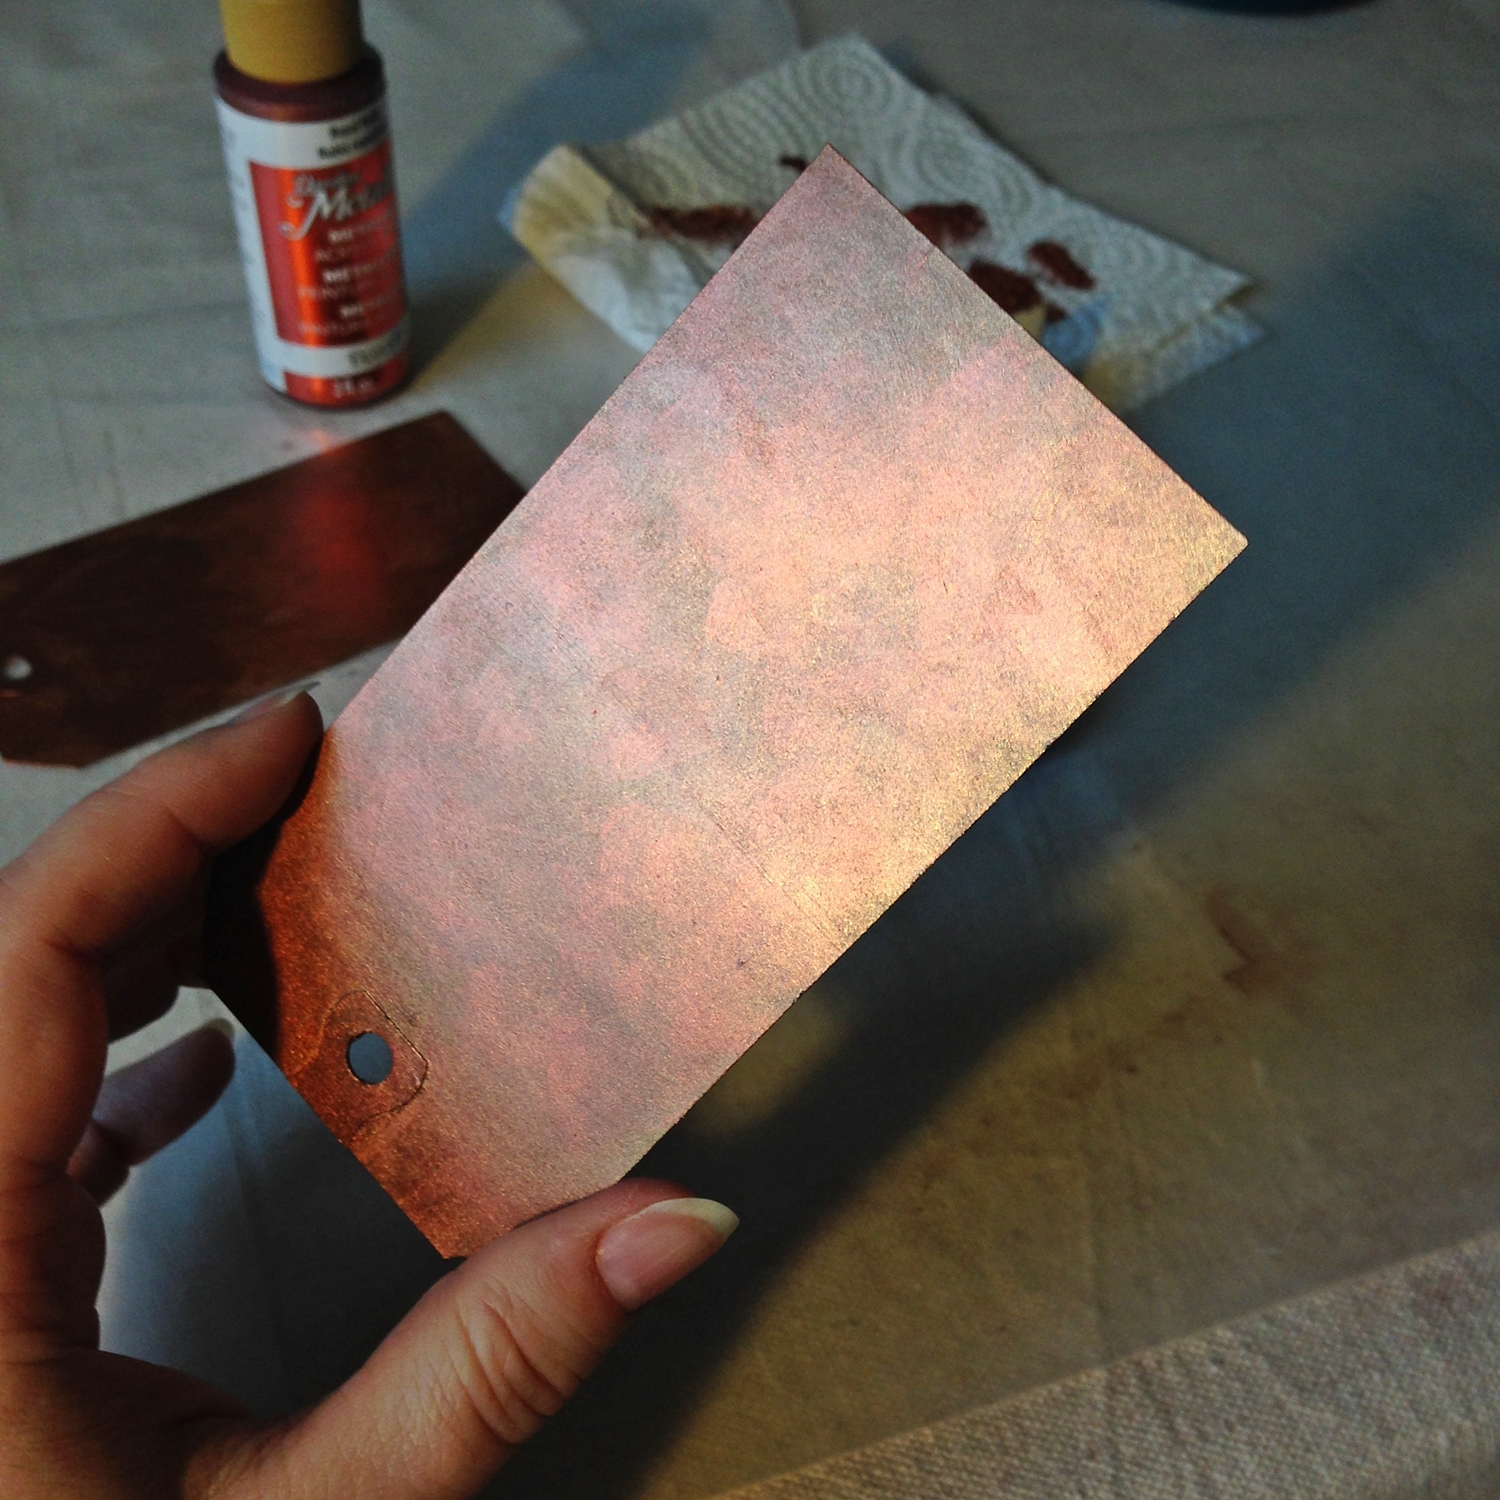
- Using a soft cloth, apply Rose Gold to each of the storage bins and lids. (Don't apply to the bottoms of the bins.) Let dry. Once dry, apply an additional coat. Use a clean section of the cloth to buff to a shine.
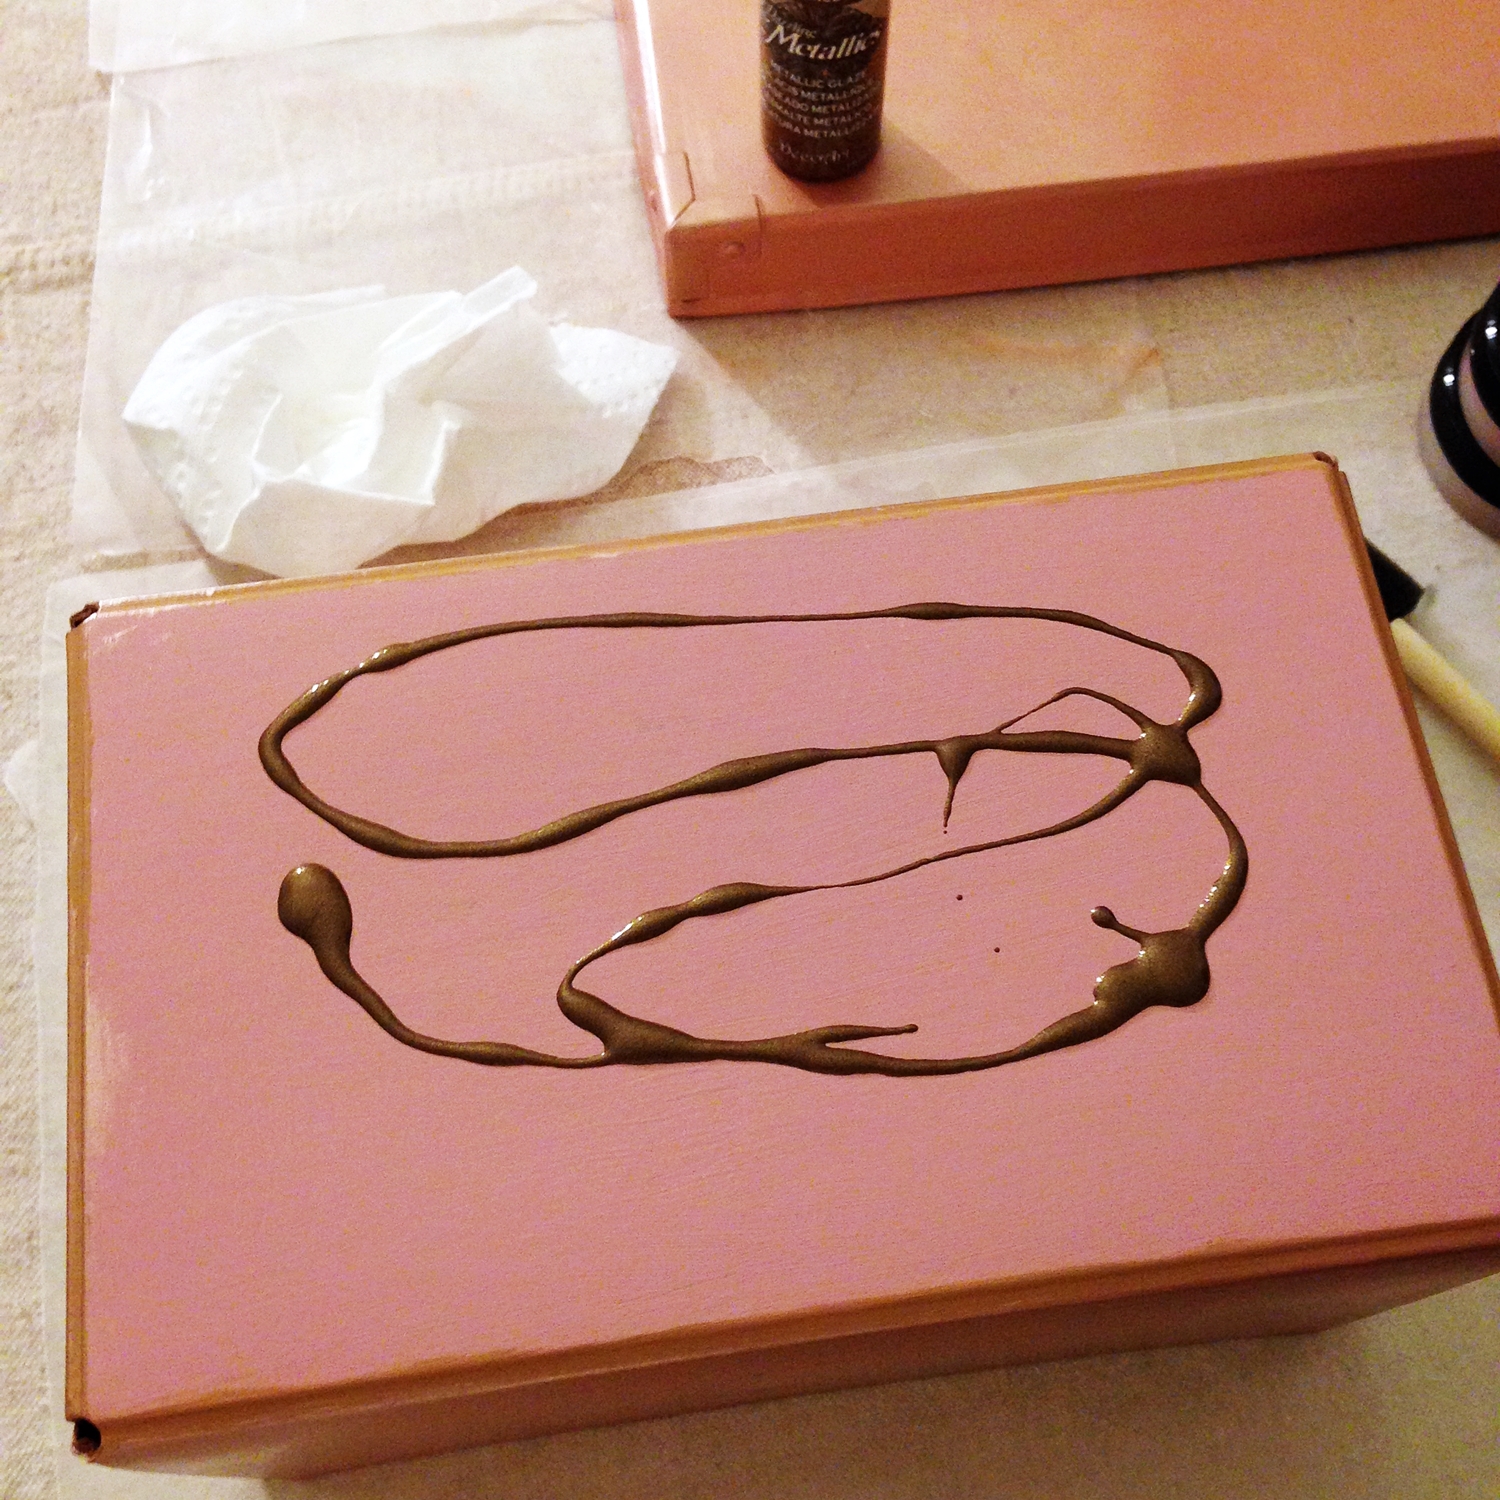
- Using Rich Espresso (Metallic), paint the bottom of each bin using a 2" chip brush.
- Squeeze out a smaller amount of Rich Espresso (Metallic) onto the bottom of each bin; use a sea sponge to blot the color all over the bottom. (This will add a textured look.)
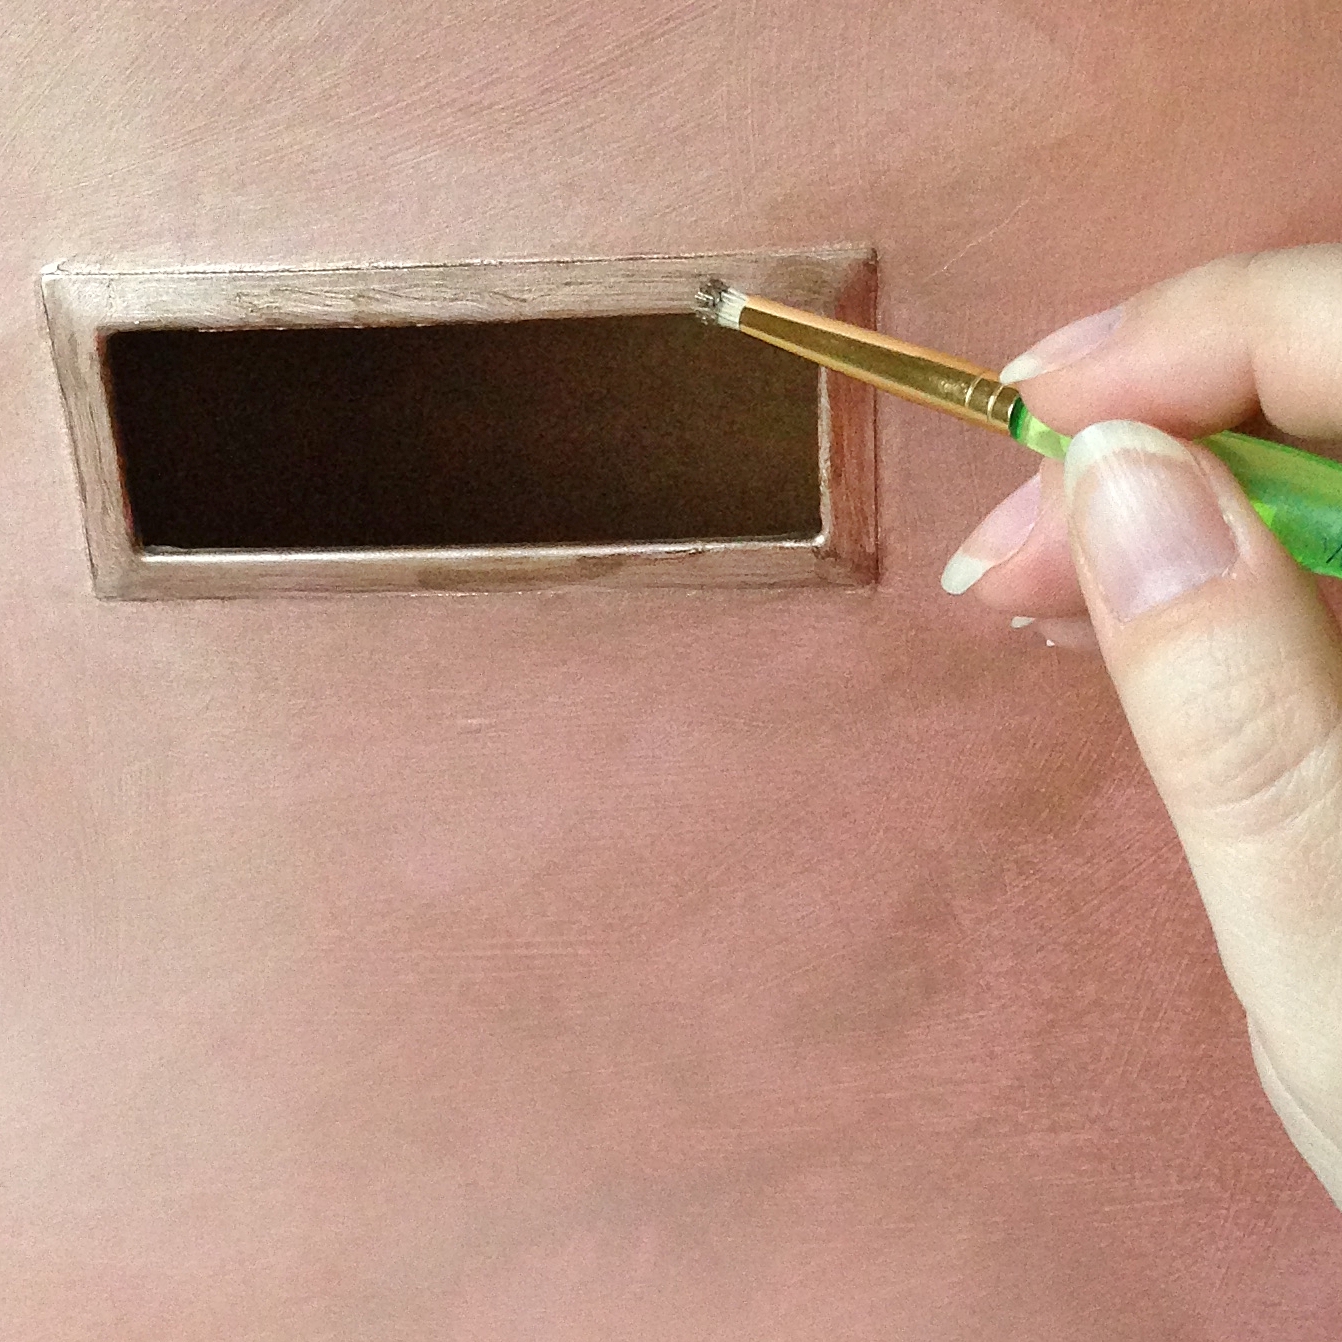
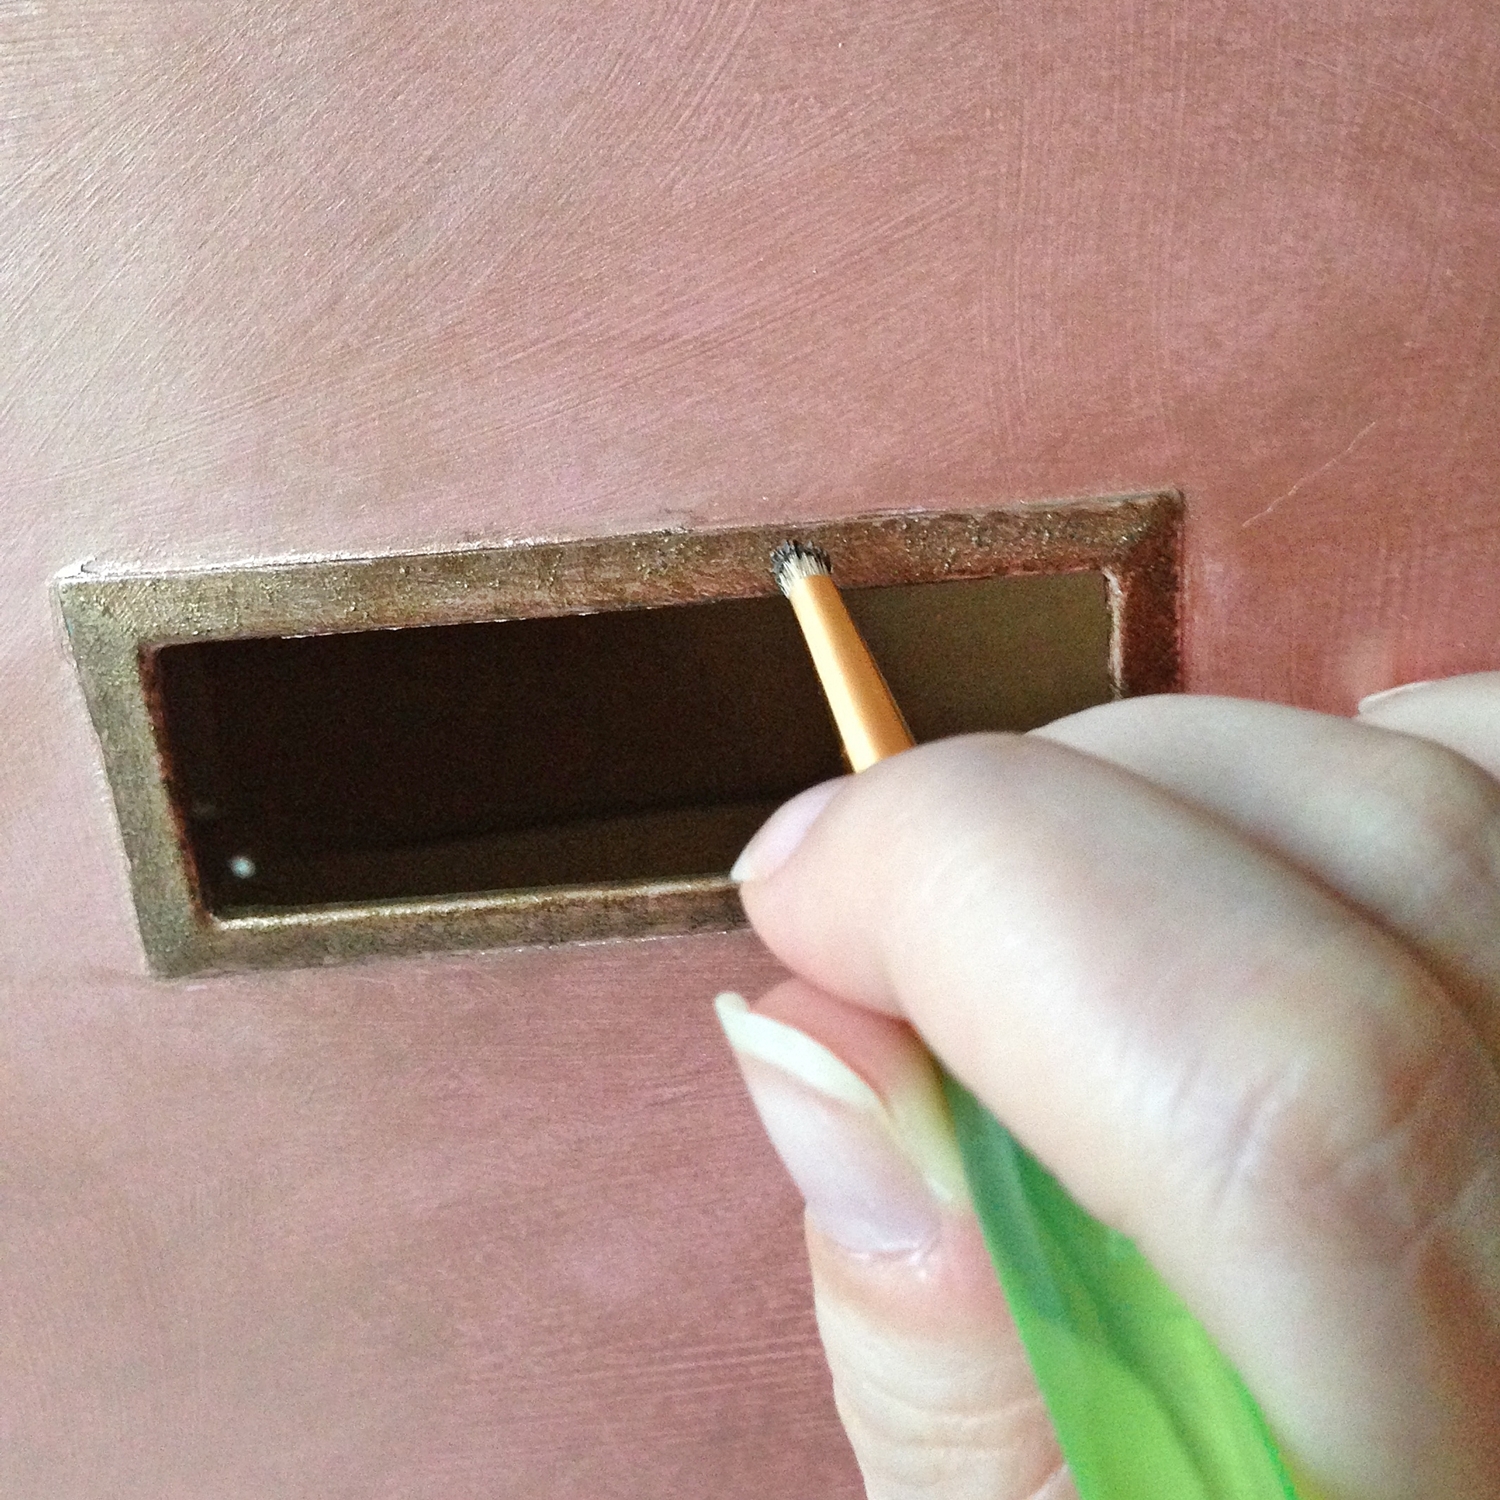
- Paint the metal handles, label holders, corners, and edges with two coats of Rich Espresso (Metallic) using a 3/4" flat and small stencil brush. Allow the brush-strokes to show through on the first coat.
- For the second coat, apply the paint using a stippling (up-and-down) motion with just the tip of the stencil brush.
- For added durability, spray each bin and lid with Americana Spray Finish in a finish of your choice. (Shown: Americana Matte Spray Finish)
- Add adhesive pearl embellishments to the inside of the label areas on each small bin.
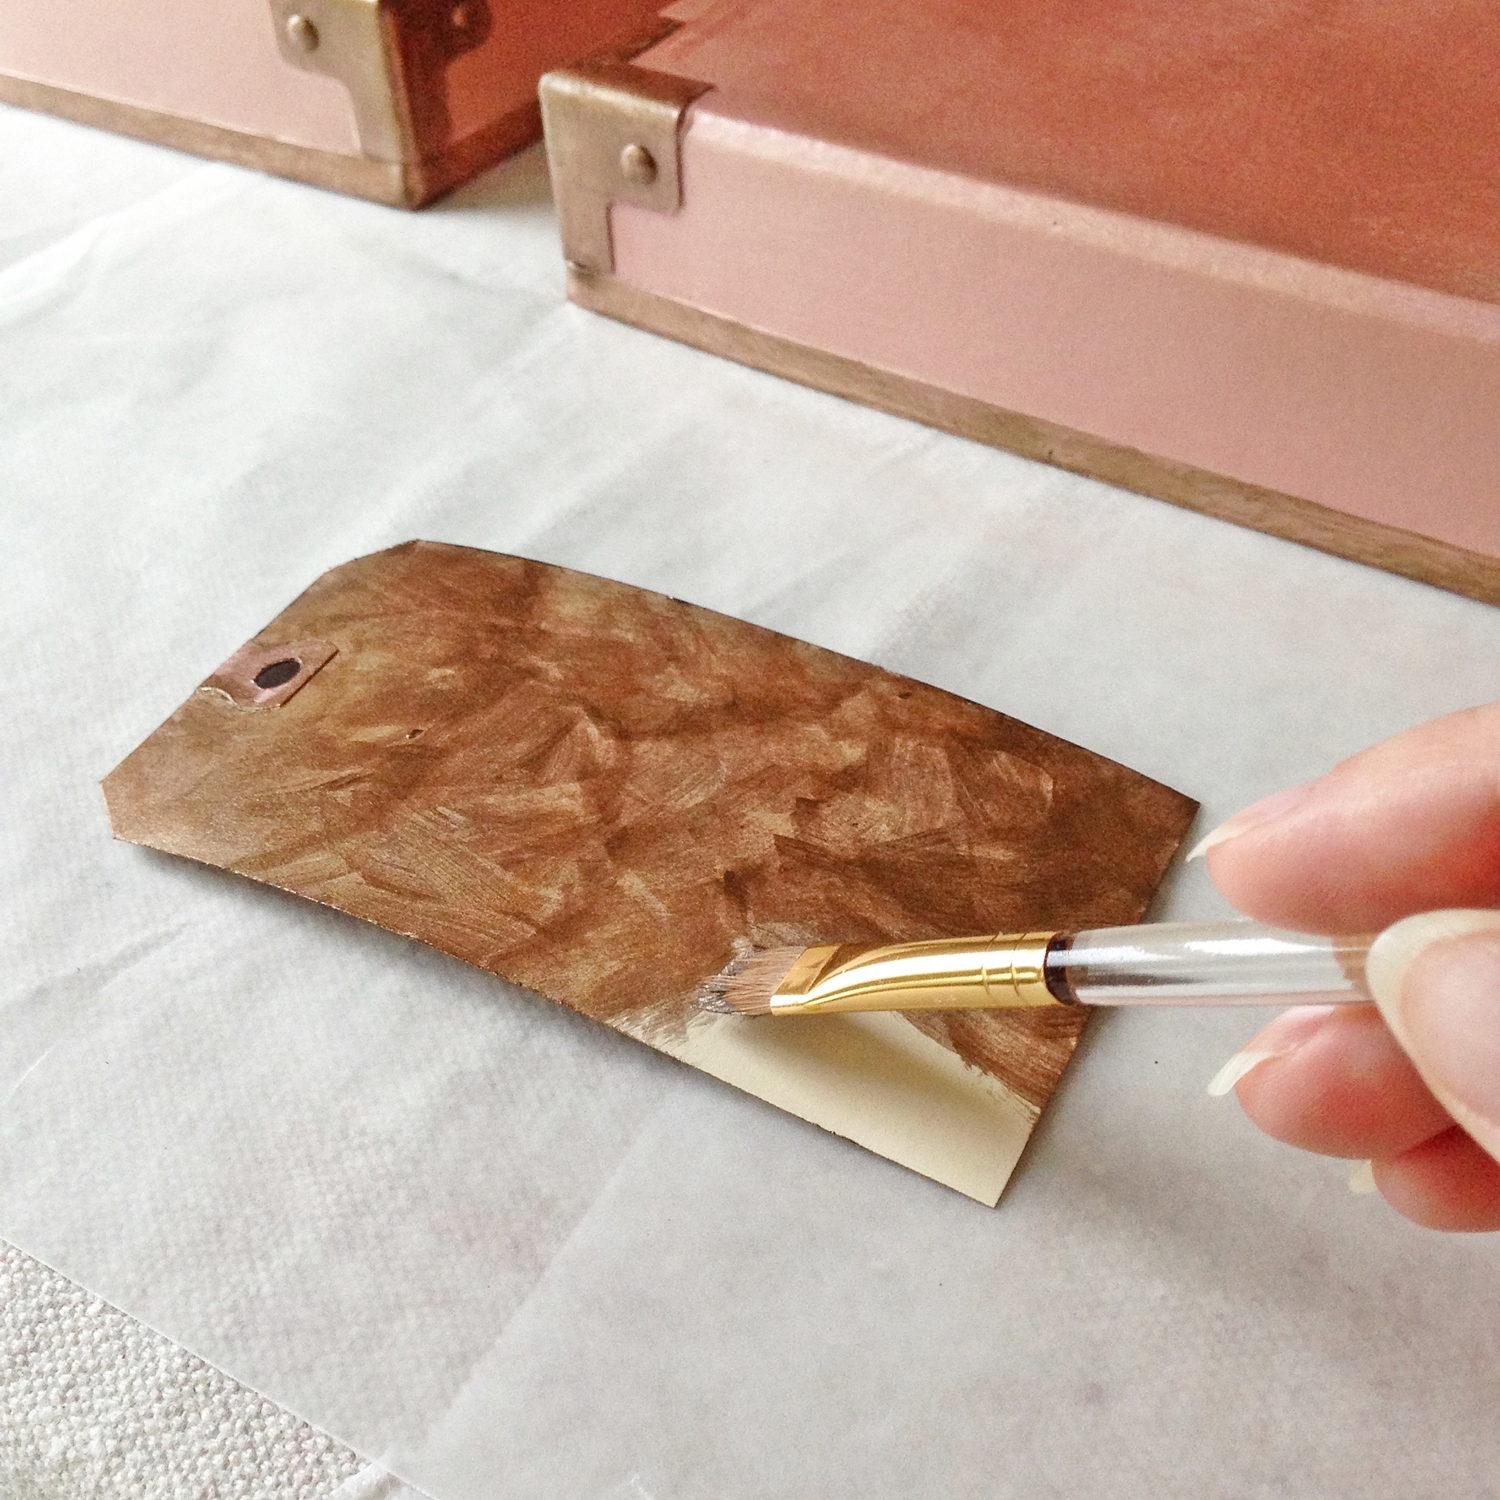
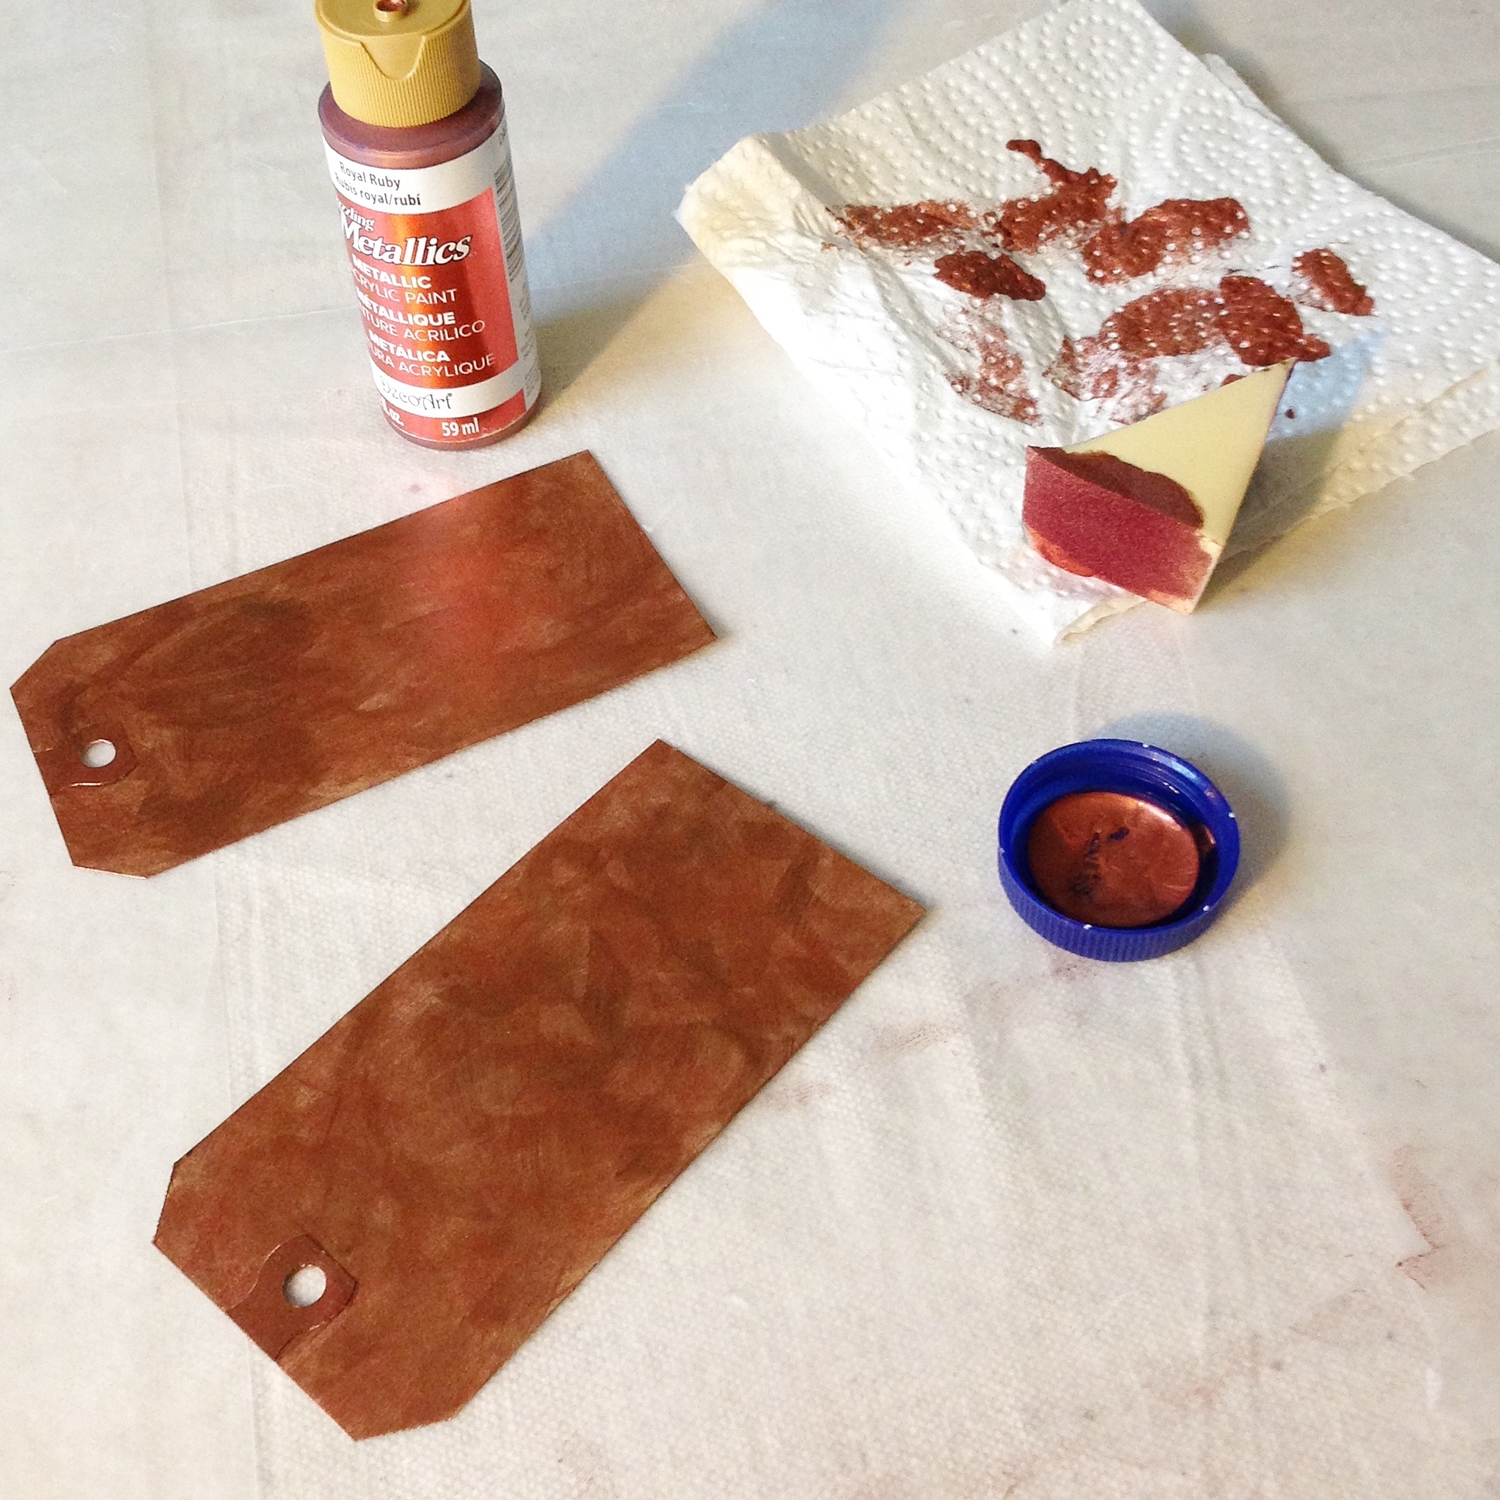
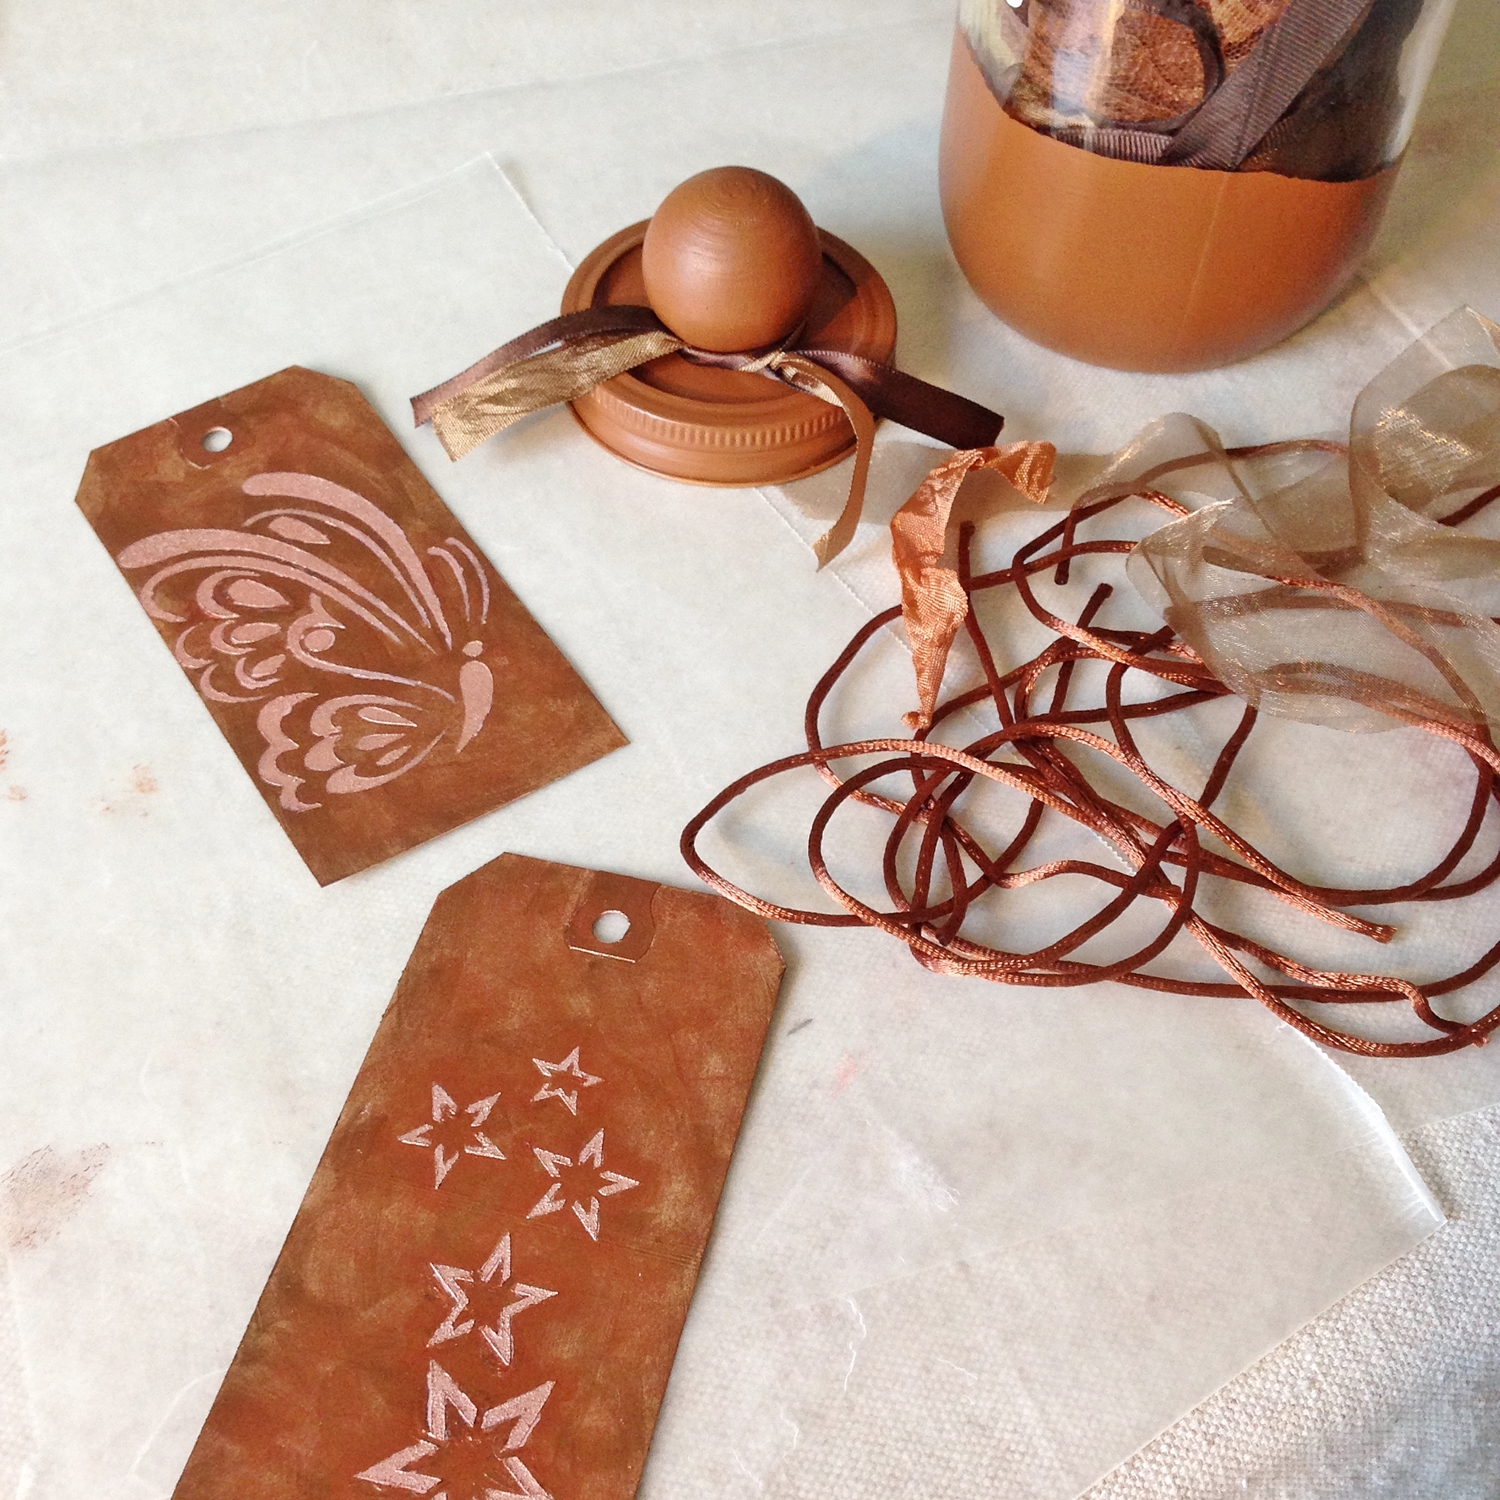
- To make the mixed media tags, paint a rough coat of Rich Espresso (Metallic) onto the front and back of each tag using a 3/4" angle brush. (Allow the brush-strokes to show through.)
- Using a cosmetic sponge, pounce Royal Ruby all over the front of each tag.
- Using a cosmetic sponge, apply just a bit of the Rich Espresso (Metallic) onto the tag fronts until the desired look is achieved.
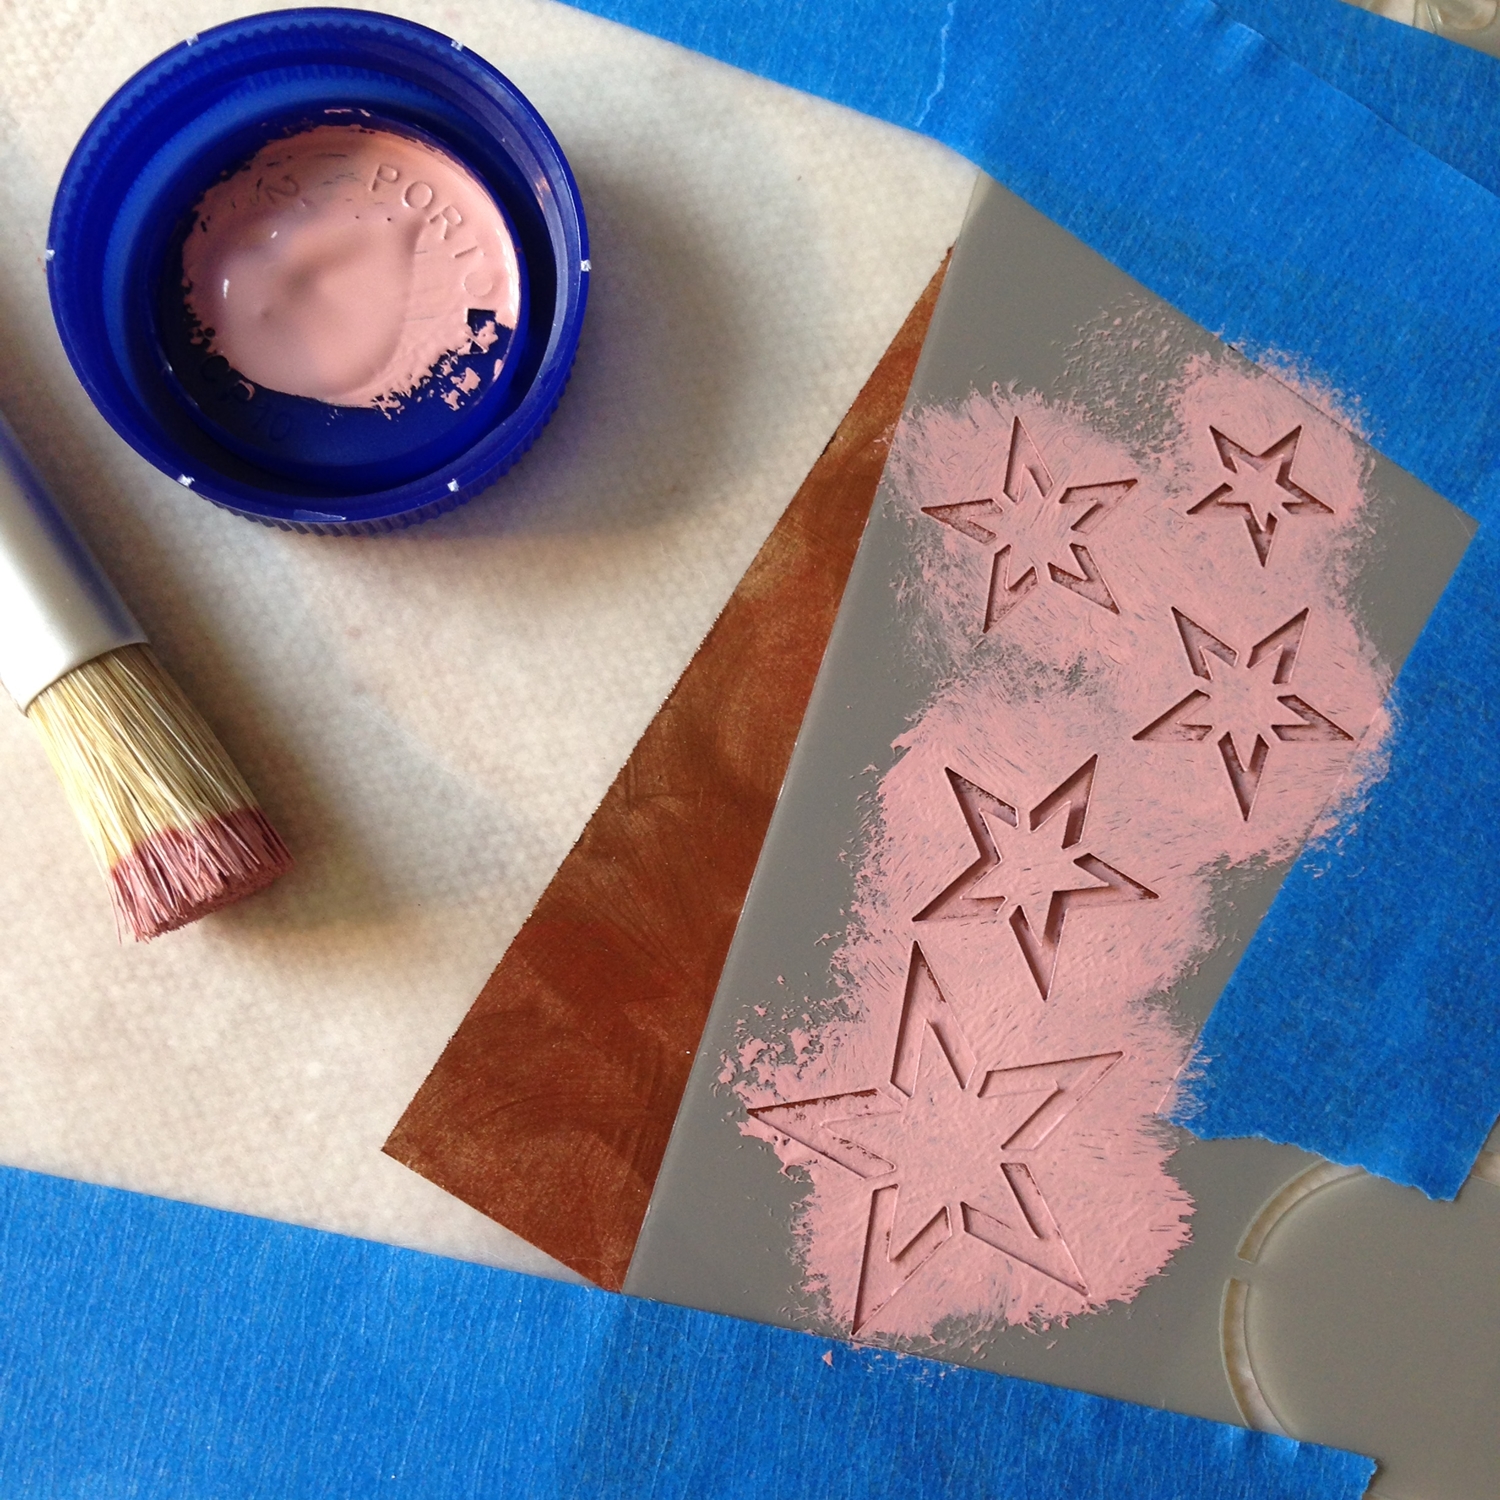
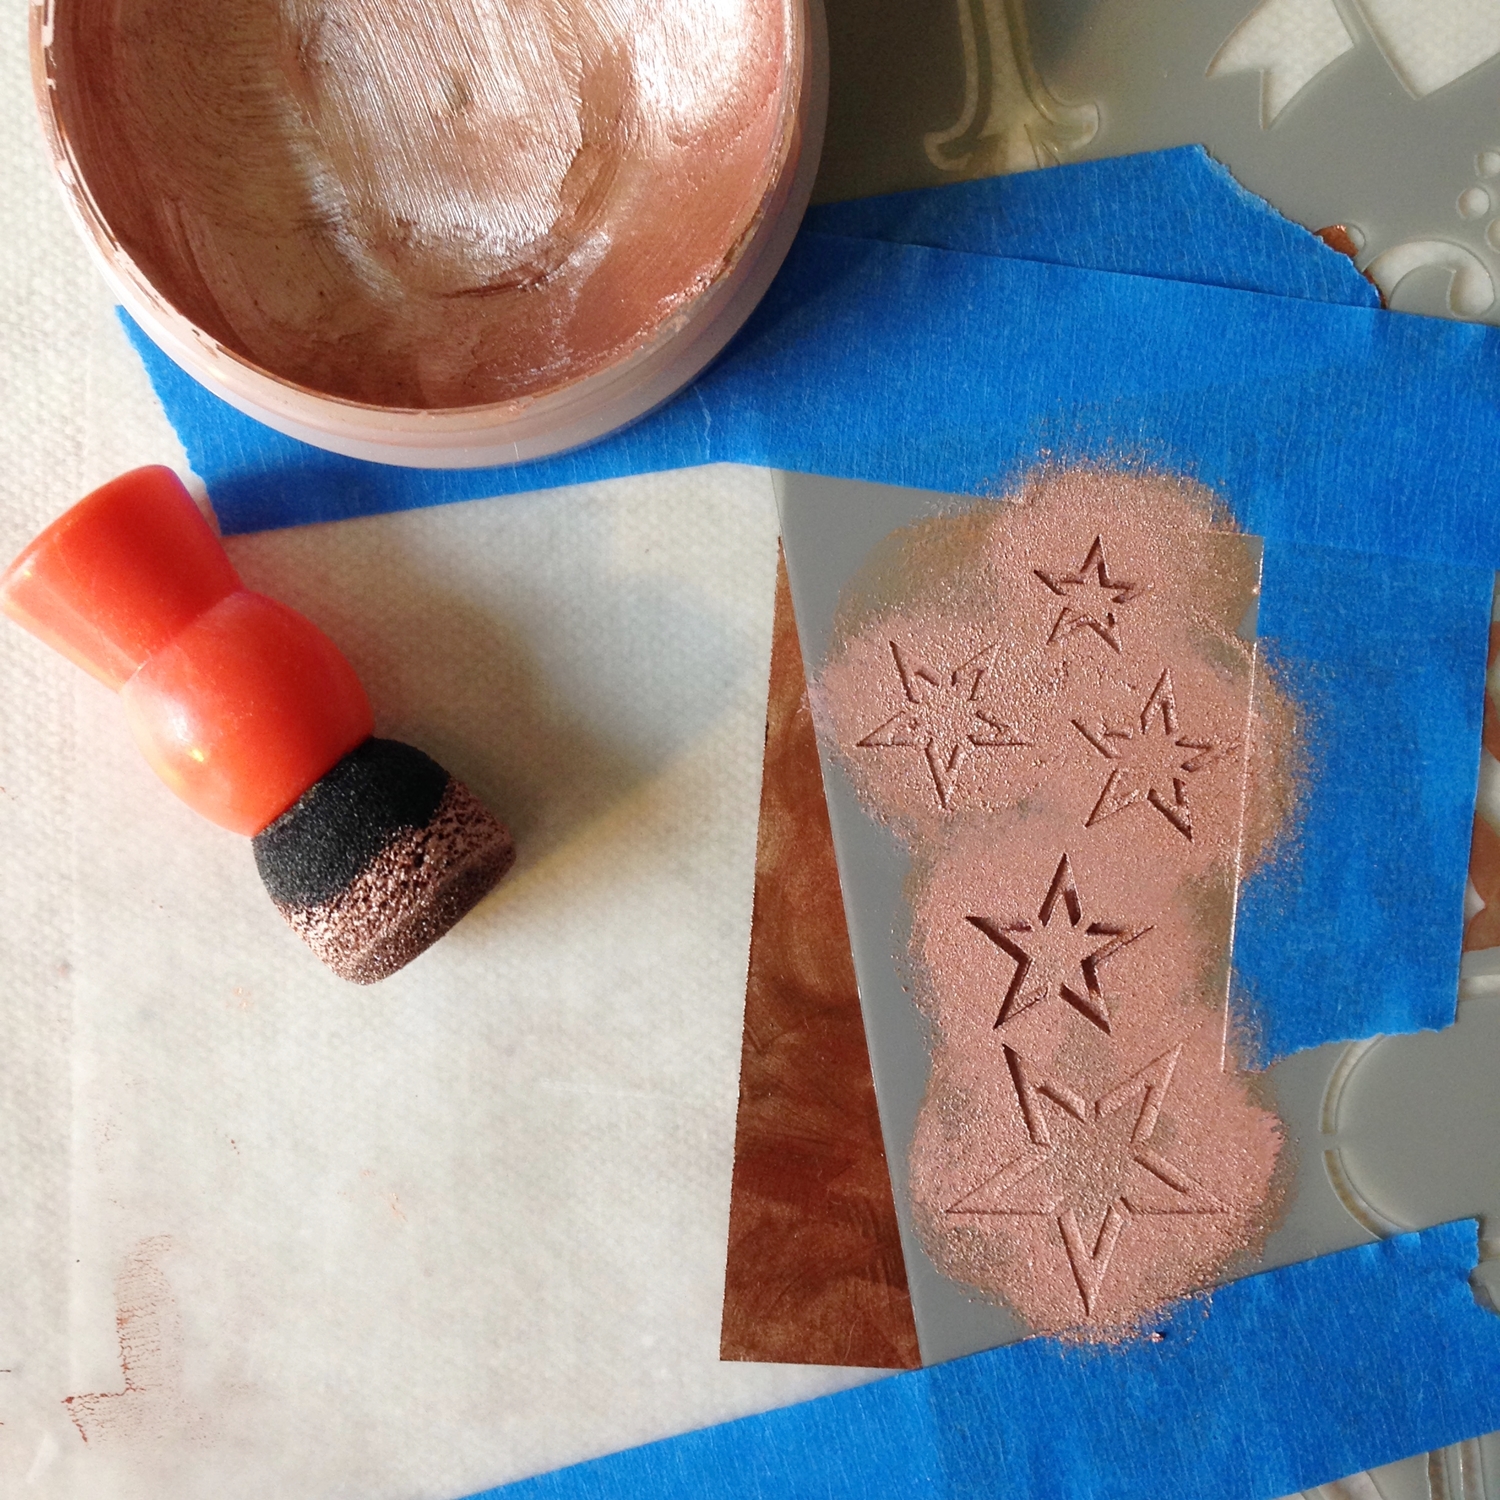
- Place the stars stencil from the Urban Ink - Beliefs Stencil on top of one of the tags; use painter's tape to hold in place. Using a stencil brush, apply French Mauve stars to the tag. Do not remove stencil.
- Using a small sponge dauber, apply Rose Gold over the French Mauve through the stencil.
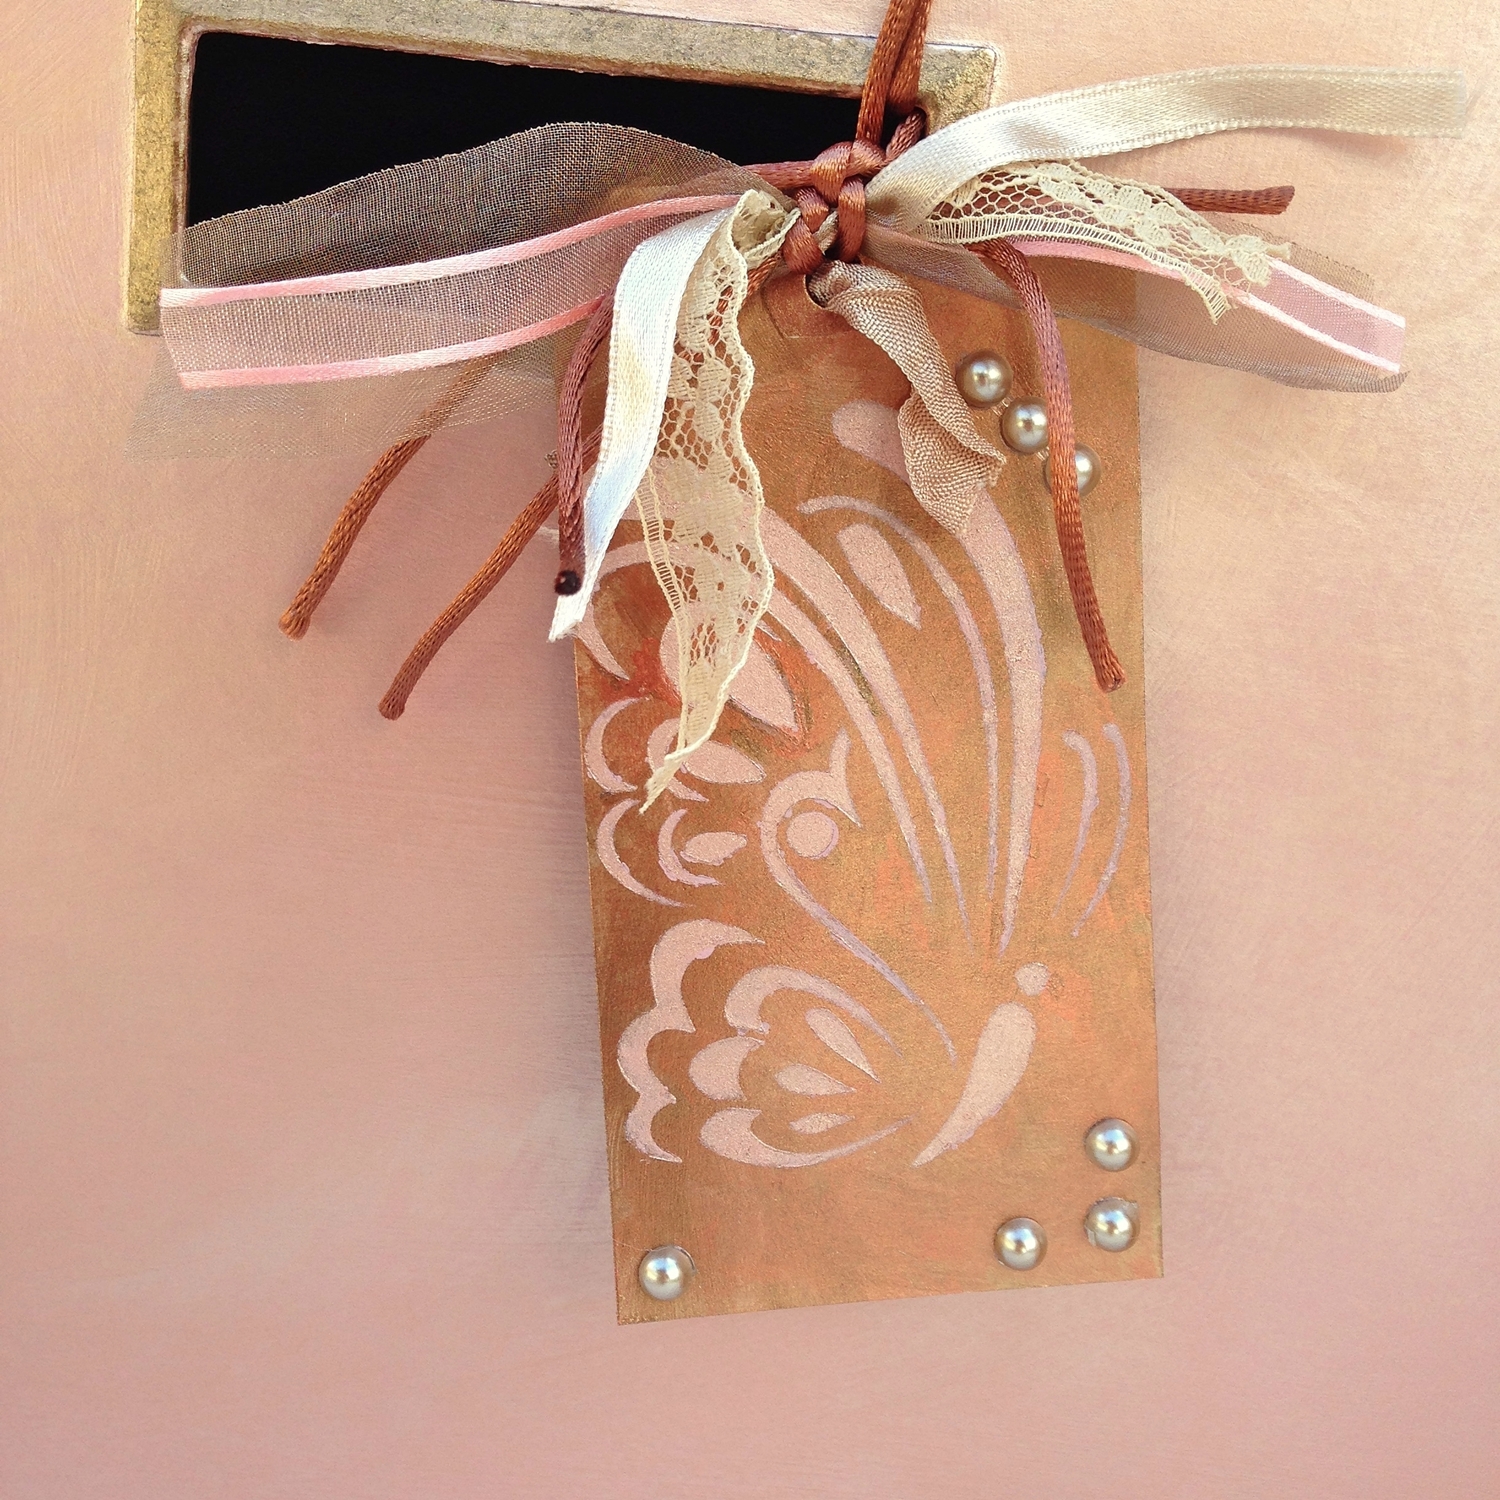
- Choose ribbon scraps to match the tag and storage bins. Cut the scraps to the same size; tie them together; and attach the ribbon scraps through the hole at the top of the tag.
- Add adhesive pearl embellishments to the finished tag. Attach the tag through the opening of one of the large bins using brown metallic cord.
- Repeat the above steps for the other tag, this time using the butterfly stencil from the Urban Ink - Spirited Stencils.