Rainbow Arches Water Marbling I
Posted by DecoArt on Jan 24th 2022
Water marble your own colorful Arches pattern on paper using the Over the Rainbow Water Marbling Set.
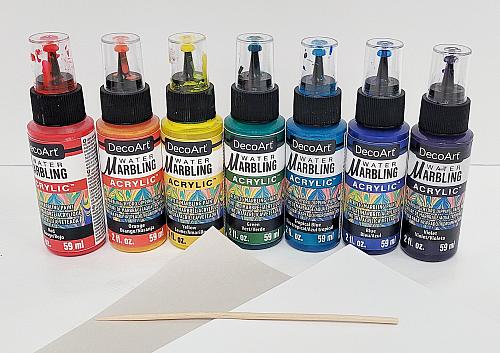
SUPPLIES
- Over The Rainbow Water Marbling Set (BD7WMOTR)
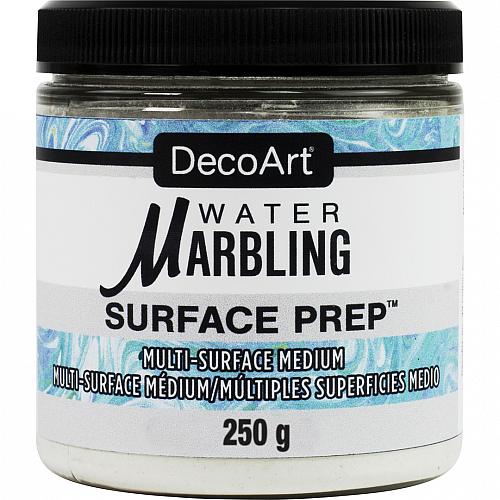
- Magic Medium Water Prep (DWM100-36)
- Premium Marbling Paper (20pcs) (DAS277-K)
- Speciality Marbling Sticks (20pc) (DABK50-K)
- Water Marbling Premium Cleaning Paper (32pcs) (DAS278-K)
- paper towels
- iron
- watercolor paper
- plastic tub or tray
- tray for rinsing
INSTRUCTIONS
NOTES:
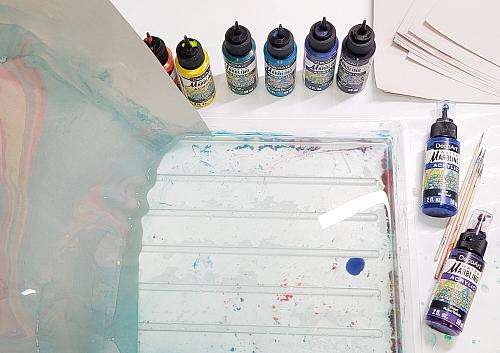
Before you begin be sure to set up your water marbling station. You should have your supplies set up and easily accessible. Following directions on bottle, mix the Magic Medium Water Prep with the appropriate amount of water in the water marbling tray or separate container.
You should also have a tray of clean water to rinse your prints after they are dipped. (TIP: Lay out paper towels to place your fresh prints on to speed drying time.) Plan to create several unique prints at one time.
Some of the drops of paint will sink and you may begin to see drops of paint gathering on the bottom of the tray, this is normal and will not effect the surface where the print is pulled.
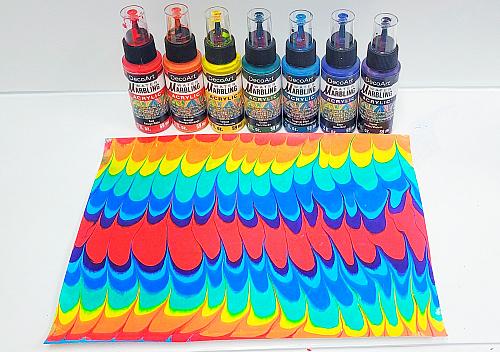
For this project use the Crystal Geode Water Marbling Set, which includes the following colors: Red, Orange, Yellow, Green, Tropical Blue, Blue and Violet.
- Prepare your size. Follow the easy instructions on the Magic Medium bottle to prepare the size (water) mixture. (TIP: Prepare mixture in a plastic tub with a lid and fill/refill the water marbling tray as needed. Cover unused size and store at room temperature to keep it fresh for up to five days) Now you are ready to add paint.
- Having everything set up and accessible makes water marbling much more efficient.
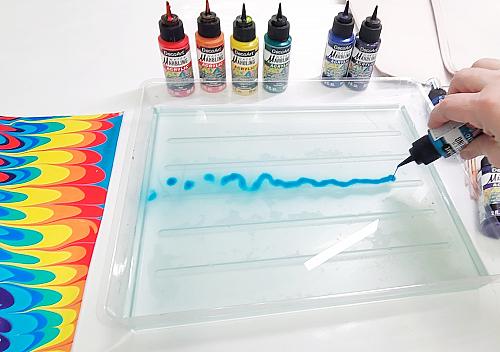
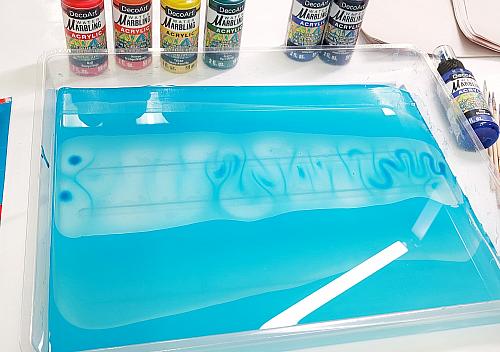
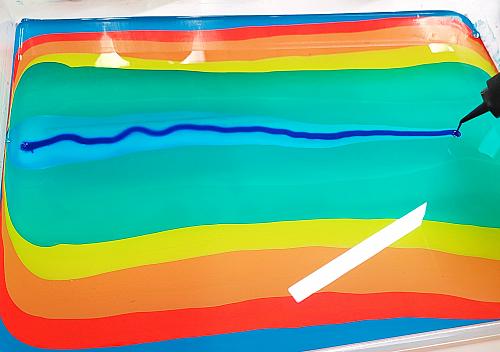
- Start by filling the surface of the size with an even coat of Tropical Blue. Do this by pouring a line of paint horizontally across the center of the tray.
- Allow the paint to disperse, then pour an additional line of Tropical Blue paint.
- Continue to add more lines of Tropical Blue. Allow each line of color to dissolve before adding another.
- Adding the paint to the water, watching it move and settle is wonderfully calming. Water marbling is a very mindful art practice.
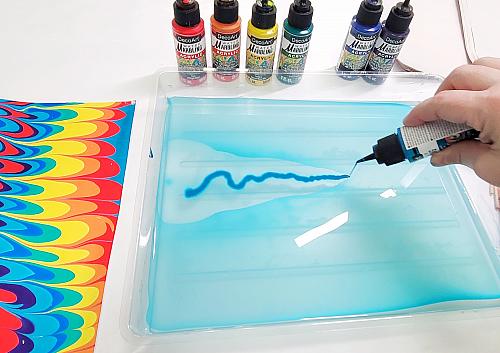
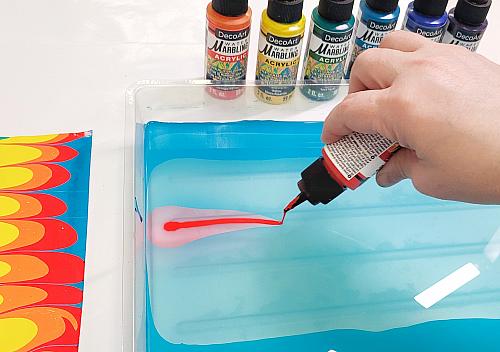
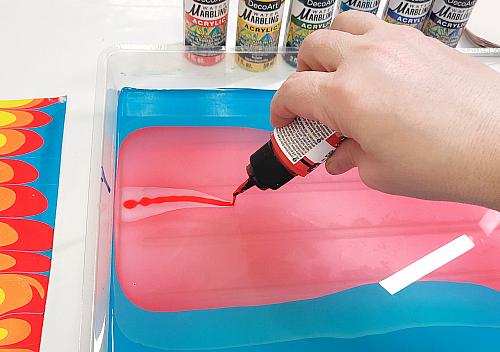
- After adding five or six lines of Tropical Blue (the surface should be covered in transparent paint), move to the next color. Pour a line of Red.
- Once the first line has dispersed, add another line of Red.
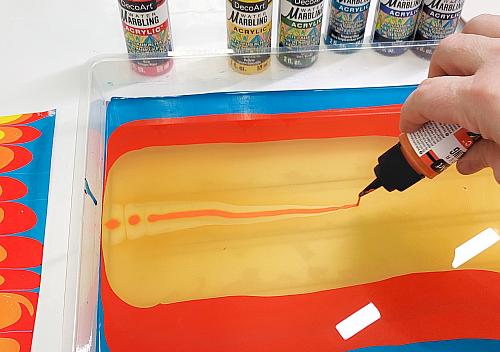
- Next, pour two lines of Orange paint down the center of the Red.
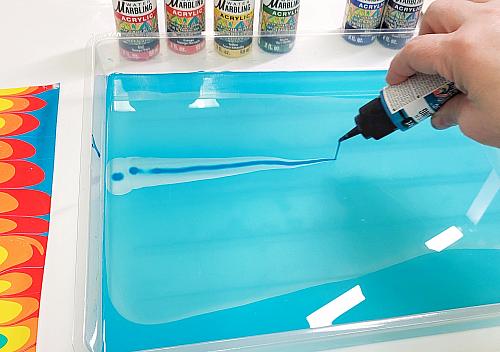
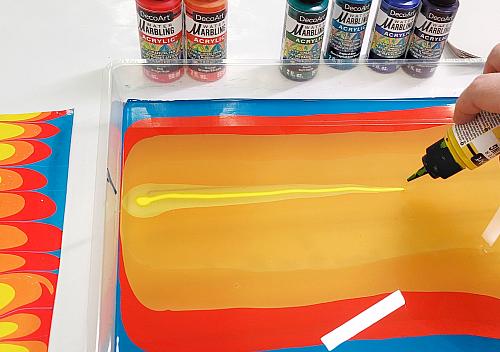
- Pour a Yellow line.
- Allow the first to dissolve and add the second line of Yellow paint.
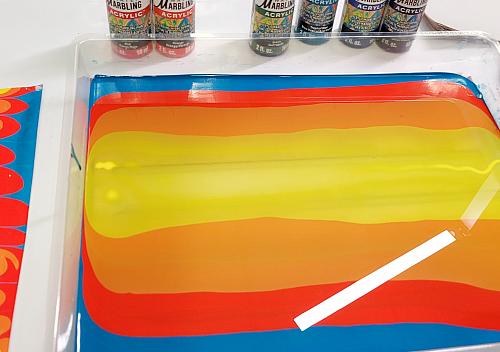
- Next, pour a line of Green paint and allow it to disperse.
- Add the second line of Green paint. (TIP: As you will see later, adding paint in this method will set the foundation for the Arches pattern we are going to create.)
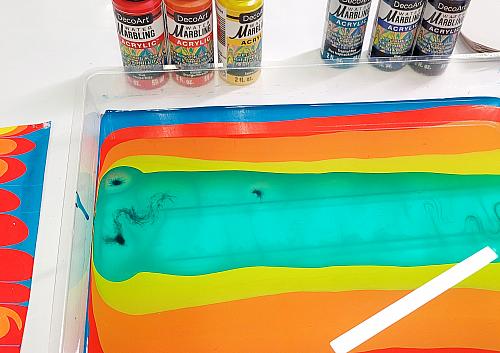
- Next, add two lines of Blue paint.
- Allow to disperse and add two lines of Tropical Blue.
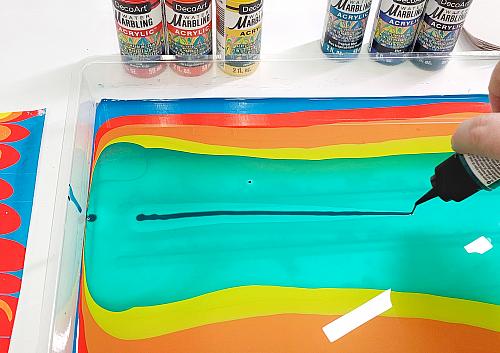
- Pour two lines of Violet paint.
- Add two lines of Red paint and allow the Red to disperse.
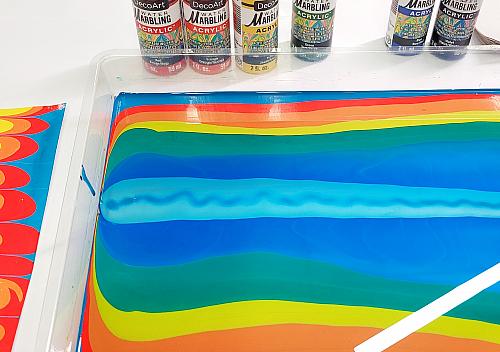
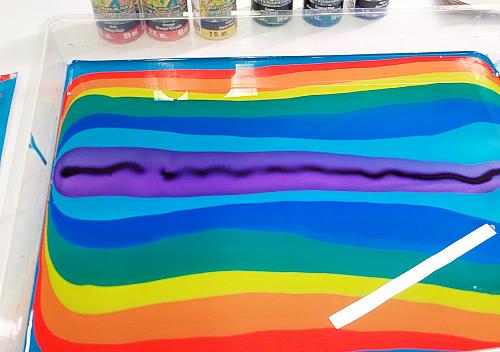
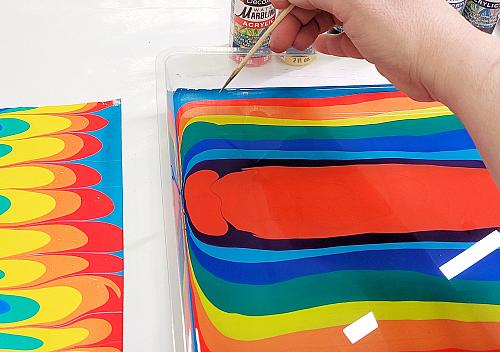
- Using the tip of the Water Marbling Stick, pull it down through the horizontal paint lines.
- Wipe the stick clean of paint after each pull.
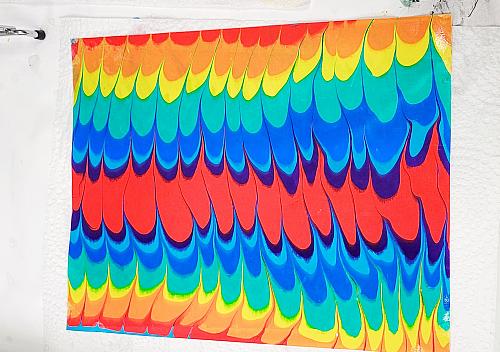
- Continue this method across the entire surface. You now have an Arches pattern!
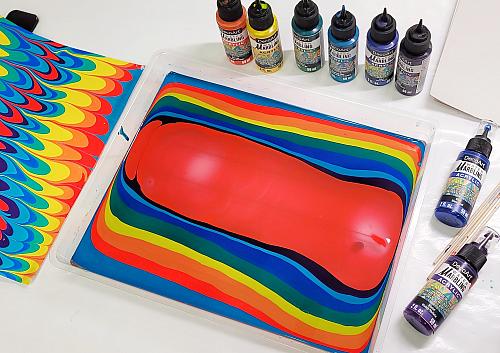
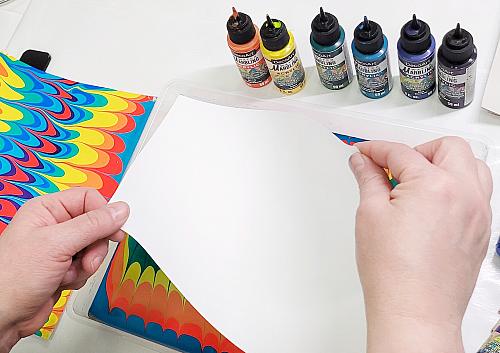
- When your tray is ready to transfer the design onto the paper, use a piece of DecoArt's Premium Water Marbling Paper to get maximum absorbency of the paint. (TIP: Keep paper very dry! If the surface is wet prior to dipping into the size, it won't absorb the paint, which will result in a white spot.) A good technique to minimize bubbles in your print is to hold your paper on opposing corners to allow the center of the paper to touch the surface first. Then, slowly lay your corners down onto the surface. Make sure the paper is in full contact with the surface.
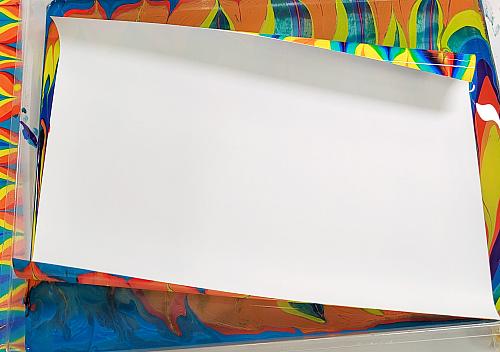
- Allow the paper to float on the surface of the size for a moment. This allows the design to transfer onto the paper. The corners of the paper will begin to pull away from the surface. Lift the paper off the surface by lifting opposing corners of the paper. Although you may notice some slight finger smudges in the corners of the paper, do not be concerned. They simply add to the overall effect.
- Place print face down in a clean tray of water to rinse off extra sizing. This step is optional, but rinsing off extra sizing allows for cleaner, more vibrant colors to shine through! Also, the paper will be less stiff and dry flatter.
- Drain excess water off of the surface.
- Lay paper, print side up on a paper towel to dry. This step will help absorb excess moisture and allow prints to dry faster.
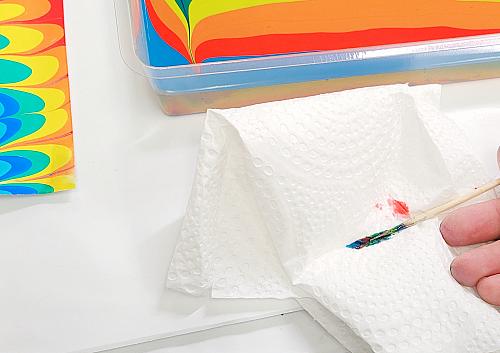
- There will be extra paint left on the surface. You can transfer another print at this point. (TIP: blow on the surface to give the paint more movement and interest.) The pool of sizing can be reused again and again. To prepare the pool for a new project, simply use DecoArt's Water Marbling Premium Cleaning Paper and drag it across the surface until clean. (TIP: Remember, just the surface has to be clean to reuse. There may still be paint that has fallen to the bottom. This is called "sinking". This will not affect further prints!)
- (TIP: Remember, just the surface has to be clean to reuse. There may still be paint that has fallen to the bottom. This is called "sinking". This will not affect further prints!)
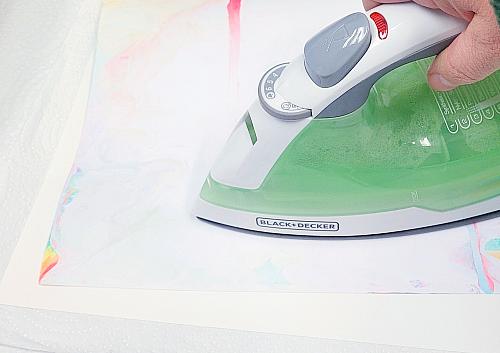
- Allow print to dry completely. Lay paper, print side down and using an iron on high, iron to flatten. (TIP: Place a piece of watercolor paper between the paint and the table surface to protect the print. If you have steam, place a paper towel between the watercolor paper and the table.)
- The print looks beautiful in a simple frame. But there are endless possibilities as to how you can use these one-of-a-kind prints. Incorporate them in a collage, cover a journal, or even as a background for a mixed media project.
- Try using DecoArt's Water Marbling Surface prep and techniques to hydro-dip a scarf, a pair of shoes or anything you want to try!