Toxic Love Tag
Posted by DecoArt on Dec 28th 2017
Layer up paint techniques and crackle effects to create a grungy background, the perfect base for rusty elements.
Items Needed:
- DecoArt Media Mediums and Specialty Products - Gesso - White (DMM18-71)
- Dimensional Effects 4oz - Dimentional Effects (DS109C-10)
- Assorted Brushes
- Pallet Knife?
- Greyboard Tag?
- Greyboard Heart?
- Greyboard Industrial Elements?
- Assorted Stamps?
- Foam Pads?
- Rusty Wire?
- Cable Tie
Instructions:
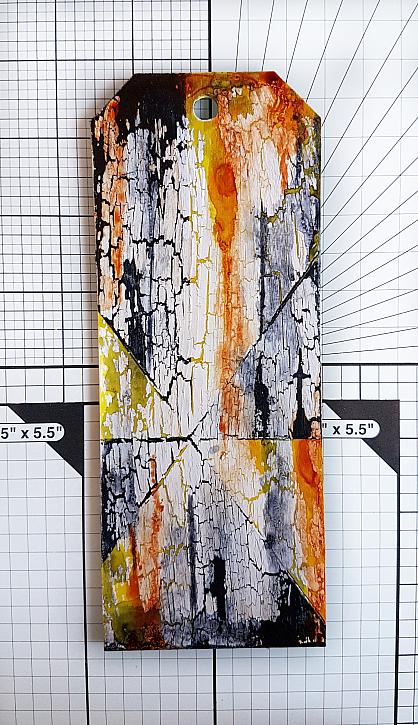
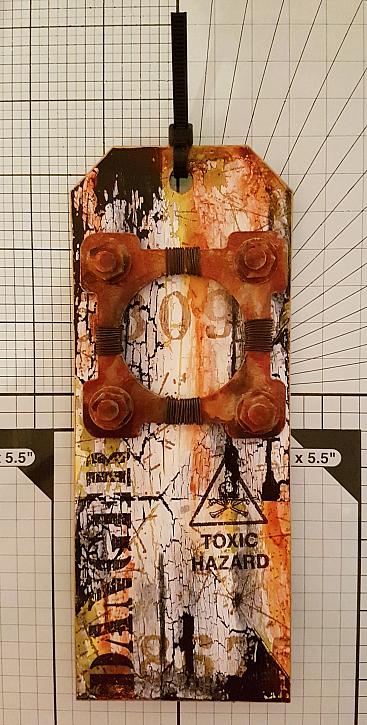
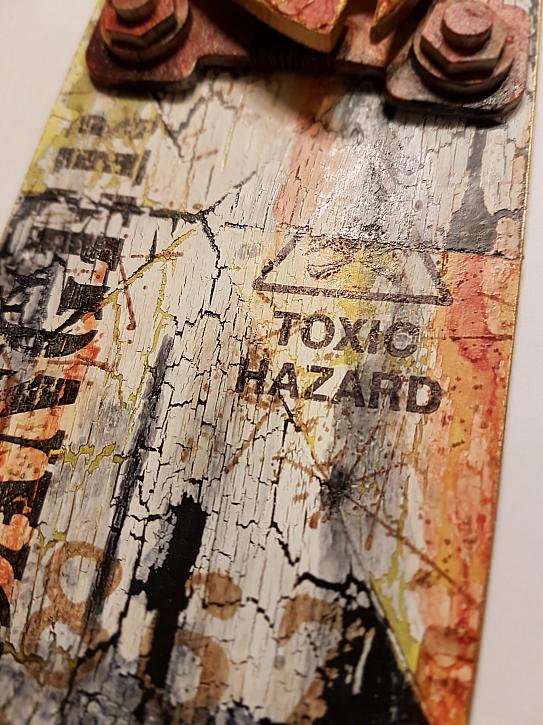
Step One: Prime a Greyboard Tag with White Gesso, once dry - paint in triangles of Primary Yellow and Paynes Grey to represent the “Toxic” symbol. Add a generous layer of Crackle Medium and set to one side to dry. Next add a layer of Chalky Finish Everlasting, and allow the crackles to appear. When applying this layer be careful not to over work, so as not to disturb the crackle process.
Create a wash of Payne’s Grey and apply to the tag, build the level of intensity, allowing the wash to pool in areas. Repeat this wash process with Quinacridone Gold until you have the desired level of grunginess.
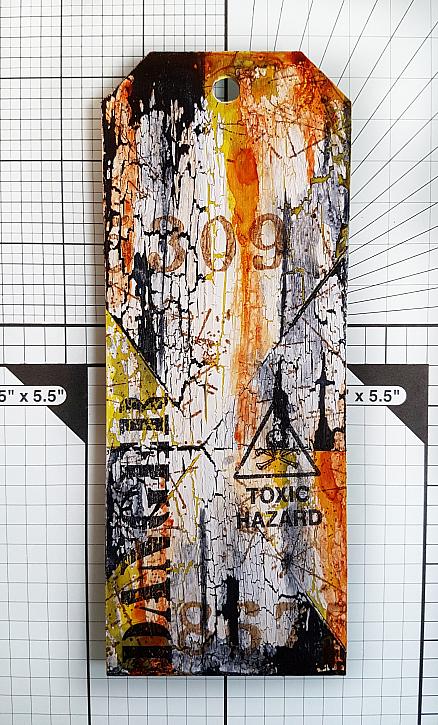
Step Two: Add detail to the tag background with stamps. I used a combination of Sepia and Jet Black inks with stamps from Andy Skinners “Toxic” and “Unexplained” sets. I selected stamps that worked in with the theme of the tag.
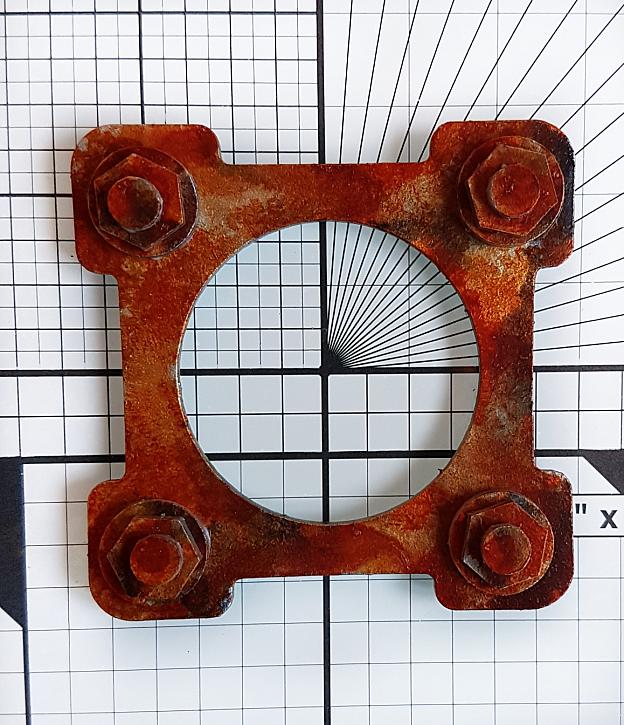
Step Three: Create a rusty effect to greyboard elements by first painting them in a layer of Metallic Silver. On to this base introduce layers of washes of Payne’s Grey, Yellow Oxide and Quinacridone Gold build layers of intensity, drying each wash with a heat gun. To build the rust effect, stipple the surface of the greyboard with undiluted Quinacridone Gold.
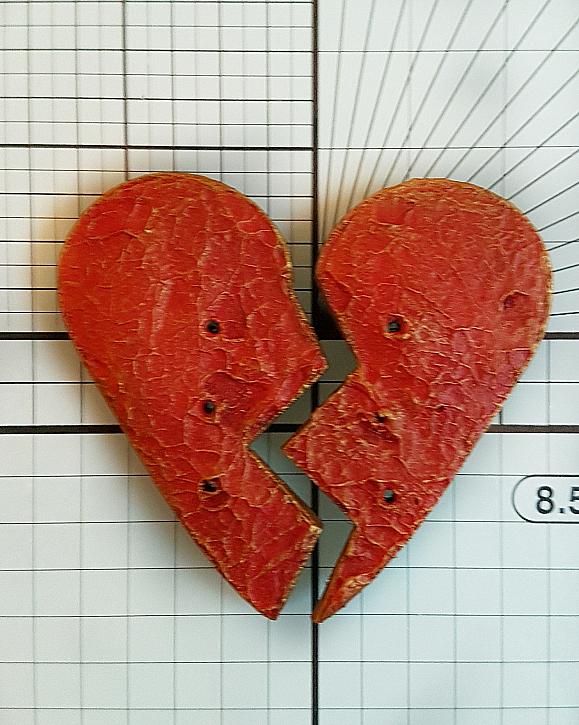
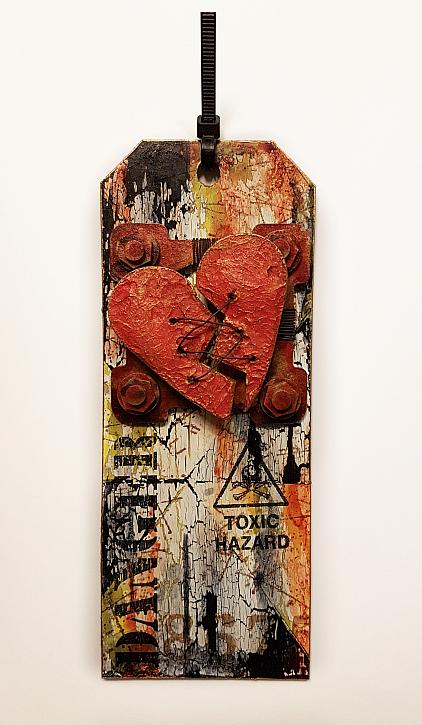
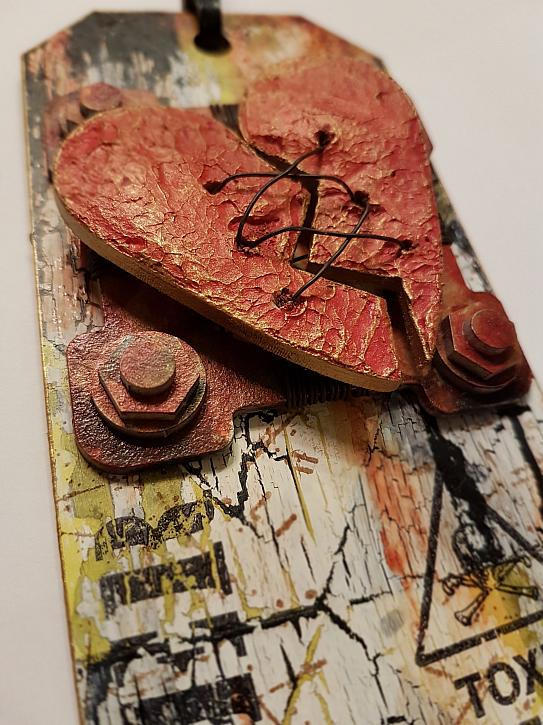
Step Four: Next create the heart motif. Cut a jagged line through a heart embellishment and drill 3 holes either side of the line. Using a palette knife, roughly spread Dimensional Effect Texture Paste on to the heart. Allow the paste to dry fully before adding layers of Cadmium Red, Primary Magenta, Cadmium Orange and Quinacridone Gold to give the heart depth. Dry brush the heart in Metallic Gold to bring out the textures of the paste.
Step Five: Wrap rusty wire around the greyboard embellishments and fix the greyboard piece to the tag using Decoupage Matte Glue.
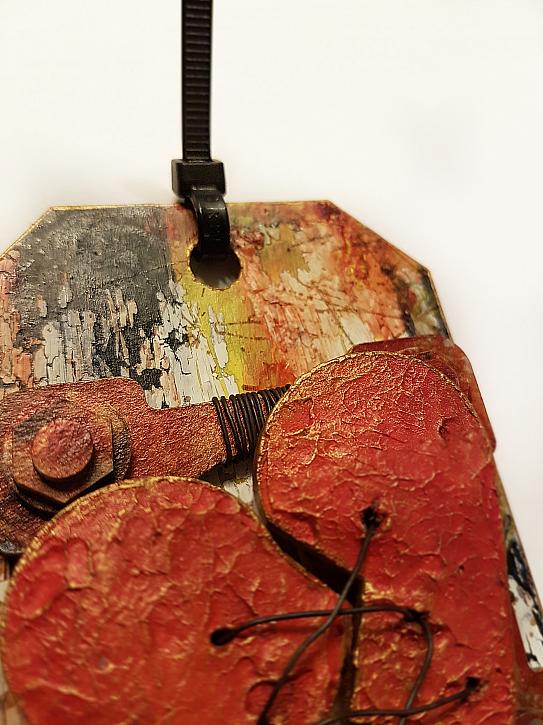
Step Six: Next, lace rusty wire through the holes drilled in the heart to create a stitched look and mount the heart of foam pads to raise it about the tag and greyboard. To finish, loop a black cable tie through the tags top.
Detail of the stitched heart created using Dimensional Effects Texture Paste.
Crackled layers of the background, stamped using “Toxic” themed stamps.
Rusty greyboard elements and a cable tie to finish.